Compare commits
21 Commits
@portaljs/
...
feature/le
| Author | SHA1 | Date | |
|---|---|---|---|
|
|
ba438e49d0 | ||
|
|
8a3669c2c9 | ||
|
|
805e2f0817 | ||
|
|
f04b86dda4 | ||
|
|
0fd3ee9912 | ||
|
|
cb0b9b1f14 | ||
|
|
9ee4376abf | ||
|
|
7ba9b5157e | ||
|
|
6c2a1ea125 | ||
|
|
343faf72cf | ||
|
|
1eb3f7367b | ||
|
|
8cdf54397f | ||
|
|
fb94cb9ce9 | ||
|
|
4595cd2231 | ||
|
|
aa2c8aac04 | ||
|
|
f2e5459297 | ||
|
|
e111adfe73 | ||
|
|
492c21ca4e | ||
|
|
0581357df8 | ||
|
|
15ceeec035 | ||
|
|
1caabcf6b4 |
@@ -40,16 +40,25 @@ export default function Home({
|
||||
});
|
||||
|
||||
return (
|
||||
<main className="flex min-h-screen flex-col items-center p-24 bg-zinc-900">
|
||||
<DatasetSearchForm
|
||||
options={options}
|
||||
setOptions={setOptions}
|
||||
groups={groups}
|
||||
orgs={orgs}
|
||||
/>
|
||||
<div className="bg-white p-8 my-4 rounded-lg">
|
||||
<ListOfDatasets options={options} setOptions={setOptions} ckan={ckan} />{' '}
|
||||
</div>
|
||||
</main>
|
||||
<div>
|
||||
<main className="py-12 bg-zinc-900">
|
||||
<DatasetSearchForm
|
||||
options={options}
|
||||
setOptions={setOptions}
|
||||
groups={groups}
|
||||
orgs={orgs}
|
||||
/>
|
||||
<div
|
||||
className="bg-white p-8 mx-auto my-4 rounded-lg"
|
||||
style={{ width: 'min(1100px, 95vw)' }}
|
||||
>
|
||||
<ListOfDatasets
|
||||
options={options}
|
||||
setOptions={setOptions}
|
||||
ckan={ckan}
|
||||
/>{' '}
|
||||
</div>
|
||||
</main>
|
||||
</div>
|
||||
);
|
||||
}
|
||||
|
||||
5
examples/learn/next.config.js
Normal file
@@ -0,0 +1,5 @@
|
||||
const nextConfig = {
|
||||
swcMinify: false
|
||||
}
|
||||
|
||||
module.exports = nextConfig
|
||||
@@ -7,13 +7,21 @@ import { Mermaid } from '@portaljs/core';
|
||||
// to handle import statements. Instead, you must include components in scope
|
||||
// here.
|
||||
const components = {
|
||||
Table: dynamic(() => import('@portaljs/components').then(mod => mod.Table)),
|
||||
Catalog: dynamic(() => import('@portaljs/components').then(mod => mod.Catalog)),
|
||||
Table: dynamic(() => import('@portaljs/components').then((mod) => mod.Table)),
|
||||
Catalog: dynamic(() =>
|
||||
import('@portaljs/components').then((mod) => mod.Catalog)
|
||||
),
|
||||
mermaid: Mermaid,
|
||||
Vega: dynamic(() => import('@portaljs/components').then(mod => mod.Vega)),
|
||||
VegaLite: dynamic(() => import('@portaljs/components').then(mod => mod.VegaLite)),
|
||||
LineChart: dynamic(() => import('@portaljs/components').then(mod => mod.LineChart)),
|
||||
FlatUiTable: dynamic(() => import('@portaljs/components').then(mod => mod.FlatUiTable)),
|
||||
Vega: dynamic(() => import('@portaljs/components').then((mod) => mod.Vega)),
|
||||
VegaLite: dynamic(() =>
|
||||
import('@portaljs/components').then((mod) => mod.VegaLite)
|
||||
),
|
||||
LineChart: dynamic(() =>
|
||||
import('@portaljs/components').then((mod) => mod.LineChart)
|
||||
),
|
||||
FlatUiTable: dynamic(() =>
|
||||
import('@portaljs/components').then((mod) => mod.FlatUiTable)
|
||||
),
|
||||
} as any;
|
||||
|
||||
export default function DRD({ source }: { source: any }) {
|
||||
|
||||
@@ -156,8 +156,8 @@ the key to a prosperous future.
|
||||
title: '',
|
||||
field: 'label',
|
||||
scale: {
|
||||
domain: ["Education"],
|
||||
range: ['#64b5f6']
|
||||
domain: ['Education'],
|
||||
range: ['#64b5f6'],
|
||||
},
|
||||
},
|
||||
tooltip: [
|
||||
@@ -189,4 +189,3 @@ Frankfurt is a city that's recognized the power of education, and it's using tha
|
||||
One can only hope that more cities follow suit.
|
||||
|
||||
[^1]: https://worldpopulationreview.com/world-cities/frankfurt-population
|
||||
|
||||
|
||||
@@ -1,16 +1,16 @@
|
||||
---
|
||||
title: Where does Berlin spends its ERDF benefits?
|
||||
title: Where does Berlin spend its ERDF benefits?
|
||||
date: 2023-06-12
|
||||
authors: ['João Demenech']
|
||||
---
|
||||
|
||||
In this data-driven story, let's analyze how the city of Berlin has benefited from ERDF from 2008 to 2015.
|
||||
In this data-driven story, let's analyze how the city of Berlin benefited from ERDF from 2008 to 2015.
|
||||
|
||||
## What is ERDF?
|
||||
|
||||
If you're not familiar with ERDF, it's the European Regional Development Fund. According to its [official website](https://ec.europa.eu/regional_policy/funding/erdf_en):
|
||||
|
||||
> The European Regional Development Fund (ERDF) aims to strengthen economic, social and territorial cohesion in the European Union by correcting imbalances between its regions. In 2021-2027 it will enable investments in a smarter, greener, more connected and more social Europe that is closer to its citizens.
|
||||
> The European Regional Development Fund (ERDF) aims to strengthen economic, social, and territorial cohesion in the European Union by correcting imbalances between its regions. In 2021-2027 it will enable investments in a smarter, greener, more connected, and more social Europe that is closer to its citizens.
|
||||
|
||||
## A look into the data
|
||||
|
||||
|
||||
313
examples/openspending/package-lock.json
generated
@@ -14,7 +14,7 @@
|
||||
"@heroicons/react": "^2.0.18",
|
||||
"@octokit/plugin-throttling": "^5.2.2",
|
||||
"@portaljs/ckan": "^0.0.2",
|
||||
"@portaljs/components": "^0.1.8",
|
||||
"@portaljs/components": "^0.1.12",
|
||||
"@portaljs/core": "^1.0.5",
|
||||
"@portaljs/remark-callouts": "^1.0.5",
|
||||
"@portaljs/remark-embed": "^1.0.4",
|
||||
@@ -1971,6 +1971,40 @@
|
||||
"@lit-labs/ssr-dom-shim": "^1.0.0"
|
||||
}
|
||||
},
|
||||
"node_modules/@mapbox/jsonlint-lines-primitives": {
|
||||
"version": "2.0.2",
|
||||
"resolved": "https://registry.npmjs.org/@mapbox/jsonlint-lines-primitives/-/jsonlint-lines-primitives-2.0.2.tgz",
|
||||
"integrity": "sha512-rY0o9A5ECsTQRVhv7tL/OyDpGAoUB4tTvLiW1DSzQGq4bvTPhNw1VpSNjDJc5GFZ2XuyOtSWSVN05qOtcD71qQ==",
|
||||
"engines": {
|
||||
"node": ">= 0.6"
|
||||
}
|
||||
},
|
||||
"node_modules/@mapbox/mapbox-gl-style-spec": {
|
||||
"version": "13.28.0",
|
||||
"resolved": "https://registry.npmjs.org/@mapbox/mapbox-gl-style-spec/-/mapbox-gl-style-spec-13.28.0.tgz",
|
||||
"integrity": "sha512-B8xM7Fp1nh5kejfIl4SWeY0gtIeewbuRencqO3cJDrCHZpaPg7uY+V8abuR+esMeuOjRl5cLhVTP40v+1ywxbg==",
|
||||
"dependencies": {
|
||||
"@mapbox/jsonlint-lines-primitives": "~2.0.2",
|
||||
"@mapbox/point-geometry": "^0.1.0",
|
||||
"@mapbox/unitbezier": "^0.0.0",
|
||||
"csscolorparser": "~1.0.2",
|
||||
"json-stringify-pretty-compact": "^2.0.0",
|
||||
"minimist": "^1.2.6",
|
||||
"rw": "^1.3.3",
|
||||
"sort-object": "^0.3.2"
|
||||
},
|
||||
"bin": {
|
||||
"gl-style-composite": "bin/gl-style-composite.js",
|
||||
"gl-style-format": "bin/gl-style-format.js",
|
||||
"gl-style-migrate": "bin/gl-style-migrate.js",
|
||||
"gl-style-validate": "bin/gl-style-validate.js"
|
||||
}
|
||||
},
|
||||
"node_modules/@mapbox/mapbox-gl-style-spec/node_modules/json-stringify-pretty-compact": {
|
||||
"version": "2.0.0",
|
||||
"resolved": "https://registry.npmjs.org/json-stringify-pretty-compact/-/json-stringify-pretty-compact-2.0.0.tgz",
|
||||
"integrity": "sha512-WRitRfs6BGq4q8gTgOy4ek7iPFXjbra0H3PmDLKm2xnZ+Gh1HUhiKGgCZkSPNULlP7mvfu6FV/mOLhCarspADQ=="
|
||||
},
|
||||
"node_modules/@mapbox/node-pre-gyp": {
|
||||
"version": "1.0.10",
|
||||
"resolved": "https://registry.npmjs.org/@mapbox/node-pre-gyp/-/node-pre-gyp-1.0.10.tgz",
|
||||
@@ -2020,6 +2054,16 @@
|
||||
"resolved": "https://registry.npmjs.org/yallist/-/yallist-4.0.0.tgz",
|
||||
"integrity": "sha512-3wdGidZyq5PB084XLES5TpOSRA3wjXAlIWMhum2kRcv/41Sn2emQ0dycQW4uZXLejwKvg6EsvbdlVL+FYEct7A=="
|
||||
},
|
||||
"node_modules/@mapbox/point-geometry": {
|
||||
"version": "0.1.0",
|
||||
"resolved": "https://registry.npmjs.org/@mapbox/point-geometry/-/point-geometry-0.1.0.tgz",
|
||||
"integrity": "sha512-6j56HdLTwWGO0fJPlrZtdU/B13q8Uwmo18Ck2GnGgN9PCFyKTZ3UbXeEdRFh18i9XQ92eH2VdtpJHpBD3aripQ=="
|
||||
},
|
||||
"node_modules/@mapbox/unitbezier": {
|
||||
"version": "0.0.0",
|
||||
"resolved": "https://registry.npmjs.org/@mapbox/unitbezier/-/unitbezier-0.0.0.tgz",
|
||||
"integrity": "sha512-HPnRdYO0WjFjRTSwO3frz1wKaU649OBFPX3Zo/2WZvuRi6zMiRGui8SnPQiQABgqCf8YikDe5t3HViTVw1WUzA=="
|
||||
},
|
||||
"node_modules/@mdx-js/mdx": {
|
||||
"version": "2.3.0",
|
||||
"resolved": "https://registry.npmjs.org/@mdx-js/mdx/-/mdx-2.3.0.tgz",
|
||||
@@ -2657,6 +2701,11 @@
|
||||
"resolved": "https://registry.npmjs.org/@octokit/webhooks-types/-/webhooks-types-6.11.0.tgz",
|
||||
"integrity": "sha512-AanzbulOHljrku1NGfafxdpTCfw2ENaWzH01N2vqQM+cUFbk868Cgh0xylz0JIM9BoKbfI++bdD6EYX0Q/UTEw=="
|
||||
},
|
||||
"node_modules/@petamoriken/float16": {
|
||||
"version": "3.8.1",
|
||||
"resolved": "https://registry.npmjs.org/@petamoriken/float16/-/float16-3.8.1.tgz",
|
||||
"integrity": "sha512-oj3dU9kuMy8AqrreIboVh3KCJGSQO5T+dJ8JQFl369961jTWvPLP1GIlLy0FVoWehXLoI9BXygu/yzuNiIHBlg=="
|
||||
},
|
||||
"node_modules/@pkgr/utils": {
|
||||
"version": "2.4.1",
|
||||
"resolved": "https://registry.npmjs.org/@pkgr/utils/-/utils-2.4.1.tgz",
|
||||
@@ -2676,6 +2725,14 @@
|
||||
"url": "https://opencollective.com/unts"
|
||||
}
|
||||
},
|
||||
"node_modules/@planet/maps": {
|
||||
"version": "8.1.0",
|
||||
"resolved": "https://registry.npmjs.org/@planet/maps/-/maps-8.1.0.tgz",
|
||||
"integrity": "sha512-THvbooWXFZYyjSdoqi6MFNqnjrfnO5Oev1tKh6ORjxFru0N69gZwUfEduRjg99VNklmaAk2BPaCatgKs5qr0XA==",
|
||||
"dependencies": {
|
||||
"react-reconciler": "^0.29.0"
|
||||
}
|
||||
},
|
||||
"node_modules/@portaljs/ckan": {
|
||||
"version": "0.0.2",
|
||||
"resolved": "https://registry.npmjs.org/@portaljs/ckan/-/ckan-0.0.2.tgz",
|
||||
@@ -2691,22 +2748,26 @@
|
||||
}
|
||||
},
|
||||
"node_modules/@portaljs/components": {
|
||||
"version": "0.1.11",
|
||||
"resolved": "https://registry.npmjs.org/@portaljs/components/-/components-0.1.11.tgz",
|
||||
"integrity": "sha512-ojiZ2dtnORAlo2YycpwK+mxrseqVxrD/Z/FMejHrZ9V6pAdlLLpjMU724WTvGBbjwO/RkoVFc4x6H6ykyvMOig==",
|
||||
"version": "0.1.12",
|
||||
"resolved": "file:../../packages/components/portaljs-components-0.1.12.tgz",
|
||||
"integrity": "sha512-Cr+RQ7tkbIqtBNq5D8zeZEB2dOejxD0V78l/I4AbdjYI8jvQ4Evx6APEfhPs3im6LDEGrT28LslVTZJ6luslnw==",
|
||||
"dependencies": {
|
||||
"@githubocto/flat-ui": "^0.14.1",
|
||||
"@heroicons/react": "^2.0.17",
|
||||
"@planet/maps": "^8.1.0",
|
||||
"@tanstack/react-table": "^8.8.5",
|
||||
"chroma-js": "^2.4.2",
|
||||
"flexsearch": "0.7.21",
|
||||
"leaflet": "^1.9.4",
|
||||
"next-mdx-remote": "^4.4.1",
|
||||
"ol": "^7.4.0",
|
||||
"papaparse": "^5.4.1",
|
||||
"react": "^18.2.0",
|
||||
"react-dom": "^18.2.0",
|
||||
"react-hook-form": "^7.43.9",
|
||||
"react-leaflet": "^4.2.1",
|
||||
"react-query": "^3.39.3",
|
||||
"react-vega": "^7.6.0",
|
||||
"rollup-plugin-re": "^1.0.7",
|
||||
"vega": "5.25.0",
|
||||
"vega-lite": "5.1.0",
|
||||
"vitest": "^0.31.4"
|
||||
@@ -2909,6 +2970,16 @@
|
||||
"resolved": "https://registry.npmjs.org/@reach/observe-rect/-/observe-rect-1.2.0.tgz",
|
||||
"integrity": "sha512-Ba7HmkFgfQxZqqaeIWWkNK0rEhpxVQHIoVyW1YDSkGsGIXzcaW4deC8B0pZrNSSyLTdIk7y+5olKt5+g0GmFIQ=="
|
||||
},
|
||||
"node_modules/@react-leaflet/core": {
|
||||
"version": "2.1.0",
|
||||
"resolved": "https://registry.npmjs.org/@react-leaflet/core/-/core-2.1.0.tgz",
|
||||
"integrity": "sha512-Qk7Pfu8BSarKGqILj4x7bCSZ1pjuAPZ+qmRwH5S7mDS91VSbVVsJSrW4qA+GPrro8t69gFYVMWb1Zc4yFmPiVg==",
|
||||
"peerDependencies": {
|
||||
"leaflet": "^1.9.0",
|
||||
"react": "^18.0.0",
|
||||
"react-dom": "^18.0.0"
|
||||
}
|
||||
},
|
||||
"node_modules/@rushstack/eslint-patch": {
|
||||
"version": "1.3.2",
|
||||
"resolved": "https://registry.npmjs.org/@rushstack/eslint-patch/-/eslint-patch-1.3.2.tgz",
|
||||
@@ -4424,6 +4495,11 @@
|
||||
"node": ">=10"
|
||||
}
|
||||
},
|
||||
"node_modules/chroma-js": {
|
||||
"version": "2.4.2",
|
||||
"resolved": "https://registry.npmjs.org/chroma-js/-/chroma-js-2.4.2.tgz",
|
||||
"integrity": "sha512-U9eDw6+wt7V8z5NncY2jJfZa+hUH8XEj8FQHgFJTrUFnJfXYf4Ml4adI2vXZOjqRDpFWtYVWypDfZwnJ+HIR4A=="
|
||||
},
|
||||
"node_modules/clean-set": {
|
||||
"version": "1.1.2",
|
||||
"resolved": "https://registry.npmjs.org/clean-set/-/clean-set-1.1.2.tgz",
|
||||
@@ -4735,6 +4811,11 @@
|
||||
"resolved": "https://registry.npmjs.org/css-unit-converter/-/css-unit-converter-1.1.2.tgz",
|
||||
"integrity": "sha512-IiJwMC8rdZE0+xiEZHeru6YoONC4rfPMqGm2W85jMIbkFvv5nFTwJVFHam2eFrN6txmoUYFAFXiv8ICVeTO0MA=="
|
||||
},
|
||||
"node_modules/csscolorparser": {
|
||||
"version": "1.0.3",
|
||||
"resolved": "https://registry.npmjs.org/csscolorparser/-/csscolorparser-1.0.3.tgz",
|
||||
"integrity": "sha512-umPSgYwZkdFoUrH5hIq5kf0wPSXiro51nPw0j2K/c83KflkPSTBGMz6NJvMB+07VlL0y7VPo6QJcDjcgKTTm3w=="
|
||||
},
|
||||
"node_modules/cssesc": {
|
||||
"version": "3.0.0",
|
||||
"resolved": "https://registry.npmjs.org/cssesc/-/cssesc-3.0.0.tgz",
|
||||
@@ -5858,6 +5939,11 @@
|
||||
"node": ">=4"
|
||||
}
|
||||
},
|
||||
"node_modules/earcut": {
|
||||
"version": "2.2.4",
|
||||
"resolved": "https://registry.npmjs.org/earcut/-/earcut-2.2.4.tgz",
|
||||
"integrity": "sha512-/pjZsA1b4RPHbeWZQn66SWS8nZZWLQQ23oE3Eam7aroEFGEvwKAsJfZ9ytiEMycfzXWpca4FA9QIOehf7PocBQ=="
|
||||
},
|
||||
"node_modules/ecdsa-sig-formatter": {
|
||||
"version": "1.0.11",
|
||||
"resolved": "https://registry.npmjs.org/ecdsa-sig-formatter/-/ecdsa-sig-formatter-1.0.11.tgz",
|
||||
@@ -7155,6 +7241,39 @@
|
||||
"node": ">=6.9.0"
|
||||
}
|
||||
},
|
||||
"node_modules/geotiff": {
|
||||
"version": "2.0.7",
|
||||
"resolved": "https://registry.npmjs.org/geotiff/-/geotiff-2.0.7.tgz",
|
||||
"integrity": "sha512-FKvFTNowMU5K6lHYY2f83d4lS2rsCNdpUC28AX61x9ZzzqPNaWFElWv93xj0eJFaNyOYA63ic5OzJ88dHpoA5Q==",
|
||||
"dependencies": {
|
||||
"@petamoriken/float16": "^3.4.7",
|
||||
"lerc": "^3.0.0",
|
||||
"pako": "^2.0.4",
|
||||
"parse-headers": "^2.0.2",
|
||||
"quick-lru": "^6.1.1",
|
||||
"web-worker": "^1.2.0",
|
||||
"xml-utils": "^1.0.2"
|
||||
},
|
||||
"engines": {
|
||||
"node": ">=10.19"
|
||||
}
|
||||
},
|
||||
"node_modules/geotiff/node_modules/pako": {
|
||||
"version": "2.1.0",
|
||||
"resolved": "https://registry.npmjs.org/pako/-/pako-2.1.0.tgz",
|
||||
"integrity": "sha512-w+eufiZ1WuJYgPXbV/PO3NCMEc3xqylkKHzp8bxp1uW4qaSNQUkwmLLEc3kKsfz8lpV1F8Ht3U1Cm+9Srog2ug=="
|
||||
},
|
||||
"node_modules/geotiff/node_modules/quick-lru": {
|
||||
"version": "6.1.1",
|
||||
"resolved": "https://registry.npmjs.org/quick-lru/-/quick-lru-6.1.1.tgz",
|
||||
"integrity": "sha512-S27GBT+F0NTRiehtbrgaSE1idUAJ5bX8dPAQTdylEyNlrdcH5X4Lz7Edz3DYzecbsCluD5zO8ZNEe04z3D3u6Q==",
|
||||
"engines": {
|
||||
"node": ">=12"
|
||||
},
|
||||
"funding": {
|
||||
"url": "https://github.com/sponsors/sindresorhus"
|
||||
}
|
||||
},
|
||||
"node_modules/get-caller-file": {
|
||||
"version": "2.0.5",
|
||||
"resolved": "https://registry.npmjs.org/get-caller-file/-/get-caller-file-2.0.5.tgz",
|
||||
@@ -7831,9 +7950,7 @@
|
||||
"type": "consulting",
|
||||
"url": "https://feross.org/support"
|
||||
}
|
||||
],
|
||||
"optional": true,
|
||||
"peer": true
|
||||
]
|
||||
},
|
||||
"node_modules/ignore": {
|
||||
"version": "5.2.4",
|
||||
@@ -8784,6 +8901,16 @@
|
||||
"resolved": "https://registry.npmjs.org/layout-base/-/layout-base-1.0.2.tgz",
|
||||
"integrity": "sha512-8h2oVEZNktL4BH2JCOI90iD1yXwL6iNW7KcCKT2QZgQJR2vbqDsldCTPRU9NifTCqHZci57XvQQ15YTu+sTYPg=="
|
||||
},
|
||||
"node_modules/leaflet": {
|
||||
"version": "1.9.4",
|
||||
"resolved": "https://registry.npmjs.org/leaflet/-/leaflet-1.9.4.tgz",
|
||||
"integrity": "sha512-nxS1ynzJOmOlHp+iL3FyWqK89GtNL8U8rvlMOsQdTTssxZwCXh8N2NB3GDQOL+YR3XnWyZAxwQixURb+FA74PA=="
|
||||
},
|
||||
"node_modules/lerc": {
|
||||
"version": "3.0.0",
|
||||
"resolved": "https://registry.npmjs.org/lerc/-/lerc-3.0.0.tgz",
|
||||
"integrity": "sha512-Rm4J/WaHhRa93nCN2mwWDZFoRVF18G1f47C+kvQWyHGEZxFpTUi73p7lMVSAndyxGt6lJ2/CFbOcf9ra5p8aww=="
|
||||
},
|
||||
"node_modules/levn": {
|
||||
"version": "0.4.1",
|
||||
"resolved": "https://registry.npmjs.org/levn/-/levn-0.4.1.tgz",
|
||||
@@ -8956,14 +9083,6 @@
|
||||
"yallist": "^3.0.2"
|
||||
}
|
||||
},
|
||||
"node_modules/magic-string": {
|
||||
"version": "0.16.0",
|
||||
"resolved": "https://registry.npmjs.org/magic-string/-/magic-string-0.16.0.tgz",
|
||||
"integrity": "sha512-c4BEos3y6G2qO0B9X7K0FVLOPT9uGrjYwYRLFmDqyl5YMboUviyecnXWp94fJTSMwPw2/sf+CEYt5AGpmklkkQ==",
|
||||
"dependencies": {
|
||||
"vlq": "^0.2.1"
|
||||
}
|
||||
},
|
||||
"node_modules/make-dir": {
|
||||
"version": "3.1.0",
|
||||
"resolved": "https://registry.npmjs.org/make-dir/-/make-dir-3.1.0.tgz",
|
||||
@@ -9023,6 +9142,11 @@
|
||||
"integrity": "sha512-3wdGidZyq5PB084XLES5TpOSRA3wjXAlIWMhum2kRcv/41Sn2emQ0dycQW4uZXLejwKvg6EsvbdlVL+FYEct7A==",
|
||||
"optional": true
|
||||
},
|
||||
"node_modules/mapbox-to-css-font": {
|
||||
"version": "2.4.2",
|
||||
"resolved": "https://registry.npmjs.org/mapbox-to-css-font/-/mapbox-to-css-font-2.4.2.tgz",
|
||||
"integrity": "sha512-f+NBjJJY4T3dHtlEz1wCG7YFlkODEjFIYlxDdLIDMNpkSksqTt+l/d4rjuwItxuzkuMFvPyrjzV2lxRM4ePcIA=="
|
||||
},
|
||||
"node_modules/markdown-extensions": {
|
||||
"version": "1.1.1",
|
||||
"resolved": "https://registry.npmjs.org/markdown-extensions/-/markdown-extensions-1.1.1.tgz",
|
||||
@@ -11492,6 +11616,32 @@
|
||||
"node": ">= 14"
|
||||
}
|
||||
},
|
||||
"node_modules/ol": {
|
||||
"version": "7.4.0",
|
||||
"resolved": "https://registry.npmjs.org/ol/-/ol-7.4.0.tgz",
|
||||
"integrity": "sha512-bgBbiah694HhC0jt8ptEFNRXwgO8d6xWH3G97PCg4bmn9Li5nLLbi59oSrvqUI6VPVwonPQF1YcqJymxxyMC6A==",
|
||||
"dependencies": {
|
||||
"earcut": "^2.2.3",
|
||||
"geotiff": "^2.0.7",
|
||||
"ol-mapbox-style": "^10.1.0",
|
||||
"pbf": "3.2.1",
|
||||
"rbush": "^3.0.1"
|
||||
},
|
||||
"funding": {
|
||||
"type": "opencollective",
|
||||
"url": "https://opencollective.com/openlayers"
|
||||
}
|
||||
},
|
||||
"node_modules/ol-mapbox-style": {
|
||||
"version": "10.6.0",
|
||||
"resolved": "https://registry.npmjs.org/ol-mapbox-style/-/ol-mapbox-style-10.6.0.tgz",
|
||||
"integrity": "sha512-s86QhCoyyKVRsYkvPzzdWd///bhYh3onWrBq4lNXnCd9G/hS6AoK023kn4zlDESVlTBDTWLz8vhOistp0M3TXA==",
|
||||
"dependencies": {
|
||||
"@mapbox/mapbox-gl-style-spec": "^13.23.1",
|
||||
"mapbox-to-css-font": "^2.4.1",
|
||||
"ol": "^7.3.0"
|
||||
}
|
||||
},
|
||||
"node_modules/once": {
|
||||
"version": "1.4.0",
|
||||
"resolved": "https://registry.npmjs.org/once/-/once-1.4.0.tgz",
|
||||
@@ -11638,6 +11788,11 @@
|
||||
"url": "https://github.com/sponsors/wooorm"
|
||||
}
|
||||
},
|
||||
"node_modules/parse-headers": {
|
||||
"version": "2.0.5",
|
||||
"resolved": "https://registry.npmjs.org/parse-headers/-/parse-headers-2.0.5.tgz",
|
||||
"integrity": "sha512-ft3iAoLOB/MlwbNXgzy43SWGP6sQki2jQvAyBg/zDFAgr9bfNWZIUj42Kw2eJIl8kEi4PbgE6U1Zau/HwI75HA=="
|
||||
},
|
||||
"node_modules/parse-json": {
|
||||
"version": "5.2.0",
|
||||
"resolved": "https://registry.npmjs.org/parse-json/-/parse-json-5.2.0.tgz",
|
||||
@@ -11735,6 +11890,18 @@
|
||||
"node": "*"
|
||||
}
|
||||
},
|
||||
"node_modules/pbf": {
|
||||
"version": "3.2.1",
|
||||
"resolved": "https://registry.npmjs.org/pbf/-/pbf-3.2.1.tgz",
|
||||
"integrity": "sha512-ClrV7pNOn7rtmoQVF4TS1vyU0WhYRnP92fzbfF75jAIwpnzdJXf8iTd4CMEqO4yUenH6NDqLiwjqlh6QgZzgLQ==",
|
||||
"dependencies": {
|
||||
"ieee754": "^1.1.12",
|
||||
"resolve-protobuf-schema": "^2.1.0"
|
||||
},
|
||||
"bin": {
|
||||
"pbf": "bin/pbf"
|
||||
}
|
||||
},
|
||||
"node_modules/pend": {
|
||||
"version": "1.2.0",
|
||||
"resolved": "https://registry.npmjs.org/pend/-/pend-1.2.0.tgz",
|
||||
@@ -12055,6 +12222,11 @@
|
||||
"url": "https://github.com/sponsors/wooorm"
|
||||
}
|
||||
},
|
||||
"node_modules/protocol-buffers-schema": {
|
||||
"version": "3.6.0",
|
||||
"resolved": "https://registry.npmjs.org/protocol-buffers-schema/-/protocol-buffers-schema-3.6.0.tgz",
|
||||
"integrity": "sha512-TdDRD+/QNdrCGCE7v8340QyuXd4kIWIgapsE2+n/SaGiSSbomYl4TjHlvIoCWRpE7wFt02EpB35VVA2ImcBVqw=="
|
||||
},
|
||||
"node_modules/proxy-from-env": {
|
||||
"version": "1.1.0",
|
||||
"resolved": "https://registry.npmjs.org/proxy-from-env/-/proxy-from-env-1.1.0.tgz",
|
||||
@@ -12173,6 +12345,19 @@
|
||||
"url": "https://github.com/sponsors/sindresorhus"
|
||||
}
|
||||
},
|
||||
"node_modules/quickselect": {
|
||||
"version": "2.0.0",
|
||||
"resolved": "https://registry.npmjs.org/quickselect/-/quickselect-2.0.0.tgz",
|
||||
"integrity": "sha512-RKJ22hX8mHe3Y6wH/N3wCM6BWtjaxIyyUIkpHOvfFnxdI4yD4tBXEBKSbriGujF6jnSVkJrffuo6vxACiSSxIw=="
|
||||
},
|
||||
"node_modules/rbush": {
|
||||
"version": "3.0.1",
|
||||
"resolved": "https://registry.npmjs.org/rbush/-/rbush-3.0.1.tgz",
|
||||
"integrity": "sha512-XRaVO0YecOpEuIvbhbpTrZgoiI6xBlz6hnlr6EHhd+0x9ase6EmeN+hdwwUaJvLcsFFQ8iWVF1GAK1yB0BWi0w==",
|
||||
"dependencies": {
|
||||
"quickselect": "^2.0.0"
|
||||
}
|
||||
},
|
||||
"node_modules/react": {
|
||||
"version": "18.2.0",
|
||||
"resolved": "https://registry.npmjs.org/react/-/react-18.2.0.tgz",
|
||||
@@ -12221,6 +12406,19 @@
|
||||
"resolved": "https://registry.npmjs.org/react-is/-/react-is-17.0.2.tgz",
|
||||
"integrity": "sha512-w2GsyukL62IJnlaff/nRegPQR94C/XXamvMWmSHRJ4y7Ts/4ocGRmTHvOs8PSE6pB3dWOrD/nueuU5sduBsQ4w=="
|
||||
},
|
||||
"node_modules/react-leaflet": {
|
||||
"version": "4.2.1",
|
||||
"resolved": "https://registry.npmjs.org/react-leaflet/-/react-leaflet-4.2.1.tgz",
|
||||
"integrity": "sha512-p9chkvhcKrWn/H/1FFeVSqLdReGwn2qmiobOQGO3BifX+/vV/39qhY8dGqbdcPh1e6jxh/QHriLXr7a4eLFK4Q==",
|
||||
"dependencies": {
|
||||
"@react-leaflet/core": "^2.1.0"
|
||||
},
|
||||
"peerDependencies": {
|
||||
"leaflet": "^1.9.0",
|
||||
"react": "^18.0.0",
|
||||
"react-dom": "^18.0.0"
|
||||
}
|
||||
},
|
||||
"node_modules/react-markdown": {
|
||||
"version": "8.0.7",
|
||||
"resolved": "https://registry.npmjs.org/react-markdown/-/react-markdown-8.0.7.tgz",
|
||||
@@ -12290,6 +12488,21 @@
|
||||
"react-dom": "^16.8.0-0 || ^17.0.0-0 || ^18.0.0-0"
|
||||
}
|
||||
},
|
||||
"node_modules/react-reconciler": {
|
||||
"version": "0.29.0",
|
||||
"resolved": "https://registry.npmjs.org/react-reconciler/-/react-reconciler-0.29.0.tgz",
|
||||
"integrity": "sha512-wa0fGj7Zht1EYMRhKWwoo1H9GApxYLBuhoAuXN0TlltESAjDssB+Apf0T/DngVqaMyPypDmabL37vw/2aRM98Q==",
|
||||
"dependencies": {
|
||||
"loose-envify": "^1.1.0",
|
||||
"scheduler": "^0.23.0"
|
||||
},
|
||||
"engines": {
|
||||
"node": ">=0.10.0"
|
||||
},
|
||||
"peerDependencies": {
|
||||
"react": "^18.2.0"
|
||||
}
|
||||
},
|
||||
"node_modules/react-refresh": {
|
||||
"version": "0.14.0",
|
||||
"resolved": "https://registry.npmjs.org/react-refresh/-/react-refresh-0.14.0.tgz",
|
||||
@@ -12828,6 +13041,14 @@
|
||||
"url": "https://github.com/privatenumber/resolve-pkg-maps?sponsor=1"
|
||||
}
|
||||
},
|
||||
"node_modules/resolve-protobuf-schema": {
|
||||
"version": "2.1.0",
|
||||
"resolved": "https://registry.npmjs.org/resolve-protobuf-schema/-/resolve-protobuf-schema-2.1.0.tgz",
|
||||
"integrity": "sha512-kI5ffTiZWmJaS/huM8wZfEMer1eRd7oJQhDuxeCLe3t7N7mX3z94CN0xPxBQxFYQTSNz9T0i+v6inKqSdK8xrQ==",
|
||||
"dependencies": {
|
||||
"protocol-buffers-schema": "^3.3.1"
|
||||
}
|
||||
},
|
||||
"node_modules/retext": {
|
||||
"version": "8.1.0",
|
||||
"resolved": "https://registry.npmjs.org/retext/-/retext-8.1.0.tgz",
|
||||
@@ -12949,28 +13170,6 @@
|
||||
"fsevents": "~2.3.2"
|
||||
}
|
||||
},
|
||||
"node_modules/rollup-plugin-re": {
|
||||
"version": "1.0.7",
|
||||
"resolved": "https://registry.npmjs.org/rollup-plugin-re/-/rollup-plugin-re-1.0.7.tgz",
|
||||
"integrity": "sha512-TyFf3QaV/eJ/50k4wp5BM0SodGy0Idq0uOgvA1q3gHRwgXLPVX5y3CRKkBuHzKTZPC9CTZX7igKw5UvgjDls8w==",
|
||||
"dependencies": {
|
||||
"magic-string": "^0.16.0",
|
||||
"rollup-pluginutils": "^2.0.1"
|
||||
}
|
||||
},
|
||||
"node_modules/rollup-pluginutils": {
|
||||
"version": "2.8.2",
|
||||
"resolved": "https://registry.npmjs.org/rollup-pluginutils/-/rollup-pluginutils-2.8.2.tgz",
|
||||
"integrity": "sha512-EEp9NhnUkwY8aif6bxgovPHMoMoNr2FulJziTndpt5H9RdwC47GSGuII9XxpSdzVGM0GWrNPHV6ie1LTNJPaLQ==",
|
||||
"dependencies": {
|
||||
"estree-walker": "^0.6.1"
|
||||
}
|
||||
},
|
||||
"node_modules/rollup-pluginutils/node_modules/estree-walker": {
|
||||
"version": "0.6.1",
|
||||
"resolved": "https://registry.npmjs.org/estree-walker/-/estree-walker-0.6.1.tgz",
|
||||
"integrity": "sha512-SqmZANLWS0mnatqbSfRP5g8OXZC12Fgg1IwNtLsyHDzJizORW4khDfjPqJZsemPWBB2uqykUah5YpQ6epsqC/w=="
|
||||
},
|
||||
"node_modules/rtl-css-js": {
|
||||
"version": "1.16.1",
|
||||
"resolved": "https://registry.npmjs.org/rtl-css-js/-/rtl-css-js-1.16.1.tgz",
|
||||
@@ -13314,6 +13513,34 @@
|
||||
"node": ">= 10"
|
||||
}
|
||||
},
|
||||
"node_modules/sort-asc": {
|
||||
"version": "0.1.0",
|
||||
"resolved": "https://registry.npmjs.org/sort-asc/-/sort-asc-0.1.0.tgz",
|
||||
"integrity": "sha512-jBgdDd+rQ+HkZF2/OHCmace5dvpos/aWQpcxuyRs9QUbPRnkEJmYVo81PIGpjIdpOcsnJ4rGjStfDHsbn+UVyw==",
|
||||
"engines": {
|
||||
"node": ">=0.10.0"
|
||||
}
|
||||
},
|
||||
"node_modules/sort-desc": {
|
||||
"version": "0.1.1",
|
||||
"resolved": "https://registry.npmjs.org/sort-desc/-/sort-desc-0.1.1.tgz",
|
||||
"integrity": "sha512-jfZacW5SKOP97BF5rX5kQfJmRVZP5/adDUTY8fCSPvNcXDVpUEe2pr/iKGlcyZzchRJZrswnp68fgk3qBXgkJw==",
|
||||
"engines": {
|
||||
"node": ">=0.10.0"
|
||||
}
|
||||
},
|
||||
"node_modules/sort-object": {
|
||||
"version": "0.3.2",
|
||||
"resolved": "https://registry.npmjs.org/sort-object/-/sort-object-0.3.2.tgz",
|
||||
"integrity": "sha512-aAQiEdqFTTdsvUFxXm3umdo04J7MRljoVGbBlkH7BgNsMvVNAJyGj7C/wV1A8wHWAJj/YikeZbfuCKqhggNWGA==",
|
||||
"dependencies": {
|
||||
"sort-asc": "^0.1.0",
|
||||
"sort-desc": "^0.1.1"
|
||||
},
|
||||
"engines": {
|
||||
"node": ">=0.10.0"
|
||||
}
|
||||
},
|
||||
"node_modules/source-map": {
|
||||
"version": "0.5.7",
|
||||
"resolved": "https://registry.npmjs.org/source-map/-/source-map-0.5.7.tgz",
|
||||
@@ -15964,11 +16191,6 @@
|
||||
"node": ">=12"
|
||||
}
|
||||
},
|
||||
"node_modules/vlq": {
|
||||
"version": "0.2.3",
|
||||
"resolved": "https://registry.npmjs.org/vlq/-/vlq-0.2.3.tgz",
|
||||
"integrity": "sha512-DRibZL6DsNhIgYQ+wNdWDL2SL3bKPlVrRiBqV5yuMm++op8W4kGFtaQfCs4KEJn0wBZcHVHJ3eoywX8983k1ow=="
|
||||
},
|
||||
"node_modules/warning": {
|
||||
"version": "4.0.3",
|
||||
"resolved": "https://registry.npmjs.org/warning/-/warning-4.0.3.tgz",
|
||||
@@ -16173,6 +16395,11 @@
|
||||
}
|
||||
}
|
||||
},
|
||||
"node_modules/xml-utils": {
|
||||
"version": "1.7.0",
|
||||
"resolved": "https://registry.npmjs.org/xml-utils/-/xml-utils-1.7.0.tgz",
|
||||
"integrity": "sha512-bWB489+RQQclC7A9OW8e5BzbT8Tu//jtAOvkYwewFr+Q9T9KDGvfzC1lp0pYPEQPEoPQLDkmxkepSC/2gIAZGw=="
|
||||
},
|
||||
"node_modules/xtend": {
|
||||
"version": "4.0.2",
|
||||
"resolved": "https://registry.npmjs.org/xtend/-/xtend-4.0.2.tgz",
|
||||
|
||||
@@ -18,7 +18,7 @@
|
||||
"@heroicons/react": "^2.0.18",
|
||||
"@octokit/plugin-throttling": "^5.2.2",
|
||||
"@portaljs/ckan": "^0.0.2",
|
||||
"@portaljs/components": "^0.1.8",
|
||||
"@portaljs/components": "^0.1.12",
|
||||
"@portaljs/core": "^1.0.5",
|
||||
"@portaljs/remark-callouts": "^1.0.5",
|
||||
"@portaljs/remark-embed": "^1.0.4",
|
||||
|
||||
@@ -1,5 +1,6 @@
|
||||
import { AppProps } from 'next/app';
|
||||
import './styles.css';
|
||||
import '@portaljs/components/styles.css';
|
||||
import { NextSeo } from 'next-seo';
|
||||
|
||||
import { useEffect } from 'react';
|
||||
|
||||
@@ -4,7 +4,12 @@ import { GetStaticProps } from 'next';
|
||||
import Layout from '../../components/_shared/Layout';
|
||||
import { formatDate } from '@/utils/formatDate';
|
||||
import parse from '../../lib/markdown';
|
||||
import DataRichDocument from '../../components/DataRichDocument';
|
||||
import dynamic from 'next/dynamic';
|
||||
|
||||
const DataRichDocument = dynamic(
|
||||
() => import('../../components/DataRichDocument'),
|
||||
{ ssr: false }
|
||||
);
|
||||
|
||||
export default function Page({ source, meta }) {
|
||||
return (
|
||||
@@ -46,7 +51,10 @@ export const getStaticProps: GetStaticProps = async ({ params }) => {
|
||||
|
||||
export async function getStaticPaths() {
|
||||
const mddb = await clientPromise;
|
||||
let allDocuments = await mddb.getFiles({ extensions: ['mdx'], folder: 'stories' });
|
||||
let allDocuments = await mddb.getFiles({
|
||||
extensions: ['mdx'],
|
||||
folder: 'stories',
|
||||
});
|
||||
|
||||
const paths = allDocuments
|
||||
.filter((page) => page.metadata?.isDraft !== true)
|
||||
|
||||
1000
package-lock.json
generated
10
packages/components/.storybook/preview-head.html
Normal file
@@ -0,0 +1,10 @@
|
||||
<!--
|
||||
This is necessary for Leaflet maps to work.
|
||||
-->
|
||||
|
||||
<link
|
||||
rel="stylesheet"
|
||||
href="https://unpkg.com/leaflet@1.9.4/dist/leaflet.css"
|
||||
integrity="sha256-p4NxAoJBhIIN+hmNHrzRCf9tD/miZyoHS5obTRR9BMY="
|
||||
crossorigin=""
|
||||
/>
|
||||
@@ -1,6 +1,7 @@
|
||||
import 'tailwindcss/tailwind.css'
|
||||
import '../src/index.css'
|
||||
|
||||
|
||||
import type { Preview } from '@storybook/react';
|
||||
|
||||
const preview: Preview = {
|
||||
|
||||
@@ -12,12 +12,14 @@
|
||||
],
|
||||
"scripts": {
|
||||
"dev": "npm run storybook",
|
||||
"build": "tsc && vite build && npm run build-tailwind",
|
||||
"example": "vite",
|
||||
"build": "tsc && vite build && npm run build-tailwind && npm run fix-leaflet",
|
||||
"lint": "eslint src --ext ts,tsx --report-unused-disable-directives --max-warnings 0",
|
||||
"storybook": "storybook dev -p 6006",
|
||||
"build-storybook": "storybook build",
|
||||
"build-tailwind": "NODE_ENV=production npx tailwindcss -o ./dist/styles.css --minify",
|
||||
"prepare": "npm run build"
|
||||
"build-tailwind": "NODE_ENV=production npx tailwindcss --postcss -c tailwind.config.js -i src/index.css -o ./dist/styles.css --minify",
|
||||
"prepare": "npm run build",
|
||||
"fix-leaflet": "node ./scripts/fix-leaflet.cjs"
|
||||
},
|
||||
"peerDependencies": {
|
||||
"react": "^18.2.0",
|
||||
@@ -26,16 +28,20 @@
|
||||
"dependencies": {
|
||||
"@githubocto/flat-ui": "^0.14.1",
|
||||
"@heroicons/react": "^2.0.17",
|
||||
"@planet/maps": "^8.1.0",
|
||||
"@tanstack/react-table": "^8.8.5",
|
||||
"chroma-js": "^2.4.2",
|
||||
"flexsearch": "0.7.21",
|
||||
"leaflet": "^1.9.4",
|
||||
"next-mdx-remote": "^4.4.1",
|
||||
"ol": "^7.4.0",
|
||||
"papaparse": "^5.4.1",
|
||||
"react": "^18.2.0",
|
||||
"react-dom": "^18.2.0",
|
||||
"react-hook-form": "^7.43.9",
|
||||
"react-leaflet": "^4.2.1",
|
||||
"react-query": "^3.39.3",
|
||||
"react-vega": "^7.6.0",
|
||||
"rollup-plugin-re": "^1.0.7",
|
||||
"vega": "5.25.0",
|
||||
"vega-lite": "5.1.0",
|
||||
"vitest": "^0.31.4"
|
||||
@@ -48,13 +54,16 @@
|
||||
"@storybook/react": "^7.0.7",
|
||||
"@storybook/react-vite": "^7.0.7",
|
||||
"@storybook/testing-library": "^0.0.14-next.2",
|
||||
"@swc/core": "^1.3.68",
|
||||
"@types/flexsearch": "^0.7.3",
|
||||
"@types/leaflet": "^1.9.3",
|
||||
"@types/papaparse": "^5.3.7",
|
||||
"@types/react": "^18.0.28",
|
||||
"@types/react-dom": "^18.0.11",
|
||||
"@typescript-eslint/eslint-plugin": "^5.57.1",
|
||||
"@typescript-eslint/parser": "^5.57.1",
|
||||
"@vitejs/plugin-react": "^4.0.0",
|
||||
"@vitejs/plugin-react-swc": "^3.3.2",
|
||||
"autoprefixer": "^10.4.14",
|
||||
"eslint": "^8.38.0",
|
||||
"eslint-plugin-react-hooks": "^4.6.0",
|
||||
@@ -62,12 +71,15 @@
|
||||
"eslint-plugin-storybook": "^0.6.11",
|
||||
"json": "^11.0.0",
|
||||
"postcss": "^8.4.23",
|
||||
"postcss-import": "^15.1.0",
|
||||
"postcss-import-url": "^7.2.0",
|
||||
"prop-types": "^15.8.1",
|
||||
"storybook": "^7.0.7",
|
||||
"tailwindcss": "^3.3.2",
|
||||
"typescript": "^5.0.2",
|
||||
"vite": "^4.3.2",
|
||||
"vite-plugin-dts": "^2.3.0"
|
||||
"vite-plugin-dts": "^2.3.0",
|
||||
"vite-plugin-swc-only": "^0.1.18"
|
||||
},
|
||||
"files": [
|
||||
"dist"
|
||||
|
||||
BIN
packages/components/portaljs-components-0.1.12.tgz
Normal file
@@ -1,6 +1,9 @@
|
||||
console.log('PostCSS')
|
||||
|
||||
export default {
|
||||
plugins: {
|
||||
'postcss-import': {},
|
||||
tailwindcss: {},
|
||||
autoprefixer: {},
|
||||
},
|
||||
}
|
||||
};
|
||||
|
||||
6
packages/components/scripts/fix-leaflet.cjs
Normal file
@@ -0,0 +1,6 @@
|
||||
const fs = require('fs');
|
||||
const path = require('path');
|
||||
|
||||
const leafletPath = path.join(require.resolve('leaflet'), '../')
|
||||
|
||||
fs.cpSync(`${leafletPath}images`,'./dist/images', { recursive: true });
|
||||
211
packages/components/src/components/Map.tsx
Normal file
@@ -0,0 +1,211 @@
|
||||
import { useEffect, useState } from 'react';
|
||||
import LoadingSpinner from './LoadingSpinner';
|
||||
import loadData from '../lib/loadData';
|
||||
import chroma from 'chroma-js';
|
||||
import {
|
||||
MapContainer,
|
||||
TileLayer,
|
||||
GeoJSON as GeoJSONLayer,
|
||||
LayersControl
|
||||
} from 'react-leaflet';
|
||||
|
||||
import * as L from 'leaflet';
|
||||
|
||||
export type MapProps = {
|
||||
layers: {
|
||||
data: string | GeoJSON.GeoJSON;
|
||||
name: string;
|
||||
colorScale?: {
|
||||
starting: string;
|
||||
ending: string;
|
||||
};
|
||||
tooltip?:
|
||||
| {
|
||||
propNames: string[];
|
||||
}
|
||||
| boolean;
|
||||
_id?: number;
|
||||
}[];
|
||||
title?: string;
|
||||
center?: { latitude: number | undefined; longitude: number | undefined };
|
||||
zoom?: number;
|
||||
};
|
||||
|
||||
export function Map({
|
||||
layers = [
|
||||
{
|
||||
data: null,
|
||||
name: null,
|
||||
colorScale: { starting: 'blue', ending: 'red' },
|
||||
tooltip: true,
|
||||
},
|
||||
],
|
||||
center = { latitude: 45, longitude: 45 },
|
||||
zoom = 2,
|
||||
title = '',
|
||||
}: MapProps) {
|
||||
const [isLoading, setIsLoading] = useState<boolean>(false);
|
||||
const [layersData, setLayersData] = useState<any>([]);
|
||||
|
||||
useEffect(() => {
|
||||
const loadDataPromises = layers.map(async (layer) => {
|
||||
let layerData: any;
|
||||
|
||||
if (typeof layer.data === 'string') {
|
||||
// If "data" is string, assume it's a URL
|
||||
setIsLoading(true);
|
||||
layerData = await loadData(layer.data).then((res: any) => {
|
||||
return JSON.parse(res);
|
||||
});
|
||||
} else {
|
||||
// Else, expect raw GeoJSON
|
||||
layerData = layer.data;
|
||||
}
|
||||
|
||||
if (layer.colorScale) {
|
||||
const colorScaleAr = chroma
|
||||
.scale([layer.colorScale.starting, layer.colorScale.ending])
|
||||
.mode('lch')
|
||||
.colors(layerData.features.length);
|
||||
|
||||
layerData.features.forEach((feature, i) => {
|
||||
// Only style if the feature doesn't have a color prop
|
||||
if (feature.color === undefined) {
|
||||
feature.color = colorScaleAr[i];
|
||||
}
|
||||
});
|
||||
}
|
||||
|
||||
return { name: layer.name, data: layerData };
|
||||
});
|
||||
|
||||
Promise.all(loadDataPromises).then((values) => {
|
||||
setLayersData(values);
|
||||
setIsLoading(false);
|
||||
});
|
||||
}, []);
|
||||
|
||||
return isLoading ? (
|
||||
<div className="w-full flex items-center justify-center w-[600px] h-[300px]">
|
||||
<LoadingSpinner />
|
||||
</div>
|
||||
) : (
|
||||
<MapContainer
|
||||
center={[center.latitude, center.longitude]}
|
||||
zoom={zoom}
|
||||
scrollWheelZoom={false}
|
||||
className="h-80 w-full"
|
||||
// @ts-ignore
|
||||
whenReady={(map: any) => {
|
||||
// Enable zoom using scroll wheel
|
||||
map.target.scrollWheelZoom.enable();
|
||||
|
||||
// Create the title box
|
||||
var info = new L.Control() as any;
|
||||
|
||||
info.onAdd = function () {
|
||||
this._div = L.DomUtil.create('div', 'info');
|
||||
this.update();
|
||||
return this._div;
|
||||
};
|
||||
|
||||
info.update = function () {
|
||||
this._div.innerHTML = `<h4 style="font-weight: 600; background: #f9f9f9; padding: 5px; border-radius: 5px; color: #464646;">${title}</h4>`;
|
||||
};
|
||||
|
||||
if (title) info.addTo(map.target);
|
||||
}}
|
||||
>
|
||||
<TileLayer
|
||||
attribution='© <a href="https://www.openstreetmap.org/copyright">OpenStreetMap</a> contributors'
|
||||
url="https://{s}.tile.openstreetmap.org/{z}/{x}/{y}.png"
|
||||
/>
|
||||
<LayersControl position="bottomright">
|
||||
{layers.map((layer) => {
|
||||
const data = layersData.find(
|
||||
(layerData) => layerData.name === layer.name
|
||||
)?.data;
|
||||
|
||||
return (
|
||||
data && (
|
||||
<LayersControl.Overlay key={layer.name} checked name={layer.name}>
|
||||
<GeoJSONLayer
|
||||
data={data}
|
||||
style={(geoJsonFeature: any) => {
|
||||
// Set the fill color of each feature when appliable
|
||||
if (
|
||||
!['Point', 'MultiPoint'].includes(geoJsonFeature.type)
|
||||
) {
|
||||
return { color: geoJsonFeature?.color };
|
||||
}
|
||||
}}
|
||||
eventHandlers={{
|
||||
add: (e) => {
|
||||
const featureGroup = e.target;
|
||||
const tooltip = layer.tooltip;
|
||||
|
||||
featureGroup.eachLayer((featureLayer) => {
|
||||
const feature = featureLayer.feature;
|
||||
const geometryType = feature.geometry.type;
|
||||
|
||||
if (tooltip) {
|
||||
const featurePropNames = Object.keys(
|
||||
feature.properties
|
||||
);
|
||||
let includedFeaturePropNames;
|
||||
|
||||
if (tooltip === true) {
|
||||
includedFeaturePropNames = featurePropNames;
|
||||
} else {
|
||||
includedFeaturePropNames = tooltip.propNames.filter(
|
||||
(name) => featurePropNames.includes(name)
|
||||
);
|
||||
}
|
||||
|
||||
if (includedFeaturePropNames) {
|
||||
const tooltipContent = includedFeaturePropNames
|
||||
.map(
|
||||
(name) =>
|
||||
`<b>${name}:</b> ${feature.properties[name]}`
|
||||
)
|
||||
.join('<br />');
|
||||
|
||||
featureLayer.bindTooltip(tooltipContent, {
|
||||
direction: 'center',
|
||||
});
|
||||
}
|
||||
}
|
||||
|
||||
featureLayer.on({
|
||||
mouseover: (event) => {
|
||||
if (
|
||||
['Polygon', 'MultiPolygon'].includes(geometryType)
|
||||
) {
|
||||
event.target.setStyle({
|
||||
fillOpacity: 0.5,
|
||||
});
|
||||
}
|
||||
},
|
||||
mouseout: (event) => {
|
||||
if (
|
||||
['Polygon', 'MultiPolygon'].includes(geometryType)
|
||||
) {
|
||||
event.target.setStyle({
|
||||
fillOpacity: 0.2,
|
||||
});
|
||||
}
|
||||
},
|
||||
});
|
||||
});
|
||||
},
|
||||
}}
|
||||
/>
|
||||
;
|
||||
</LayersControl.Overlay>
|
||||
)
|
||||
);
|
||||
})}
|
||||
</LayersControl>
|
||||
</MapContainer>
|
||||
);
|
||||
}
|
||||
84
packages/components/src/components/OpenLayers/Controls.jsx
Normal file
@@ -0,0 +1,84 @@
|
||||
import React, { useContext, useEffect, useState } from 'react';
|
||||
export const Controls = ({ children }) => {
|
||||
return <div>{children}</div>;
|
||||
};
|
||||
|
||||
import { FullScreen, Zoom } from 'ol/control';
|
||||
import { MapContext } from './Map';
|
||||
|
||||
export const FullScreenControl = () => {
|
||||
const { map } = useContext(MapContext);
|
||||
useEffect(() => {
|
||||
if (!map) return;
|
||||
let fullScreenControl = new FullScreen({
|
||||
className: 'ml-1 flex flex-col w-8 items-center mt-2',
|
||||
activeClassName:
|
||||
'w-full inline-flex justify-center items-center rounded-t-md bg-white px-2 py-2 text-gray-400 ring-1 ring-inset ring-gray-300 hover:bg-gray-50 focus:z-10 text-sm',
|
||||
inactiveClassName:
|
||||
'inline-flex w-full justify-center items-center rounded-t-md bg-white px-2 py-2 text-gray-400 ring-1 ring-inset ring-gray-300 hover:bg-gray-50 focus:z-10 text-sm',
|
||||
});
|
||||
let zoomControl = new Zoom({
|
||||
className: 'ml-1 flex flex-col w-8 items-center',
|
||||
zoomInClassName:
|
||||
'inline-flex w-full justify-center items-center bg-white px-2 py-2 text-gray-400 ring-1 ring-inset ring-gray-300 hover:bg-gray-50 focus:z-10 text-sm',
|
||||
zoomOutClassName:
|
||||
'inline-flex w-full justify-center items-center rounded-b-md bg-white px-2 py-2 text-gray-400 ring-1 ring-inset ring-gray-300 hover:bg-gray-50 focus:z-10 text-sm',
|
||||
});
|
||||
map.controls.push(fullScreenControl);
|
||||
map.controls.push(zoomControl);
|
||||
|
||||
return () => {
|
||||
map.controls.remove(zoomControl);
|
||||
map.controls.remove(fullScreenControl);
|
||||
};
|
||||
}, [map]);
|
||||
return null;
|
||||
};
|
||||
|
||||
//build a list of checkboxes in react
|
||||
|
||||
export const ListOfCheckboxes = ({ layers, shownLayers, setShownLayers }) => {
|
||||
//layers is an array of url and name
|
||||
function addLayer(layer) {
|
||||
setShownLayers([...shownLayers, layer.url]);
|
||||
}
|
||||
|
||||
function removeLayer(layer) {
|
||||
setShownLayers(shownLayers.filter((l) => l !== layer.url));
|
||||
}
|
||||
|
||||
return (
|
||||
<div>
|
||||
<h3 className="mb-4 font-semibold text-gray-900 ">Layers</h3>
|
||||
<ul className="w-48 text-sm font-medium text-gray-900 bg-white border border-gray-200 rounded-lg ">
|
||||
{layers.map((layer, index) => (
|
||||
<li
|
||||
key={index}
|
||||
className="w-full border-b border-gray-200 rounded-t-lg "
|
||||
>
|
||||
<div className="flex items-center pl-3">
|
||||
<input
|
||||
id={layer.name}
|
||||
type="checkbox"
|
||||
defaultChecked={shownLayers.includes(layer.url)}
|
||||
onClick={() =>
|
||||
shownLayers.includes(layer.url)
|
||||
? removeLayer(layer)
|
||||
: addLayer(layer)
|
||||
}
|
||||
value={true}
|
||||
className="w-4 h-4 text-blue-600 bg-gray-100 border-gray-300 rounded focus:ring-blue-500 focus:ring-2 "
|
||||
></input>
|
||||
<label
|
||||
htmlFor={layer.name}
|
||||
className="w-full py-3 ml-2 text-sm font-medium text-gray-90"
|
||||
>
|
||||
{layer.name}
|
||||
</label>
|
||||
</div>
|
||||
</li>
|
||||
))}
|
||||
</ul>
|
||||
</div>
|
||||
);
|
||||
};
|
||||
@@ -0,0 +1,29 @@
|
||||
import { useContext, useEffect, useState } from 'react';
|
||||
import HeatMap from 'ol/layer/Heatmap';
|
||||
import { MapContext } from './Map';
|
||||
const HeatMapLayer = ({ source, style, zIndex = 0 }) => {
|
||||
const { map } = useContext(MapContext);
|
||||
const [heatMapLayer, setHeatMapLayer] = useState(null);
|
||||
useEffect(() => {
|
||||
if (!map) return;
|
||||
let heatMapLayer = new HeatMap({
|
||||
source,
|
||||
style,
|
||||
blur: parseInt(5, 10),
|
||||
radius: parseInt(5, 10),
|
||||
});
|
||||
map.addLayer(heatMapLayer);
|
||||
setHeatMapLayer(heatMapLayer);
|
||||
heatMapLayer.setZIndex(zIndex);
|
||||
return () => {
|
||||
if (map) {
|
||||
map.removeLayer(heatMapLayer);
|
||||
}
|
||||
};
|
||||
}, [map]);
|
||||
useEffect(() => {
|
||||
heatMapLayer && heatMapLayer.setZIndex(zIndex);
|
||||
}, [zIndex]);
|
||||
return null;
|
||||
};
|
||||
export default HeatMapLayer;
|
||||
4
packages/components/src/components/OpenLayers/Layers.jsx
Normal file
@@ -0,0 +1,4 @@
|
||||
import React from 'react';
|
||||
export const Layers = ({ children }) => {
|
||||
return <div>{children}</div>;
|
||||
};
|
||||
50
packages/components/src/components/OpenLayers/Map.jsx
Normal file
@@ -0,0 +1,50 @@
|
||||
import React, { useRef, useState, useEffect } from 'react';
|
||||
import * as ol from 'ol';
|
||||
|
||||
export const MapContext = new React.createContext();
|
||||
|
||||
const Map = ({ children, zoom, center, setSelected }) => {
|
||||
const mapRef = useRef();
|
||||
const [map, setMap] = useState(null);
|
||||
// on component mount
|
||||
useEffect(() => {
|
||||
let options = {
|
||||
view: new ol.View({ zoom, center }),
|
||||
layers: [],
|
||||
controls: [],
|
||||
overlays: [],
|
||||
};
|
||||
let mapObject = new ol.Map(options);
|
||||
mapObject.setTarget(mapRef.current);
|
||||
setMap(mapObject);
|
||||
return () => mapObject.setTarget(undefined);
|
||||
}, []);
|
||||
|
||||
useEffect(() => {
|
||||
if (map) {
|
||||
if (setSelected !== null) {
|
||||
let selected = null;
|
||||
map.on('pointermove', function (e) {
|
||||
map.forEachFeatureAtPixel(e.pixel, function (f) {
|
||||
selected = f;
|
||||
return true;
|
||||
});
|
||||
if (selected) {
|
||||
setSelected(selected);
|
||||
} else {
|
||||
setSelected(null);
|
||||
}
|
||||
});
|
||||
}
|
||||
}
|
||||
}, [map]);
|
||||
return (
|
||||
<MapContext.Provider value={{ map }}>
|
||||
<div ref={mapRef} className="w-full" style={{height: '500px'}}>
|
||||
{children}
|
||||
</div>
|
||||
</MapContext.Provider>
|
||||
);
|
||||
};
|
||||
|
||||
export default Map;
|
||||
136
packages/components/src/components/OpenLayers/OpenLayers.tsx
Normal file
@@ -0,0 +1,136 @@
|
||||
import { useEffect, useState } from 'react';
|
||||
import Map from './Map';
|
||||
import { Layers } from './Layers';
|
||||
import { Fill, Icon, Style } from 'ol/style';
|
||||
import * as olSource from 'ol/source';
|
||||
import TileLayer from './TileLayer';
|
||||
import { fromLonLat } from 'ol/proj';
|
||||
import VectorLayer from './VectorLayer';
|
||||
import { Vector as VectorSource } from 'ol/source';
|
||||
import GeoJSON from 'ol/format/GeoJSON';
|
||||
import KML from 'ol/format/KML';
|
||||
import { colors } from './colors';
|
||||
import { FullScreenControl, Controls, ListOfCheckboxes } from './Controls';
|
||||
import HeatMapLayer from './HeatMapLayer';
|
||||
|
||||
function osm() {
|
||||
return new olSource.OSM();
|
||||
}
|
||||
|
||||
const formats = {
|
||||
geojson: new GeoJSON(),
|
||||
kml: new KML(),
|
||||
};
|
||||
|
||||
interface OpenLayersProps {
|
||||
layers: {
|
||||
url: string;
|
||||
name?: string;
|
||||
format?: string;
|
||||
heatmap?: boolean;
|
||||
}[];
|
||||
center?: [number, number];
|
||||
zoom?: number;
|
||||
popup?: (selected: any) => JSX.Element;
|
||||
}
|
||||
|
||||
export default function OpenLayers({
|
||||
layers,
|
||||
center = [0, 0],
|
||||
zoom = 1,
|
||||
popup,
|
||||
}: OpenLayersProps) {
|
||||
const [shownLayers, setShownLayers] = useState(
|
||||
layers.map((layer) => layer.url)
|
||||
);
|
||||
const [selected, setSelected] = useState(null);
|
||||
const [style, setStyle] = useState(null);
|
||||
|
||||
useEffect(() => {
|
||||
const style = new Style({
|
||||
fill: new Fill({
|
||||
color: '#eeeeee',
|
||||
}),
|
||||
image: new Icon({
|
||||
anchor: [0.5, 46],
|
||||
anchorXUnits: 'fraction',
|
||||
anchorYUnits: 'pixels',
|
||||
width: 18,
|
||||
height: 28,
|
||||
src: 'https://upload.wikimedia.org/wikipedia/commons/thumb/a/aa/Google_Maps_icon_%282020%29.svg/418px-Google_Maps_icon_%282020%29.svg.png?20200218211225',
|
||||
}),
|
||||
});
|
||||
setStyle(style);
|
||||
}, []);
|
||||
|
||||
return (
|
||||
<div className="relative">
|
||||
<Map
|
||||
center={fromLonLat(center)}
|
||||
zoom={zoom}
|
||||
setSelected={popup ? setSelected : null}
|
||||
>
|
||||
<Layers>
|
||||
<TileLayer source={osm()} zIndex={0} />
|
||||
{layers.map((layer, index) =>
|
||||
!layer.heatmap ? (
|
||||
<VectorLayer
|
||||
key={index}
|
||||
zIndex={shownLayers.includes(layer.url) ? 1 : -1}
|
||||
source={
|
||||
new VectorSource({
|
||||
url: layer.url,
|
||||
format: layer.format
|
||||
? formats[layer.format]
|
||||
: new GeoJSON(),
|
||||
})
|
||||
}
|
||||
style={function (feature) {
|
||||
const id = feature.getId();
|
||||
const color = feature.get('COLOR') || colors[id % 1302].hex;
|
||||
style.getFill().setColor(color);
|
||||
return style;
|
||||
}}
|
||||
/>
|
||||
) : (
|
||||
<HeatMapLayer
|
||||
key={index}
|
||||
zIndex={shownLayers.includes(layer.url) ? 1 : -1}
|
||||
source={
|
||||
new VectorSource({
|
||||
url: layer.url,
|
||||
format: layer.format
|
||||
? formats[layer.format]
|
||||
: new GeoJSON(),
|
||||
})
|
||||
}
|
||||
style={function (feature) {
|
||||
const color =
|
||||
feature.get('COLOR') || colors[feature.ol_uid % 1302].hex;
|
||||
style.getFill().setColor(color);
|
||||
return style;
|
||||
}}
|
||||
/>
|
||||
)
|
||||
)}
|
||||
</Layers>
|
||||
{/* add a floating pane that will output the ListOfCheckboxes component using tailwind*/}
|
||||
<div className="absolute bottom-0 right-0 m-4 p-4 z-50 bg-white rounded-lg shadow-xl">
|
||||
<ListOfCheckboxes
|
||||
layers={layers}
|
||||
shownLayers={shownLayers}
|
||||
setShownLayers={setShownLayers}
|
||||
/>
|
||||
</div>
|
||||
{popup && selected && (
|
||||
<div className="absolute bottom-0 left-0 m-4 p-4 z-50 bg-white rounded-lg shadow-xl">
|
||||
{popup(selected)}
|
||||
</div>
|
||||
)}
|
||||
<Controls>
|
||||
<FullScreenControl />
|
||||
</Controls>
|
||||
</Map>
|
||||
</div>
|
||||
);
|
||||
}
|
||||
23
packages/components/src/components/OpenLayers/TileLayer.jsx
Normal file
@@ -0,0 +1,23 @@
|
||||
import { useContext, useEffect } from 'react';
|
||||
import OLTileLayer from 'ol/layer/Tile';
|
||||
import { MapContext } from './Map';
|
||||
const TileLayer = ({ source, zIndex = 0 }) => {
|
||||
const { map } = useContext(MapContext);
|
||||
useEffect(() => {
|
||||
if (!map) return;
|
||||
|
||||
let tileLayer = new OLTileLayer({
|
||||
source,
|
||||
zIndex,
|
||||
});
|
||||
map.addLayer(tileLayer);
|
||||
tileLayer.setZIndex(zIndex);
|
||||
return () => {
|
||||
if (map) {
|
||||
map.removeLayer(tileLayer);
|
||||
}
|
||||
};
|
||||
}, [map]);
|
||||
return null;
|
||||
};
|
||||
export default TileLayer;
|
||||
@@ -0,0 +1,33 @@
|
||||
import { useContext, useEffect, useState } from 'react';
|
||||
import OLVectorLayer from 'ol/layer/Vector';
|
||||
import { MapContext } from './Map';
|
||||
const VectorLayer = ({ source, style, zIndex = 0 }) => {
|
||||
const { map } = useContext(MapContext);
|
||||
const [vectorLayer, setVectorLayer] = useState(null);
|
||||
useEffect(() => {
|
||||
if (!map) return;
|
||||
let vectorLayer = new OLVectorLayer({
|
||||
source,
|
||||
style,
|
||||
});
|
||||
const vectorSource = vectorLayer.getSource();
|
||||
vectorSource.on('featuresloadend', function () {
|
||||
vectorSource.getFeatures().forEach((feature, index) => {
|
||||
feature.setId(index);
|
||||
});
|
||||
});
|
||||
map.addLayer(vectorLayer);
|
||||
setVectorLayer(vectorLayer);
|
||||
vectorLayer.setZIndex(zIndex);
|
||||
return () => {
|
||||
if (map) {
|
||||
map.removeLayer(vectorLayer);
|
||||
}
|
||||
};
|
||||
}, [map]);
|
||||
useEffect(() => {
|
||||
vectorLayer && vectorLayer.setZIndex(zIndex);
|
||||
}, [zIndex]);
|
||||
return null;
|
||||
};
|
||||
export default VectorLayer;
|
||||
5210
packages/components/src/components/OpenLayers/colors.js
Normal file
6
packages/components/src/include.css
Normal file
@@ -0,0 +1,6 @@
|
||||
/* Temporary fix for a size issue with FlatUiTable loading indicator on Firefox */
|
||||
@layer base {
|
||||
svg[tw^='animate-pulse w-12'] {
|
||||
max-width: 100px;
|
||||
}
|
||||
}
|
||||
@@ -1,10 +1,7 @@
|
||||
@tailwind base;
|
||||
@tailwind components;
|
||||
@tailwind utilities;
|
||||
|
||||
/* Temporary fix for a size issue with FlatUiTable loading indicator on Firefox */
|
||||
@layer base {
|
||||
svg[tw^='animate-pulse w-12'] {
|
||||
max-width: 100px;
|
||||
}
|
||||
}
|
||||
@import "tailwindcss/base";
|
||||
@import "tailwindcss/components";
|
||||
@import "leaflet";
|
||||
@import "include";
|
||||
@import "tailwindcss/utilities";
|
||||
|
||||
|
||||
@@ -4,3 +4,5 @@ export * from "./components/LineChart";
|
||||
export * from "./components/Vega";
|
||||
export * from "./components/VegaLite";
|
||||
export * from "./components/FlatUiTable";
|
||||
export * from './components/OpenLayers/OpenLayers';
|
||||
export * from "./components/Map";
|
||||
|
||||
171
packages/components/src/types/GeoJSON.tsx
Normal file
@@ -0,0 +1,171 @@
|
||||
/**
|
||||
* Typescript types for the GeoJSON RFC7946 specification. This is not fully RFC-compliant due to lack of support for
|
||||
* ranged number data types.
|
||||
*
|
||||
* See https://tools.ietf.org/html/rfc7946
|
||||
*/
|
||||
export declare namespace GeoJSON {
|
||||
/**
|
||||
* Inside this document, the term "geometry type" refers to seven case-sensitive strings: "Point", "MultiPoint",
|
||||
* "LineString", "MultiLineString", "Polygon", "MultiPolygon", and "GeometryCollection".
|
||||
*/
|
||||
export type Geometry = Point | MultiPoint | LineString | MultiLineString | Polygon | MultiPolygon
|
||||
| GeometryCollection;
|
||||
export type GeometryType = Geometry["type"];
|
||||
|
||||
/**
|
||||
* ...the term "GeoJSON types" refers to nine case-sensitive strings: "Feature", "FeatureCollection", and the
|
||||
* geometry types listed above.
|
||||
*/
|
||||
export type GeoJson = Geometry | Feature | FeatureCollection;
|
||||
export type GeoJsonType = GeoJson["type"];
|
||||
|
||||
// types
|
||||
|
||||
/**
|
||||
* A position is an array of numbers. There MUST be two or more elements. The first two elements are longitude and
|
||||
* latitude, or easting and northing, precisely in that order and using decimal numbers. Altitude or elevation MAY
|
||||
* be included as an optional third element.
|
||||
*
|
||||
* Implementations SHOULD NOT extend positions beyond three elements because the semantics of extra elements are
|
||||
* unspecified and ambiguous.
|
||||
*/
|
||||
export type Position = [longitude: number, latitude: number, elevation?: number]
|
||||
|
||||
export type Record = { [key in string | number]: unknown };
|
||||
|
||||
/**
|
||||
* Properties inherit to all GeoJSON types
|
||||
*/
|
||||
export interface GeometryBase extends Record {
|
||||
/**
|
||||
* A GeoJSON object MAY have a member named "bbox" to include information on the coordinate range for its
|
||||
* Geometries, Features, or FeatureCollections. The value of the bbox member MUST be an array of length 2*n
|
||||
* where n is the number of dimensions represented in the contained geometries, with all axes of the most
|
||||
* southwesterly point followed by all axes of the more northeasterly point. The axes order of a bbox follows
|
||||
* the axes order of geometries.
|
||||
*/
|
||||
bbox?: number[];
|
||||
|
||||
/**
|
||||
* A GeoJSON object MAY have other members.
|
||||
*
|
||||
* Members not described in this specification ("foreign members") MAY be used in a GeoJSON document. Note that
|
||||
* support for foreign members can vary across implementations, and no normative processing model for foreign
|
||||
* members is defined.
|
||||
*/
|
||||
}
|
||||
|
||||
// geometry types
|
||||
|
||||
export interface Point extends GeometryBase {
|
||||
type: "Point";
|
||||
/**
|
||||
* For type "Point", the "coordinates" member is a single position.
|
||||
*/
|
||||
coordinates: Position;
|
||||
}
|
||||
|
||||
export interface MultiPoint extends GeometryBase {
|
||||
type: "MultiPoint";
|
||||
/**
|
||||
* For type "MultiPoint", the "coordinates" member is an array of positions.
|
||||
*/
|
||||
coordinates: Position[];
|
||||
}
|
||||
|
||||
export interface LineString extends GeometryBase {
|
||||
type: "LineString";
|
||||
/**
|
||||
* For type "LineString", the "coordinates" member is an array of two or more positions.
|
||||
*/
|
||||
coordinates: { 0: Position, 1: Position } & Position[]
|
||||
}
|
||||
|
||||
export interface MultiLineString extends GeometryBase {
|
||||
type: "MultiLineString";
|
||||
/**
|
||||
* For type "MultiLineString", the "coordinates" member is an array of LineString coordinate arrays.
|
||||
*/
|
||||
coordinates: LineString["coordinates"][];
|
||||
}
|
||||
|
||||
/**
|
||||
* To specify a constraint specific to Polygons, it is useful to introduce the concept of a linear ring:
|
||||
* - A linear ring is a closed LineString with four or more positions.
|
||||
* - The first and last positions are equivalent, and they MUST contain identical values; their representation
|
||||
* SHOULD also be identical.
|
||||
* - A linear ring is the boundary of a surface or the boundary of a hole in a surface.
|
||||
* - A linear ring MUST follow the right-hand rule with respect to the area it bounds, i.e., exterior rings are
|
||||
* counterclockwise, and holes are clockwise.
|
||||
*/
|
||||
export type LinearRing = { 0: Position, 1: Position, 2: Position, 3: Position } & Position[];
|
||||
|
||||
export interface Polygon extends GeometryBase {
|
||||
type: "Polygon";
|
||||
/**
|
||||
* For type "Polygon", the "coordinates" member MUST be an array of linear ring coordinate arrays.
|
||||
*
|
||||
* For Polygons with more than one of these rings, the first MUST be the exterior ring, and any others MUST be
|
||||
* interior rings. The exterior ring bounds the surface, and the interior rings (if present) bound holes within
|
||||
* the surface.
|
||||
*/
|
||||
coordinates: LinearRing[];
|
||||
}
|
||||
|
||||
export interface MultiPolygon extends GeometryBase {
|
||||
type: "MultiPolygon";
|
||||
/**
|
||||
* For type "MultiPolygon", the "coordinates" member is an array of Polygon coordinate arrays.
|
||||
*/
|
||||
coordinates: Polygon["coordinates"][];
|
||||
}
|
||||
|
||||
export interface GeometryCollection {
|
||||
/**
|
||||
* A GeoJSON object with type "GeometryCollection" is a Geometry object.
|
||||
*/
|
||||
type: "GeometryCollection";
|
||||
/**
|
||||
* A GeometryCollection has a member with the name "geometries". The value of "geometries" is an array. Each
|
||||
* element of this array is a GeoJSON Geometry object. It is possible for this array to be empty.
|
||||
*/
|
||||
geometries: Geometry[];
|
||||
}
|
||||
|
||||
// GeoJSON types
|
||||
|
||||
export interface Feature {
|
||||
/**
|
||||
* A Feature object has a "type" member with the value "Feature".
|
||||
*/
|
||||
type: "Feature";
|
||||
/**
|
||||
* If a Feature has a commonly used identifier, that identifier SHOULD be included as a member of the Feature object
|
||||
* with the name "id", and the value of this member is either a JSON string or number.
|
||||
*/
|
||||
id?: string | number;
|
||||
/**
|
||||
* A Feature object has a member with the name "geometry". The value of the geometry member SHALL be either a
|
||||
* Geometry object as defined above or, in the case that the Feature is unlocated, a JSON null value.
|
||||
*/
|
||||
geometry: Geometry | null;
|
||||
/**
|
||||
* A Feature object has a member with the name "properties". The value of the properties member is an object
|
||||
* (any JSON object or a JSON null value).
|
||||
*/
|
||||
properties: Record | null;
|
||||
}
|
||||
|
||||
export interface FeatureCollection {
|
||||
/**
|
||||
* A GeoJSON object with the type "FeatureCollection" is a FeatureCollection object.
|
||||
*/
|
||||
type: "FeatureCollection";
|
||||
/**
|
||||
* A FeatureCollection object has a member with the name "features". The value of "features" is a JSON array. Each
|
||||
* element of the array is a Feature object as defined above. It is possible for this array to be empty.
|
||||
*/
|
||||
features: Feature[];
|
||||
}
|
||||
}
|
||||
91
packages/components/stories/Map.stories.ts
Normal file
@@ -0,0 +1,91 @@
|
||||
import type { Meta, StoryObj } from '@storybook/react';
|
||||
|
||||
import { Map, MapProps } from '../src/components/Map';
|
||||
|
||||
// More on how to set up stories at: https://storybook.js.org/docs/react/writing-stories/introduction
|
||||
const meta: Meta = {
|
||||
title: 'Components/Map',
|
||||
component: Map,
|
||||
tags: ['autodocs'],
|
||||
argTypes: {
|
||||
layers: {
|
||||
description:
|
||||
'Data to be displayed.\n\n GeoJSON Object \n\nOR\n\n URL to GeoJSON Object',
|
||||
},
|
||||
title: {
|
||||
description: 'Title to display on the map. Optional.',
|
||||
},
|
||||
center: {
|
||||
description: 'Initial coordinates of the center of the map',
|
||||
},
|
||||
zoom: {
|
||||
description: 'Zoom level',
|
||||
},
|
||||
},
|
||||
};
|
||||
|
||||
export default meta;
|
||||
|
||||
type Story = StoryObj<MapProps>;
|
||||
|
||||
// More on writing stories with args: https://storybook.js.org/docs/react/writing-stories/args
|
||||
export const GeoJSONPolygons: Story = {
|
||||
name: 'GeoJSON polygons map',
|
||||
args: {
|
||||
layers: [
|
||||
{
|
||||
data: 'https://d2ad6b4ur7yvpq.cloudfront.net/naturalearth-3.3.0/ne_10m_geography_marine_polys.geojson',
|
||||
name: 'Polygons',
|
||||
tooltip: { propNames: ['name'] },
|
||||
colorScale: {
|
||||
starting: '#ff0000',
|
||||
ending: '#00ff00',
|
||||
},
|
||||
},
|
||||
],
|
||||
title: 'Seas and Oceans Map',
|
||||
center: { latitude: 45, longitude: 0 },
|
||||
zoom: 2,
|
||||
},
|
||||
};
|
||||
|
||||
export const GeoJSONPoints: Story = {
|
||||
name: 'GeoJSON points map',
|
||||
args: {
|
||||
layers: [
|
||||
{
|
||||
data: 'https://opendata.arcgis.com/datasets/9c58741995174fbcb017cf46c8a42f4b_25.geojson',
|
||||
name: 'Points',
|
||||
tooltip: { propNames: ['Location'] },
|
||||
},
|
||||
],
|
||||
title: 'Roads in York',
|
||||
center: { latitude: 53.9614, longitude: -1.0739 },
|
||||
zoom: 12,
|
||||
},
|
||||
};
|
||||
|
||||
export const GeoJSONMultipleLayers: Story = {
|
||||
name: 'GeoJSON polygons and points map',
|
||||
args: {
|
||||
layers: [
|
||||
{
|
||||
data: 'https://opendata.arcgis.com/datasets/9c58741995174fbcb017cf46c8a42f4b_25.geojson',
|
||||
name: 'Points',
|
||||
tooltip: true,
|
||||
},
|
||||
{
|
||||
data: 'https://d2ad6b4ur7yvpq.cloudfront.net/naturalearth-3.3.0/ne_10m_geography_marine_polys.geojson',
|
||||
name: 'Polygons',
|
||||
tooltip: true,
|
||||
colorScale: {
|
||||
starting: '#ff0000',
|
||||
ending: '#00ff00',
|
||||
},
|
||||
},
|
||||
],
|
||||
title: 'Polygons and points',
|
||||
center: { latitude: 45, longitude: 0 },
|
||||
zoom: 2,
|
||||
},
|
||||
};
|
||||
136
packages/components/stories/OpenLayers.stories.tsx
Normal file
@@ -0,0 +1,136 @@
|
||||
import type { Meta, StoryObj } from '@storybook/react';
|
||||
import React from 'react';
|
||||
import OpenLayers from '../src/components/OpenLayers/OpenLayers';
|
||||
|
||||
const meta: Meta = {
|
||||
title: 'Components/OpenLayers',
|
||||
component: OpenLayers,
|
||||
argTypes: {
|
||||
layers: {
|
||||
description: 'Layers to be added to the map',
|
||||
control: {
|
||||
type: 'array',
|
||||
},
|
||||
},
|
||||
center: {
|
||||
description: 'Center of the map',
|
||||
defaultValue: [0, 0],
|
||||
control: {
|
||||
type: 'array',
|
||||
},
|
||||
},
|
||||
zoom: {
|
||||
description: 'Zoom level of the map',
|
||||
defaultValue: 1,
|
||||
control: {
|
||||
type: 'number',
|
||||
},
|
||||
},
|
||||
},
|
||||
};
|
||||
|
||||
export default meta;
|
||||
|
||||
type Story = StoryObj<any>;
|
||||
|
||||
export const Secondary: Story = {
|
||||
name: 'Map with OpenLayers',
|
||||
args: {
|
||||
layers: [
|
||||
{
|
||||
url: 'https://openlayers.org/data/vector/ecoregions.json',
|
||||
name: 'Ecoregions',
|
||||
},
|
||||
],
|
||||
},
|
||||
};
|
||||
|
||||
export const Primary: Story = {
|
||||
name: 'Map with OpenLayers 2',
|
||||
args: {
|
||||
layers: [
|
||||
{
|
||||
url: 'https://d2ad6b4ur7yvpq.cloudfront.net/naturalearth-3.3.0/ne_10m_geography_marine_polys.geojson',
|
||||
name: 'Marine regions',
|
||||
},
|
||||
],
|
||||
},
|
||||
};
|
||||
|
||||
export const MapWithPopover: Story = {
|
||||
name: 'Map with popup',
|
||||
args: {
|
||||
layers: [
|
||||
{
|
||||
url: 'https://openlayers.org/data/vector/ecoregions.json',
|
||||
name: 'Ecoregions',
|
||||
},
|
||||
],
|
||||
popup: (feature: any) => {
|
||||
return (
|
||||
<div className="flex flex-col gap-y-1" style={{ color: 'red' }}>
|
||||
<span className="font-bold">Biome name</span>
|
||||
<span className="text-sm">{feature.values_.BIOME_NAME}</span>
|
||||
</div>
|
||||
);
|
||||
},
|
||||
},
|
||||
};
|
||||
|
||||
export const Third: Story = {
|
||||
name: 'Map with two layers',
|
||||
args: {
|
||||
layers: [
|
||||
{
|
||||
url: 'https://d2ad6b4ur7yvpq.cloudfront.net/naturalearth-3.3.0/ne_10m_geography_marine_polys.geojson',
|
||||
name: 'Marine regions',
|
||||
},
|
||||
{
|
||||
url: 'https://openlayers.org/data/vector/ecoregions.json',
|
||||
name: 'Ecoregions',
|
||||
},
|
||||
],
|
||||
},
|
||||
};
|
||||
|
||||
export const CustomCenter: Story = {
|
||||
name: 'Map with custom center and zoom',
|
||||
args: {
|
||||
layers: [
|
||||
{
|
||||
url: 'https://openlayers.org/data/vector/ecoregions.json',
|
||||
name: 'Ecoregions',
|
||||
},
|
||||
],
|
||||
center: [-15, 20],
|
||||
zoom: 4,
|
||||
},
|
||||
};
|
||||
|
||||
export const PointsOnMap: Story = {
|
||||
name: 'Map with points on',
|
||||
args: {
|
||||
layers: [
|
||||
{
|
||||
url: 'https://opendata.arcgis.com/datasets/9c58741995174fbcb017cf46c8a42f4b_25.geojson',
|
||||
name: 'E-Scooter Parking Bays',
|
||||
},
|
||||
],
|
||||
center: [-1.055429957881787, 53.963900188025301],
|
||||
zoom: 12,
|
||||
},
|
||||
};
|
||||
|
||||
export const KMLFile: Story = {
|
||||
name: 'Map with KML File',
|
||||
args: {
|
||||
layers: [
|
||||
{
|
||||
url: 'https://openlayers.org/en/latest/examples/data/kml/2012_Earthquakes_Mag5.kml',
|
||||
name: '2012 Earthquakes M5+',
|
||||
format: 'kml',
|
||||
heatmap: true,
|
||||
},
|
||||
],
|
||||
},
|
||||
};
|
||||
@@ -1,8 +1,6 @@
|
||||
/** @type {import('tailwindcss').Config} */
|
||||
export default {
|
||||
content: ['./index.html', './src/**/*.{js,ts,jsx,tsx}'],
|
||||
theme: {
|
||||
extend: {},
|
||||
},
|
||||
theme: {},
|
||||
plugins: [],
|
||||
};
|
||||
|
||||
@@ -1,29 +1,15 @@
|
||||
import react from '@vitejs/plugin-react'
|
||||
import path from 'node:path'
|
||||
import { defineConfig } from 'vitest/config'
|
||||
import dts from 'vite-plugin-dts'
|
||||
import tailwindcss from 'tailwindcss'
|
||||
import { UserConfigExport } from 'vite'
|
||||
import replace from "rollup-plugin-re"
|
||||
import react from '@vitejs/plugin-react';
|
||||
import path from 'node:path';
|
||||
import { defineConfig } from 'vitest/config';
|
||||
import dts from 'vite-plugin-dts';
|
||||
import tailwindcss from 'tailwindcss';
|
||||
import { UserConfigExport } from 'vite';
|
||||
import replace from 'rollup-plugin-re';
|
||||
|
||||
const app = async (): Promise<UserConfigExport> => {
|
||||
return defineConfig({
|
||||
plugins: [
|
||||
react(),
|
||||
replace({
|
||||
patterns: [
|
||||
{
|
||||
match: /js-sha256/,
|
||||
test: `eval("require('crypto')")`,
|
||||
replace: `require('crypto')`,
|
||||
},
|
||||
{
|
||||
match: /js-sha256/,
|
||||
test: `eval("require('buffer').Buffer")`,
|
||||
replace: `require('buffer').Buffer`,
|
||||
},
|
||||
],
|
||||
}),
|
||||
dts({
|
||||
insertTypesEntry: true,
|
||||
}),
|
||||
@@ -34,6 +20,7 @@ const app = async (): Promise<UserConfigExport> => {
|
||||
},
|
||||
},
|
||||
build: {
|
||||
target: 'es2020',
|
||||
lib: {
|
||||
entry: path.resolve(__dirname, 'src/index.ts'),
|
||||
name: 'components',
|
||||
@@ -41,12 +28,27 @@ const app = async (): Promise<UserConfigExport> => {
|
||||
fileName: (format) => `components.${format}.js`,
|
||||
},
|
||||
rollupOptions: {
|
||||
external: ['react', 'react-dom', 'tailwindcss', 'vega-lite', 'vega', 'react-vega'],
|
||||
external: [
|
||||
'react',
|
||||
'ol-mapbox-style',
|
||||
'react-dom',
|
||||
'tailwindcss',
|
||||
'vega-lite',
|
||||
'vega',
|
||||
'react-vega',
|
||||
'ol',
|
||||
'leaflet'
|
||||
],
|
||||
output: {
|
||||
manualChunks: undefined,
|
||||
globals: {
|
||||
react: 'React',
|
||||
ol: 'ol',
|
||||
'ol-mapbox-style': 'ol-mapbox-style',
|
||||
'react-vega': 'react-vega',
|
||||
'react-dom': 'ReactDOM',
|
||||
tailwindcss: 'tailwindcss',
|
||||
leaflet: 'leaflet'
|
||||
},
|
||||
},
|
||||
},
|
||||
@@ -55,7 +57,7 @@ const app = async (): Promise<UserConfigExport> => {
|
||||
globals: true,
|
||||
environment: 'jsdom',
|
||||
},
|
||||
})
|
||||
}
|
||||
});
|
||||
};
|
||||
// https://vitejs.dev/config/
|
||||
export default app
|
||||
export default app;
|
||||
|
||||
@@ -0,0 +1,64 @@
|
||||
// vite.config.ts
|
||||
import react from "file:///home/urutu-branco/Projetos/portaljs/node_modules/@vitejs/plugin-react-swc/index.mjs";
|
||||
import path from "node:path";
|
||||
import { defineConfig } from "file:///home/urutu-branco/Projetos/portaljs/node_modules/vitest/dist/config.js";
|
||||
import dts from "file:///home/urutu-branco/Projetos/portaljs/node_modules/vite-plugin-dts/dist/index.mjs";
|
||||
import tailwindcss from "file:///home/urutu-branco/Projetos/portaljs/node_modules/tailwindcss/lib/index.js";
|
||||
var __vite_injected_original_dirname = "/home/urutu-branco/Projetos/portaljs/packages/components";
|
||||
var app = async () => {
|
||||
return defineConfig({
|
||||
plugins: [
|
||||
react(),
|
||||
dts({
|
||||
insertTypesEntry: true
|
||||
})
|
||||
],
|
||||
css: {
|
||||
postcss: {
|
||||
plugins: [tailwindcss]
|
||||
}
|
||||
},
|
||||
build: {
|
||||
target: "es2020",
|
||||
lib: {
|
||||
entry: path.resolve(__vite_injected_original_dirname, "src/index.ts"),
|
||||
name: "components",
|
||||
formats: ["es", "umd"],
|
||||
fileName: (format) => `components.${format}.js`
|
||||
},
|
||||
rollupOptions: {
|
||||
external: [
|
||||
"react",
|
||||
"ol-mapbox-style",
|
||||
"react-dom",
|
||||
"tailwindcss",
|
||||
"vega-lite",
|
||||
"vega",
|
||||
"react-vega",
|
||||
"ol",
|
||||
"ol/dom.js"
|
||||
],
|
||||
output: {
|
||||
manualChunks: void 0,
|
||||
globals: {
|
||||
react: "React",
|
||||
ol: "ol",
|
||||
"ol/dom.js": "ol/dom.js",
|
||||
"react-vega": "react-vega",
|
||||
"react-dom": "ReactDOM",
|
||||
tailwindcss: "tailwindcss"
|
||||
}
|
||||
}
|
||||
}
|
||||
},
|
||||
test: {
|
||||
globals: true,
|
||||
environment: "jsdom"
|
||||
}
|
||||
});
|
||||
};
|
||||
var vite_config_default = app;
|
||||
export {
|
||||
vite_config_default as default
|
||||
};
|
||||
//# sourceMappingURL=data:application/json;base64,ewogICJ2ZXJzaW9uIjogMywKICAic291cmNlcyI6IFsidml0ZS5jb25maWcudHMiXSwKICAic291cmNlc0NvbnRlbnQiOiBbImNvbnN0IF9fdml0ZV9pbmplY3RlZF9vcmlnaW5hbF9kaXJuYW1lID0gXCIvaG9tZS91cnV0dS1icmFuY28vUHJvamV0b3MvcG9ydGFsanMvcGFja2FnZXMvY29tcG9uZW50c1wiO2NvbnN0IF9fdml0ZV9pbmplY3RlZF9vcmlnaW5hbF9maWxlbmFtZSA9IFwiL2hvbWUvdXJ1dHUtYnJhbmNvL1Byb2pldG9zL3BvcnRhbGpzL3BhY2thZ2VzL2NvbXBvbmVudHMvdml0ZS5jb25maWcudHNcIjtjb25zdCBfX3ZpdGVfaW5qZWN0ZWRfb3JpZ2luYWxfaW1wb3J0X21ldGFfdXJsID0gXCJmaWxlOi8vL2hvbWUvdXJ1dHUtYnJhbmNvL1Byb2pldG9zL3BvcnRhbGpzL3BhY2thZ2VzL2NvbXBvbmVudHMvdml0ZS5jb25maWcudHNcIjtpbXBvcnQgcmVhY3QgZnJvbSAnQHZpdGVqcy9wbHVnaW4tcmVhY3Qtc3djJztcbmltcG9ydCBwYXRoIGZyb20gJ25vZGU6cGF0aCc7XG5pbXBvcnQgeyBkZWZpbmVDb25maWcgfSBmcm9tICd2aXRlc3QvY29uZmlnJztcbmltcG9ydCBkdHMgZnJvbSAndml0ZS1wbHVnaW4tZHRzJztcbmltcG9ydCB0YWlsd2luZGNzcyBmcm9tICd0YWlsd2luZGNzcyc7XG5pbXBvcnQgeyBVc2VyQ29uZmlnRXhwb3J0IH0gZnJvbSAndml0ZSc7XG5pbXBvcnQgcmVwbGFjZSBmcm9tICdyb2xsdXAtcGx1Z2luLXJlJztcblxuY29uc3QgYXBwID0gYXN5bmMgKCk6IFByb21pc2U8VXNlckNvbmZpZ0V4cG9ydD4gPT4ge1xuICByZXR1cm4gZGVmaW5lQ29uZmlnKHtcbiAgICBwbHVnaW5zOiBbXG4gICAgICByZWFjdCgpLFxuICAgICAgZHRzKHtcbiAgICAgICAgaW5zZXJ0VHlwZXNFbnRyeTogdHJ1ZSxcbiAgICAgIH0pLFxuICAgIF0sXG4gICAgY3NzOiB7XG4gICAgICBwb3N0Y3NzOiB7XG4gICAgICAgIHBsdWdpbnM6IFt0YWlsd2luZGNzc10sXG4gICAgICB9LFxuICAgIH0sXG4gICAgYnVpbGQ6IHtcbiAgICAgIHRhcmdldDogJ2VzMjAyMCcsXG4gICAgICBsaWI6IHtcbiAgICAgICAgZW50cnk6IHBhdGgucmVzb2x2ZShfX2Rpcm5hbWUsICdzcmMvaW5kZXgudHMnKSxcbiAgICAgICAgbmFtZTogJ2NvbXBvbmVudHMnLFxuICAgICAgICBmb3JtYXRzOiBbJ2VzJywgJ3VtZCddLFxuICAgICAgICBmaWxlTmFtZTogKGZvcm1hdCkgPT4gYGNvbXBvbmVudHMuJHtmb3JtYXR9LmpzYCxcbiAgICAgIH0sXG4gICAgICByb2xsdXBPcHRpb25zOiB7XG4gICAgICAgIGV4dGVybmFsOiBbXG4gICAgICAgICAgJ3JlYWN0JyxcbiAgICAgICAgICAnb2wtbWFwYm94LXN0eWxlJyxcbiAgICAgICAgICAncmVhY3QtZG9tJyxcbiAgICAgICAgICAndGFpbHdpbmRjc3MnLFxuICAgICAgICAgICd2ZWdhLWxpdGUnLFxuICAgICAgICAgICd2ZWdhJyxcbiAgICAgICAgICAncmVhY3QtdmVnYScsXG4gICAgICAgICAgJ29sJyxcbiAgICAgICAgICAnb2wvZG9tLmpzJyxcbiAgICAgICAgXSxcbiAgICAgICAgb3V0cHV0OiB7XG4gICAgICAgICAgbWFudWFsQ2h1bmtzOiB1bmRlZmluZWQsXG4gICAgICAgICAgZ2xvYmFsczoge1xuICAgICAgICAgICAgcmVhY3Q6ICdSZWFjdCcsXG4gICAgICAgICAgICBvbDogJ29sJyxcbiAgICAgICAgICAgICdvbC9kb20uanMnOiAnb2wvZG9tLmpzJyxcbiAgICAgICAgICAgICdyZWFjdC12ZWdhJzogJ3JlYWN0LXZlZ2EnLFxuICAgICAgICAgICAgJ3JlYWN0LWRvbSc6ICdSZWFjdERPTScsXG4gICAgICAgICAgICB0YWlsd2luZGNzczogJ3RhaWx3aW5kY3NzJyxcbiAgICAgICAgICB9LFxuICAgICAgICB9LFxuICAgICAgfSxcbiAgICB9LFxuICAgIHRlc3Q6IHtcbiAgICAgIGdsb2JhbHM6IHRydWUsXG4gICAgICBlbnZpcm9ubWVudDogJ2pzZG9tJyxcbiAgICB9LFxuICB9KTtcbn07XG4vLyBodHRwczovL3ZpdGVqcy5kZXYvY29uZmlnL1xuZXhwb3J0IGRlZmF1bHQgYXBwO1xuIl0sCiAgIm1hcHBpbmdzIjogIjtBQUEwVixPQUFPLFdBQVc7QUFDNVcsT0FBTyxVQUFVO0FBQ2pCLFNBQVMsb0JBQW9CO0FBQzdCLE9BQU8sU0FBUztBQUNoQixPQUFPLGlCQUFpQjtBQUp4QixJQUFNLG1DQUFtQztBQVF6QyxJQUFNLE1BQU0sWUFBdUM7QUFDakQsU0FBTyxhQUFhO0FBQUEsSUFDbEIsU0FBUztBQUFBLE1BQ1AsTUFBTTtBQUFBLE1BQ04sSUFBSTtBQUFBLFFBQ0Ysa0JBQWtCO0FBQUEsTUFDcEIsQ0FBQztBQUFBLElBQ0g7QUFBQSxJQUNBLEtBQUs7QUFBQSxNQUNILFNBQVM7QUFBQSxRQUNQLFNBQVMsQ0FBQyxXQUFXO0FBQUEsTUFDdkI7QUFBQSxJQUNGO0FBQUEsSUFDQSxPQUFPO0FBQUEsTUFDTCxRQUFRO0FBQUEsTUFDUixLQUFLO0FBQUEsUUFDSCxPQUFPLEtBQUssUUFBUSxrQ0FBVyxjQUFjO0FBQUEsUUFDN0MsTUFBTTtBQUFBLFFBQ04sU0FBUyxDQUFDLE1BQU0sS0FBSztBQUFBLFFBQ3JCLFVBQVUsQ0FBQyxXQUFXLGNBQWM7QUFBQSxNQUN0QztBQUFBLE1BQ0EsZUFBZTtBQUFBLFFBQ2IsVUFBVTtBQUFBLFVBQ1I7QUFBQSxVQUNBO0FBQUEsVUFDQTtBQUFBLFVBQ0E7QUFBQSxVQUNBO0FBQUEsVUFDQTtBQUFBLFVBQ0E7QUFBQSxVQUNBO0FBQUEsVUFDQTtBQUFBLFFBQ0Y7QUFBQSxRQUNBLFFBQVE7QUFBQSxVQUNOLGNBQWM7QUFBQSxVQUNkLFNBQVM7QUFBQSxZQUNQLE9BQU87QUFBQSxZQUNQLElBQUk7QUFBQSxZQUNKLGFBQWE7QUFBQSxZQUNiLGNBQWM7QUFBQSxZQUNkLGFBQWE7QUFBQSxZQUNiLGFBQWE7QUFBQSxVQUNmO0FBQUEsUUFDRjtBQUFBLE1BQ0Y7QUFBQSxJQUNGO0FBQUEsSUFDQSxNQUFNO0FBQUEsTUFDSixTQUFTO0FBQUEsTUFDVCxhQUFhO0FBQUEsSUFDZjtBQUFBLEVBQ0YsQ0FBQztBQUNIO0FBRUEsSUFBTyxzQkFBUTsiLAogICJuYW1lcyI6IFtdCn0K
|
||||
@@ -1,20 +1,21 @@
|
||||
import { MDXRemote } from 'next-mdx-remote';
|
||||
import { NextSeo } from 'next-seo';
|
||||
import layouts from 'layouts';
|
||||
import DocsPagination from './DocsPagination';
|
||||
import { NextSeo } from 'next-seo';
|
||||
import { Hero } from "@portaljs/core";
|
||||
|
||||
export default function MDXPage({ source, frontMatter }) {
|
||||
const Layout = ({ children }) => {
|
||||
const layoutName = frontMatter?.layout || 'default';
|
||||
const LayoutComponent = layouts[layoutName];
|
||||
const Layout = ({ children }) => {
|
||||
const layoutName = frontMatter?.layout || 'default';
|
||||
const LayoutComponent = layouts[layoutName];
|
||||
|
||||
return <LayoutComponent {...frontMatter}>{children}</LayoutComponent>;
|
||||
};
|
||||
return <LayoutComponent {...frontMatter}>{children}</LayoutComponent>;
|
||||
};
|
||||
|
||||
|
||||
return (
|
||||
<Layout>
|
||||
<MDXRemote {...source} components={{ DocsPagination, NextSeo }} />
|
||||
</Layout>
|
||||
);
|
||||
return (
|
||||
<Layout>
|
||||
<MDXRemote {...source} components={{ DocsPagination, NextSeo, Hero }} />
|
||||
</Layout>
|
||||
);
|
||||
}
|
||||
|
||||
BIN
site/content/assets/blog/dataview.gif
Normal file
|
After Width: | Height: | Size: 2.0 MiB |
BIN
site/content/assets/blog/harry.png
Normal file
|
After Width: | Height: | Size: 2.2 MiB |
BIN
site/content/assets/blog/harry_original.png
Normal file
|
After Width: | Height: | Size: 1.4 MiB |
BIN
site/content/assets/blog/link-preview.png
Normal file
|
After Width: | Height: | Size: 296 KiB |
BIN
site/content/assets/blog/table1.png
Normal file
|
After Width: | Height: | Size: 57 KiB |
BIN
site/content/assets/blog/table2.png
Normal file
|
After Width: | Height: | Size: 64 KiB |
BIN
site/content/assets/blog/tutorial-1-result.png
Normal file
|
After Width: | Height: | Size: 578 KiB |
201
site/content/blog/create-a-simple-catalog-of-anything.md
Normal file
@@ -0,0 +1,201 @@
|
||||
---
|
||||
title: Create a catalog of anything using Markdown files in Obsidian
|
||||
date: 2023-05-30
|
||||
authors: ['Ola Rubaj']
|
||||
filetype: 'blog'
|
||||
---
|
||||
|
||||
![[dataview.gif]]
|
||||
|
||||
Have you ever wanted to create a catalog of stuff? Maybe it's a list of personal projects, maybe favourite books or movies, or perhaps the options for the next smartphone you'll buy. But you've found yourself deterred by expensive software, lack of flexibility in capturing and modifying the structure of the data, or lack of control over it?
|
||||
|
||||
Markdown files, with their unique combination of 1) rich content, including text, images, links, and more, with 2) structured metadata allowing for data retrieval, are an excellent tool for this task. These features, coupled with the user-friendly interface of Obsidian and the analytical power of the Dataview plugin, make creating a data catalog an easy task. And it's free!
|
||||
|
||||
This tutorial will provide you with an easy yet extendable approach to creating your personal data catalogs using Markdown, in Obsidian.
|
||||
|
||||
## What are we going to build?
|
||||
|
||||
In this tutorial, we're going to create a catalog of characters from the Harry Potter series. Each character will have their own markdown file containing some unstructured data like character's quotes, as well as structured metadata, such as the character's name, house, creature they own, and status (alive or dead).
|
||||
|
||||
## Step 1: Setup
|
||||
|
||||
Here are the steps to get you started:
|
||||
|
||||
1. Download and install Obsidian from their [official website](https://obsidian.md/).
|
||||
2. Create a new Obsidian vault.
|
||||
1. Open the app.
|
||||
2. Click the "New" button to create a new vault.
|
||||
3. Choose a name and a location for your vault. For this tutorial, you might name it "Harry Potter Characters".
|
||||
4. Click "Create" to create the vault.
|
||||
3. Install the ["Dataview" plugin](https://github.com/blacksmithgu/obsidian-dataview) from Obsidian's community plugins.
|
||||
1. Open the newly created vault in Obsidian.
|
||||
2. Click on the settings icon ⚙️ in the left-hand pane to open the Settings view.
|
||||
3. In the Settings view, find the "Community plugins" section and click on it.
|
||||
4. Click on the button "Turn on community plugins".
|
||||
5. Click on "Browse" and search for "Dataview" in the plugin browser.
|
||||
6. Click on "Install" to install the Dataview plugin.
|
||||
7. After the plugin is installed, click on "Enable" to enable the plugin in your vault.
|
||||
|
||||
## Step 2: Add some data about the characters
|
||||
|
||||
Let's start by creating a subfolder in our Obsidian vault, that will store all the markdown files with our characters data. Let's name it e.g. `/characters`. Then, we're going to create three markdown files in it for data about Harry Potter, Hermione, and Malfoy.
|
||||
|
||||
Here's an example file for Harry Potter:
|
||||
|
||||
```md
|
||||
---
|
||||
name: Harry Potter
|
||||
house: Gryffindor
|
||||
status: Alive
|
||||
---
|
||||
|
||||
## Quotes
|
||||
|
||||
"I solemnly swear I am up to no good."
|
||||
```
|
||||
|
||||
Here's an example file for Hermione:
|
||||
|
||||
```md
|
||||
---
|
||||
name: Hermione Granger
|
||||
house: Gryffindor
|
||||
status: Alive
|
||||
---
|
||||
|
||||
## Quotes
|
||||
|
||||
"Books! And cleverness! There are more important things - friendship and bravery."
|
||||
```
|
||||
|
||||
Here's an example file for Malfoy:
|
||||
|
||||
```md
|
||||
---
|
||||
name: Draco Malfoy
|
||||
house: Slytherin
|
||||
status: Alive
|
||||
---
|
||||
|
||||
Draco Malfoy is Harry's rival and a member of Slytherin House.
|
||||
|
||||
## Quotes
|
||||
|
||||
"My father will hear about this!"
|
||||
```
|
||||
|
||||
By the end of this step you should end up with the following folder structure:
|
||||
|
||||
```
|
||||
Harry Potter Characters
|
||||
└── characters
|
||||
├── Harry Potter.md
|
||||
├── Hermione.md
|
||||
└── Malfoy.md
|
||||
```
|
||||
|
||||
## Step 3: Create a data catalog
|
||||
|
||||
Now let's create a data catalog of our Harry Potter characters!
|
||||
|
||||
In the root of our vault, let's create a file called `Catalog` (but you can name it whatever you want) that's going to display a table with all our characters and their metadata. Inside it, we're going to write the following code block with a simple Dataview query:
|
||||
|
||||
````md
|
||||
```dataview
|
||||
table name, house, status
|
||||
from "characters"
|
||||
sort name asc
|
||||
```
|
||||
````
|
||||
|
||||
Let's break it down:
|
||||
|
||||
- `table name, house, status`: This line instructs Dataview to create a table that includes columns for "name", "house", and "status". These are fields that you should have defined in your markdown files' frontmatter, but you don't have to. For any missing field Dataview will just display `-`.
|
||||
- `from "characters"`: This tells Dataview to pull the data from all markdown files located in the `/characters` folder in your Obsidian vault.
|
||||
- `sort name asc`: This command sorts the data based on the "name" field, in ascending order.
|
||||
|
||||
After you click somewhere outside of this code block, you should see the following table:
|
||||
|
||||
![[table1.png]]
|
||||
|
||||
## Step 4: Add more metadata about characters
|
||||
|
||||
We can continue to add more information about our characters. For example, let's add creatures each character owns:
|
||||
|
||||
```md=
|
||||
---
|
||||
name: Harry Potter
|
||||
...
|
||||
creature: Hedwig (Owl)
|
||||
---
|
||||
|
||||
...
|
||||
|
||||
---
|
||||
|
||||
name: Hermione Granger
|
||||
...
|
||||
creature: Crookshanks (Cat)
|
||||
---
|
||||
|
||||
...
|
||||
|
||||
```
|
||||
|
||||
Now, if we want to show this field in our Dataview table, we need to add it to the first line of our dataview code block:
|
||||
|
||||
````md
|
||||
```dataview
|
||||
table name, house, status, creature
|
||||
from "characters"
|
||||
sort name asc
|
||||
```
|
||||
````
|
||||
|
||||
After clicking somewhere outside the code block, you should see an updated table that includes the column `creature`.
|
||||
|
||||
![[table2.png]]
|
||||
|
||||
## Step 5: Enrich content with images and links
|
||||
|
||||
To enhance your catalog, you can add images of characters, and links to other characters in your markdown content.
|
||||
|
||||
#### Add images
|
||||
|
||||
To add an image of a character, right-click on the image you want to embed and copy it to clipboard - you can use the image below - and paste it directly in your markdown file.
|
||||
|
||||
![[harry_original.png]]
|
||||
|
||||
Obsidian will automatically save the file to the root of your vault and create a link to it in your content, so you'll end up with a link similar to this one:
|
||||
|
||||
```md
|
||||
![[Pasted image 20230525212302.png]]
|
||||
```
|
||||
|
||||
Which will render as:
|
||||
|
||||
![[harry.png]]
|
||||
|
||||
#### Add links to other pages
|
||||
|
||||
Obsidian allows you to create links between different notes (or in this case, characters). To add a link to another character, use the double bracket `[[]]` syntax.
|
||||
|
||||
For example, if you're writing about Harry Potter and want to mention that he is friends with Hermione, you can link to Hermione's markdown file like this:
|
||||
|
||||
```md
|
||||
He is a friend of [[Hermione]].
|
||||
```
|
||||
|
||||
When you click on Hermione's name in the rendered link, Obsidian will take you to Hermione's file in your vault. If you hover over it, you'll see a preview of Hermione's file:
|
||||
|
||||
![[link-preview.png]]
|
||||
|
||||
## Summary
|
||||
|
||||
And there you have it! We've walked through the process of creating a personal data catalog using markdown files, the Obsidian application, and its Dataview plugin. We've transformed scattered data into a well-organized, easy-to-navigate, and visually pleasing catalog. Whether you've used our example of a Harry Potter character catalog or applied these steps to a different topic of your choosing, we hope you've found this tutorial helpful and empowering.
|
||||
|
||||
Happy data cataloging!
|
||||
|
||||
---
|
||||
|
||||
You can find the [vault created in this tutorial here](https://github.com/datopian/markdowndb/tree/main/examples/obsidian-dataview).
|
||||
190
site/content/blog/create-a-website-from-scratch.md
Normal file
@@ -0,0 +1,190 @@
|
||||
---
|
||||
title: 'Tutorial 1: Create a website from scratch using Markdown and PortalJS'
|
||||
date: 2023-06-20
|
||||
authors: ['Ola Rubaj']
|
||||
filetype: 'blog'
|
||||
---
|
||||
|
||||
In this tutorial we will walk you through creating an elegant, fully functional website written in simple markdown and published with PortalJS.
|
||||
|
||||
By the end of this tutorial you will:
|
||||
|
||||
- have a working markdown-based website powered by PortalJS.
|
||||
- be able to edit the text and add pages, all from an online interface without installing anything.
|
||||
|
||||
Below is a screenshot of how the final website will look like:
|
||||
![[tutorial-1-result.png]]
|
||||
|
||||
## Prerequisites
|
||||
|
||||
- A [GitHub](https://github.com/) account.
|
||||
- A [Vercel](https://vercel.com/) account. You can set it up using your GitHub account.
|
||||
|
||||
## Setting up a sandbox website
|
||||
|
||||
### 1. Navigate to the [datopian/flowershow repository](https://github.com/datopian/flowershow).
|
||||
|
||||
### 2. Scroll down and click on the "Deploy" button
|
||||
|
||||
After clicking on it, you'll be redirected to Vercel's "Create Git Repository" page.
|
||||
|
||||
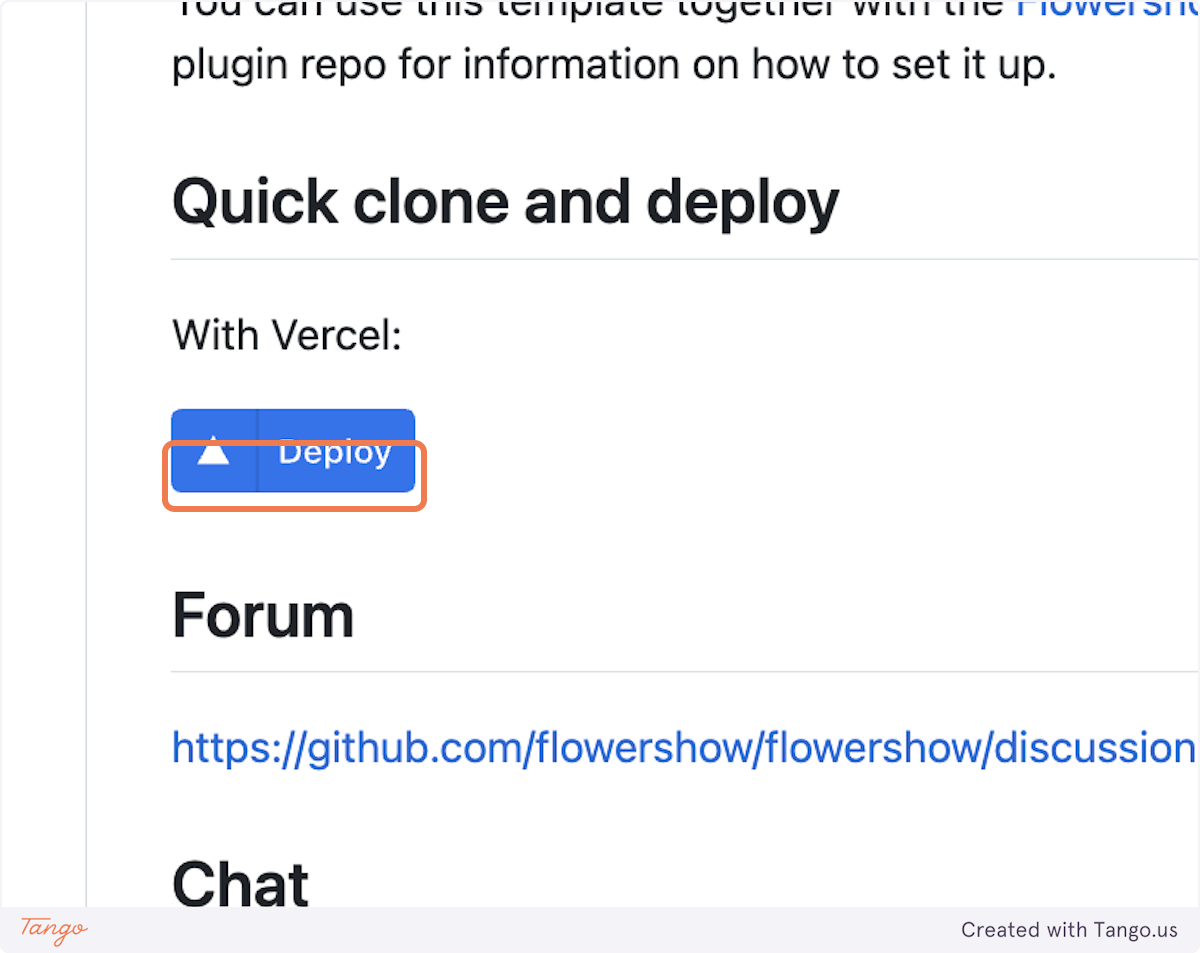
|
||||
|
||||
### 3. Select your GitHub account in "Git Scope"
|
||||
|
||||
Click on "Select Git Scope" dropdown and select your GitHub account name from the list if it's there.
|
||||
|
||||
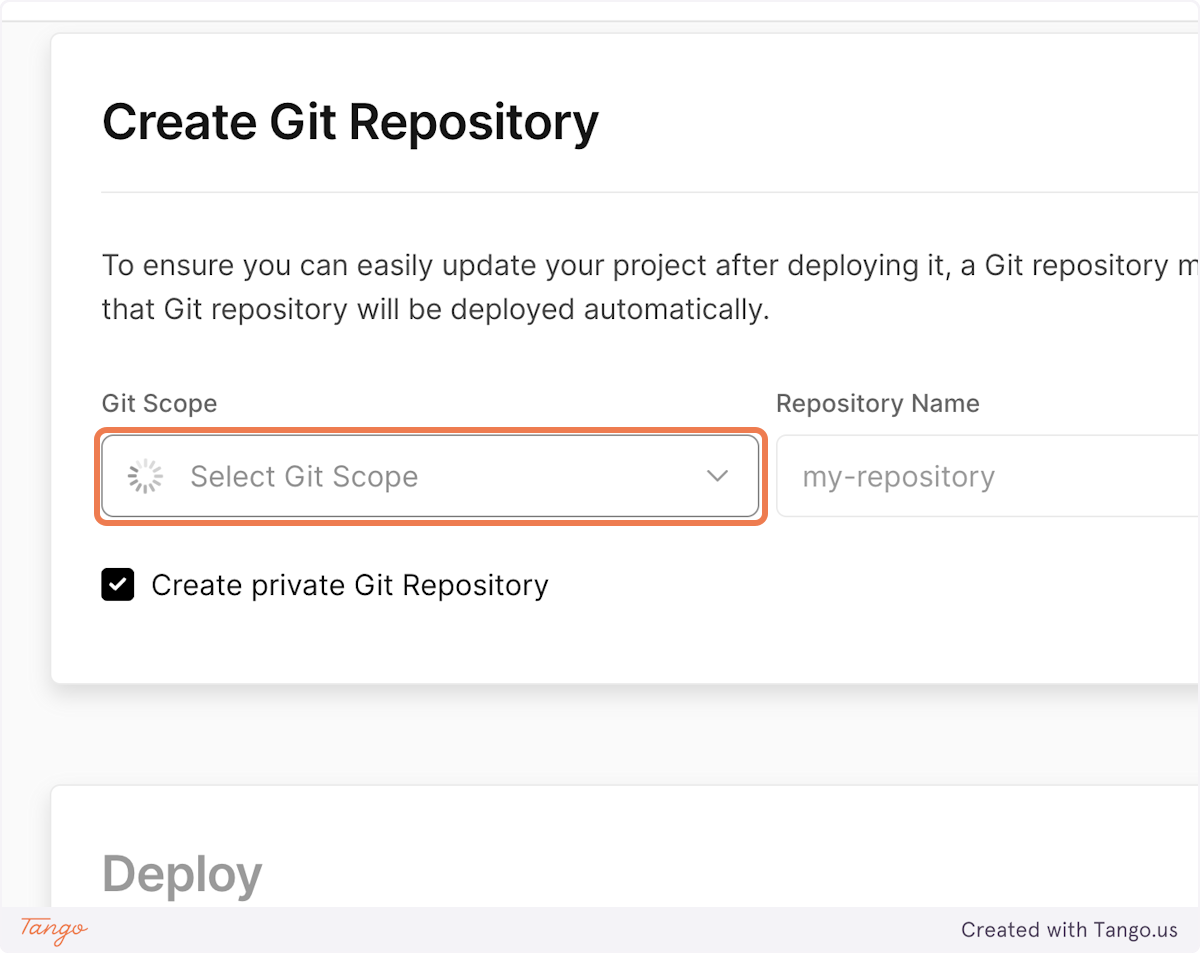
|
||||
|
||||
If your GitHub account is not available in the dropdown list, click on "Add GitHub Account"...
|
||||
|
||||
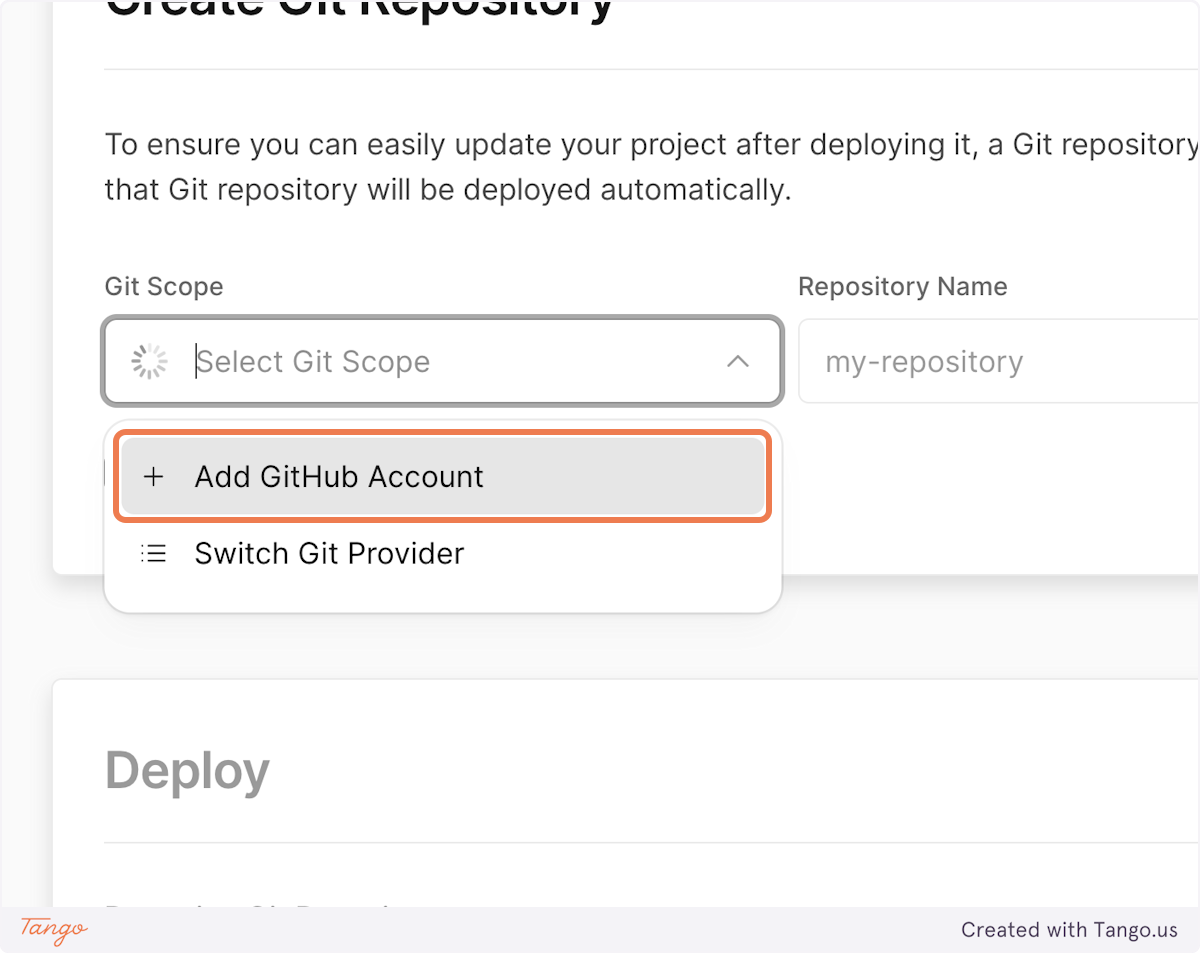
|
||||
|
||||
...and authorize Vercel to access your GitHub repositories by clicking "Install".
|
||||
|
||||
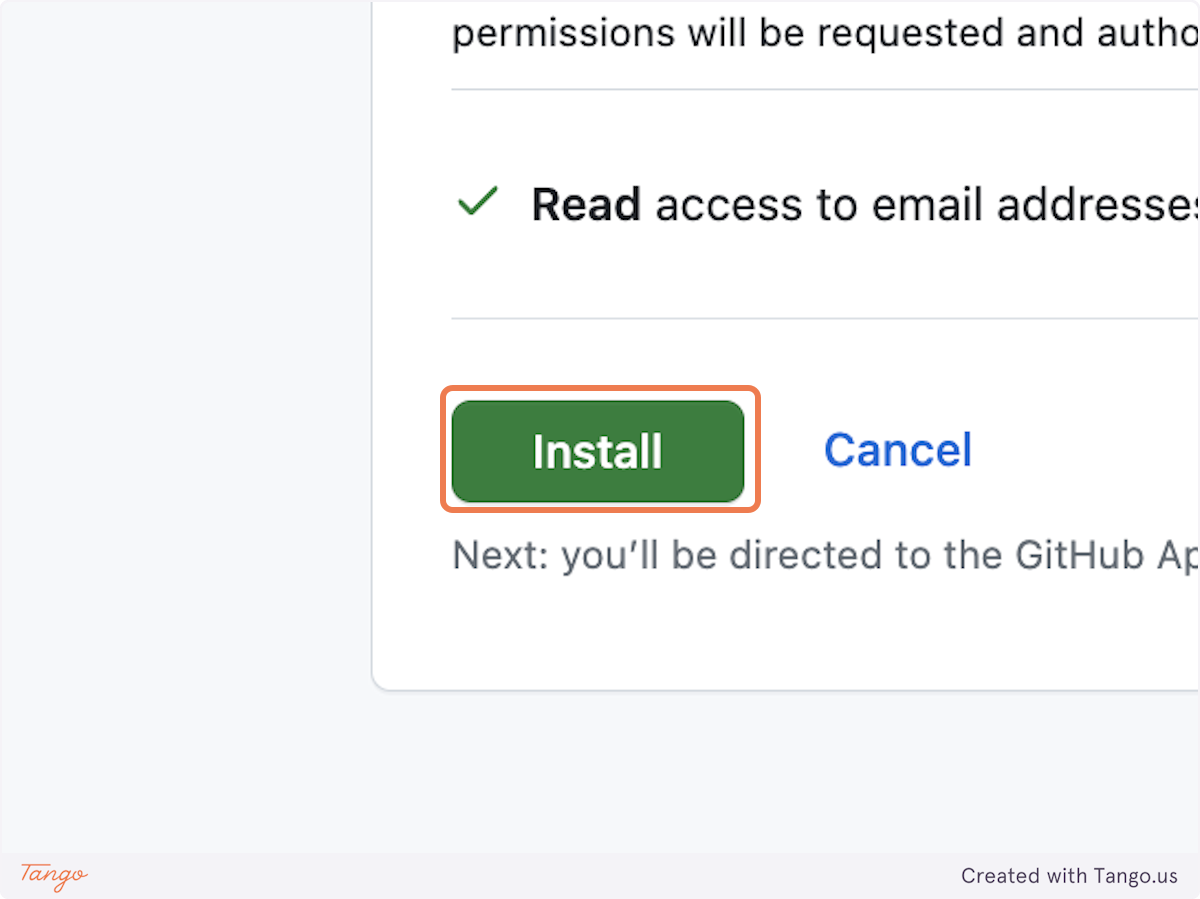
|
||||
|
||||
Now you can select your GitHub account.
|
||||
|
||||

|
||||
|
||||
### 4. Give your repository a name
|
||||
|
||||
A good practice is to use lowercase and dashes.
|
||||
|
||||
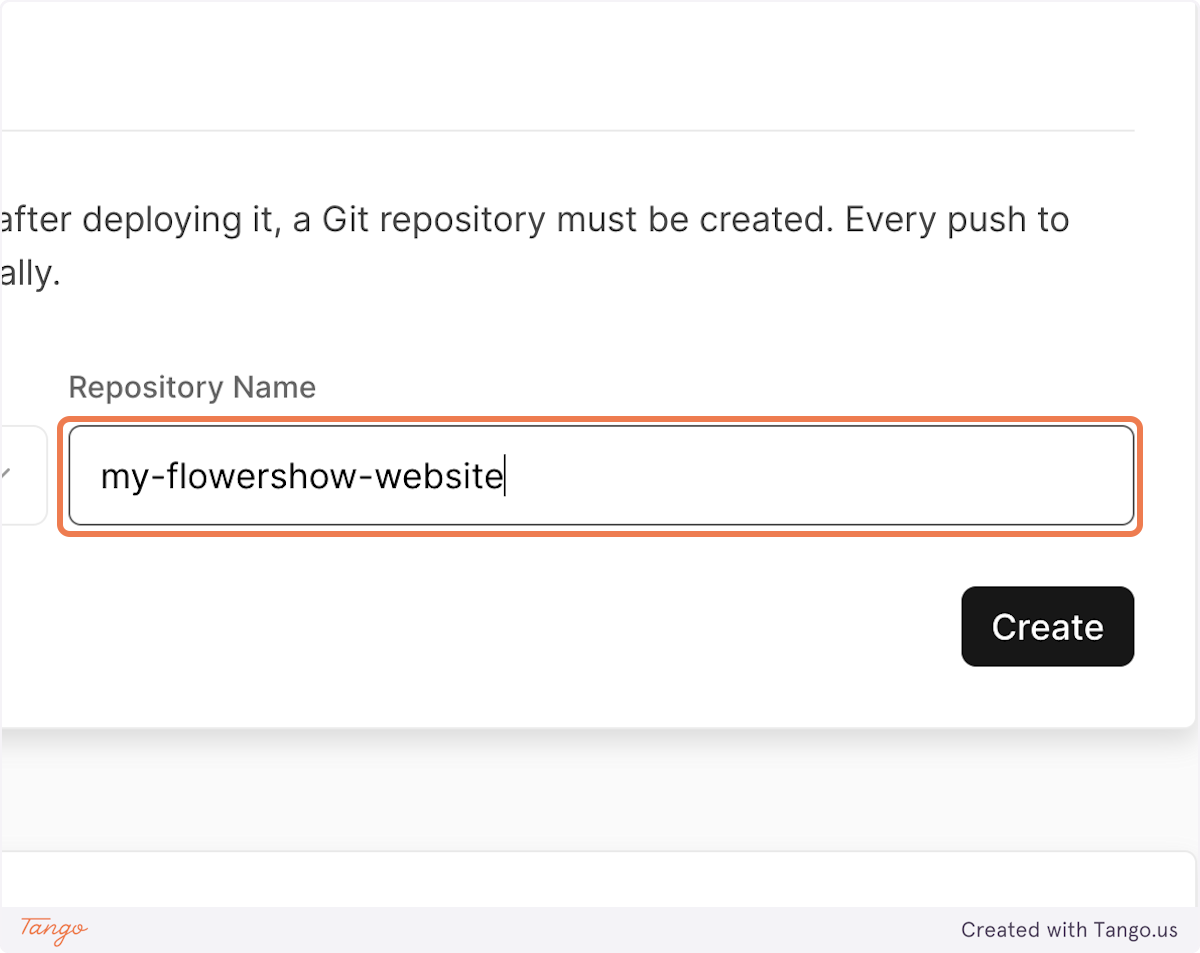
|
||||
|
||||
### 5. Click on "Create" and wait until the site deploys
|
||||
|
||||
After you click "Create", Vercel will create a new repository on your GitHub account, using the `datopian/flowershow` repository as a template. Then, it will immediately start buidling the initial version of your website. This may take about 1-2 minutes.
|
||||
|
||||
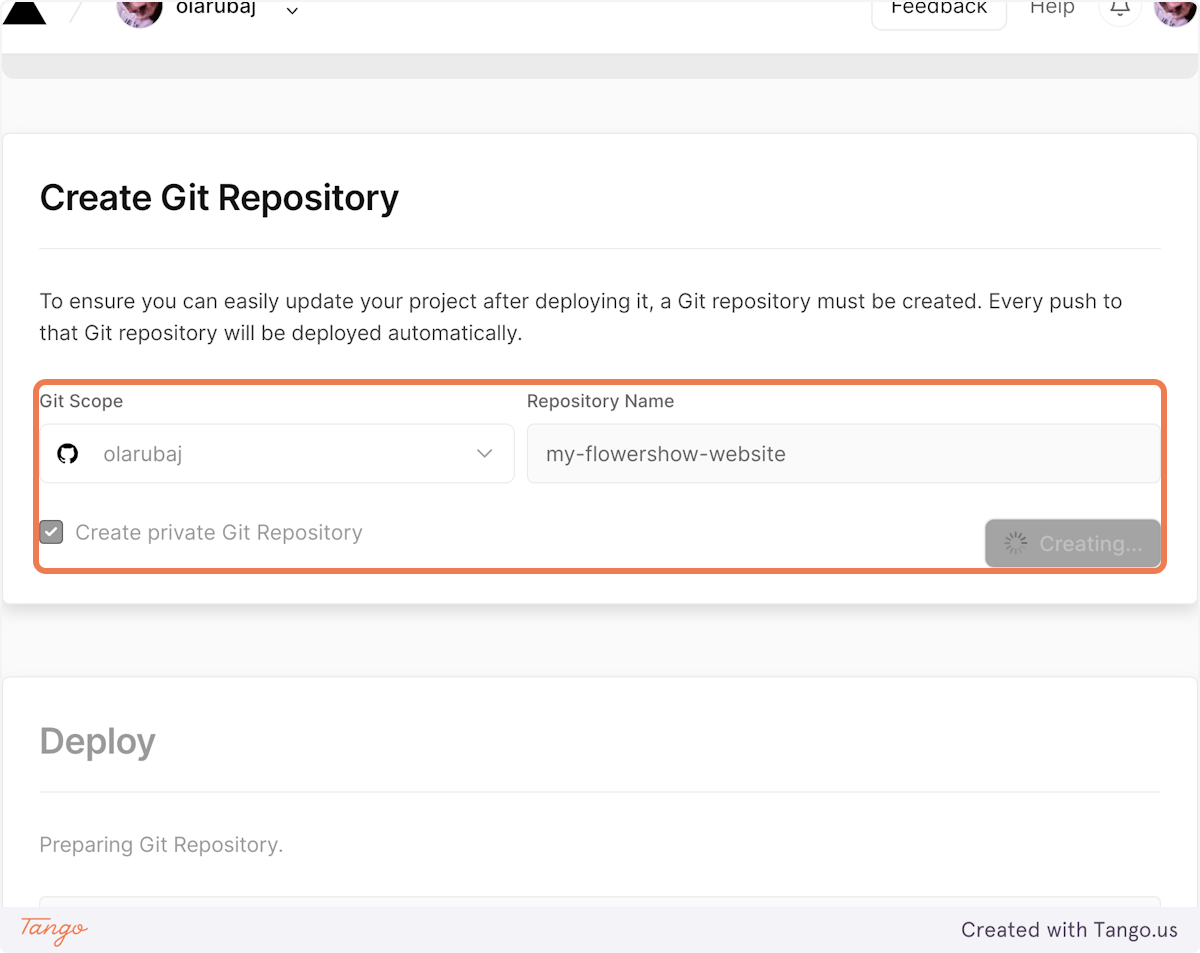
|
||||
|
||||
### 6. See your published website!
|
||||
|
||||
And voila! Your site is up and running. Once on the "Congratulations" screen, navigate to the project dashboard...
|
||||
|
||||

|
||||
|
||||
... and click on "Visit" to see your published website!
|
||||
|
||||
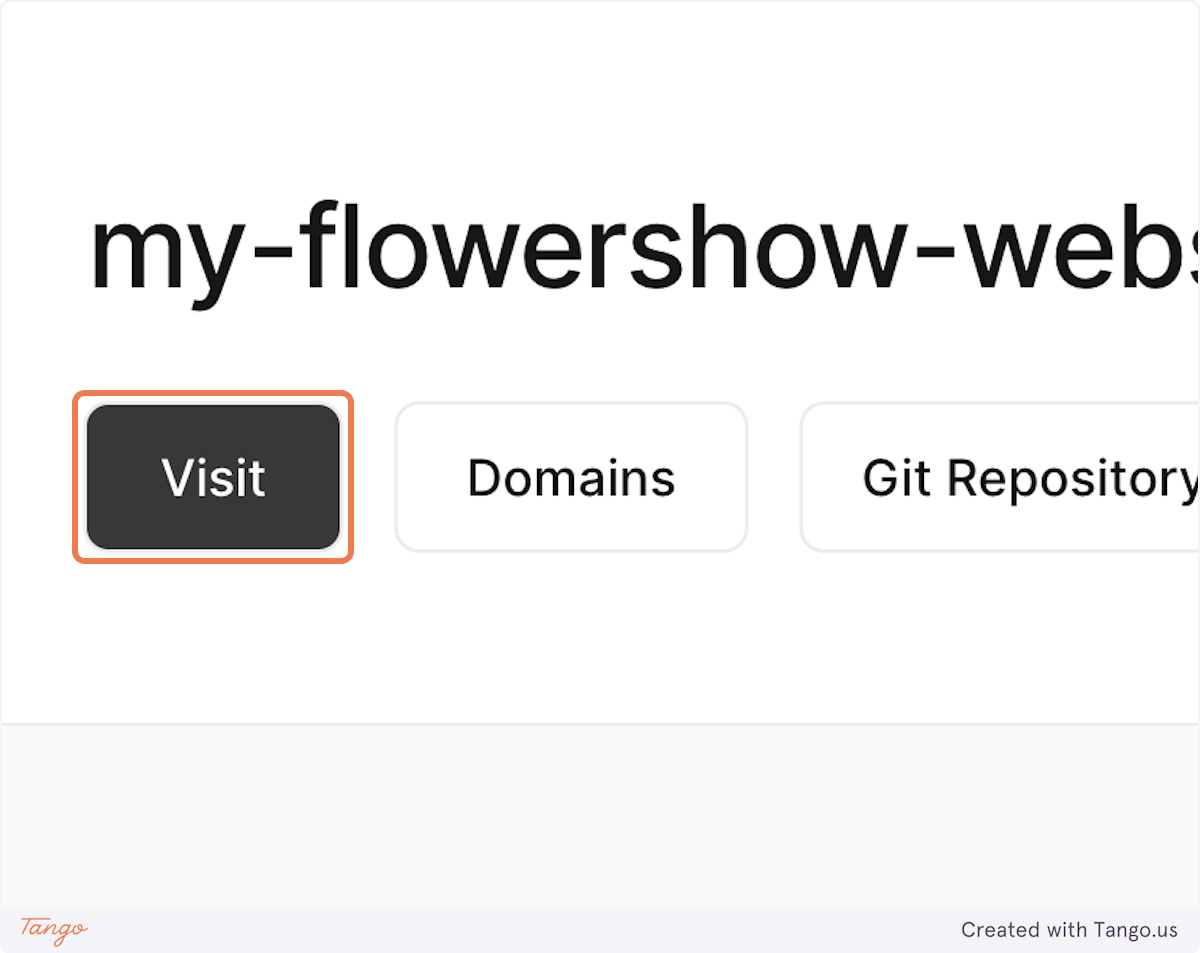
|
||||
|
||||
## Editing a page on your website
|
||||
|
||||
Once your site is up and running, the next step is to customize it to your liking. Let's start by editing our home page.
|
||||
|
||||
### 1. Navigate to the repository of your website on GitHub
|
||||
|
||||
You can get there by going to GitHub, clicking on your profile icon, and going to "Your repositories".
|
||||
|
||||
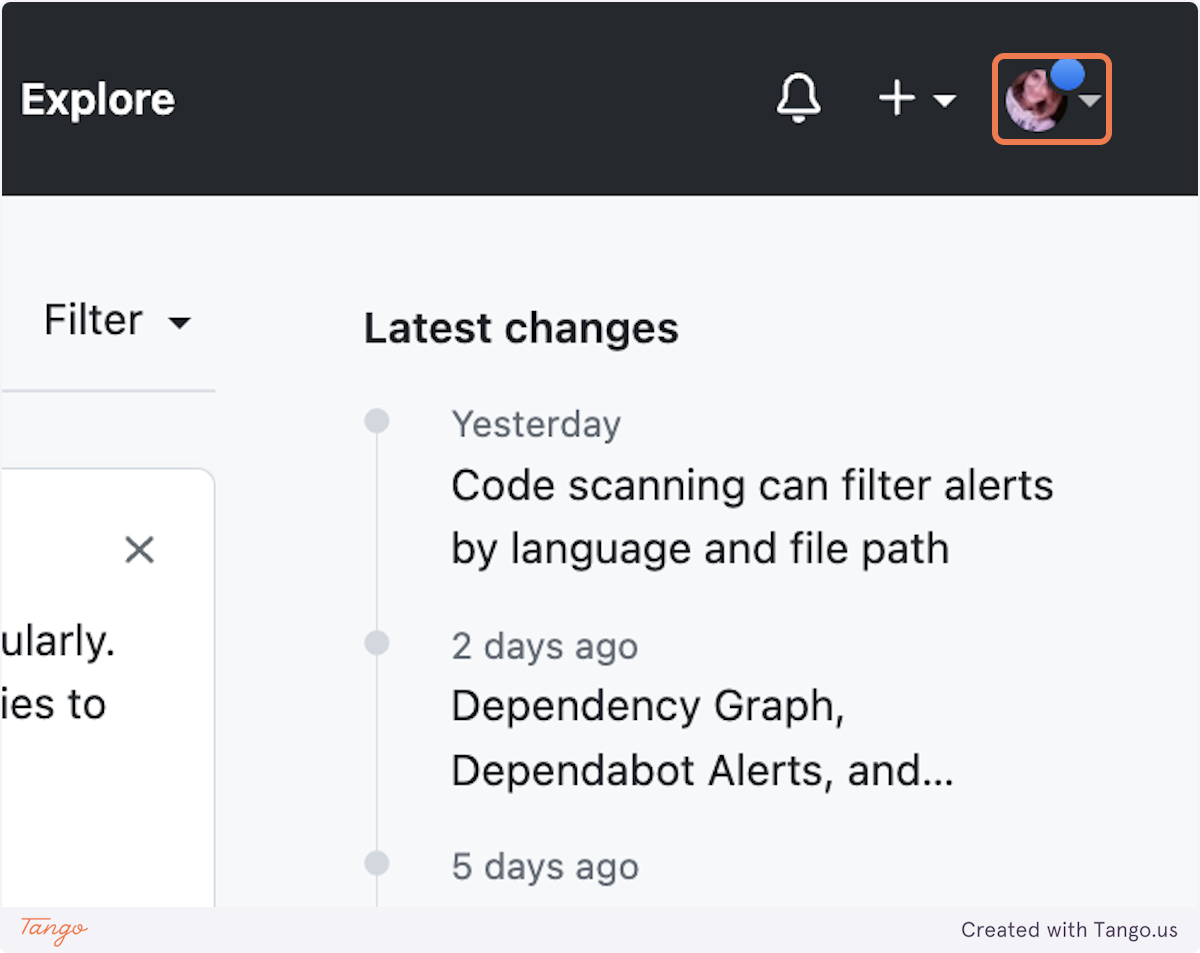
|
||||
|
||||

|
||||
|
||||
Or, you can navigate to [your Vercel dashboard](https://vercel.com/dashboard), select your project in the "Overview" tab...
|
||||
|
||||
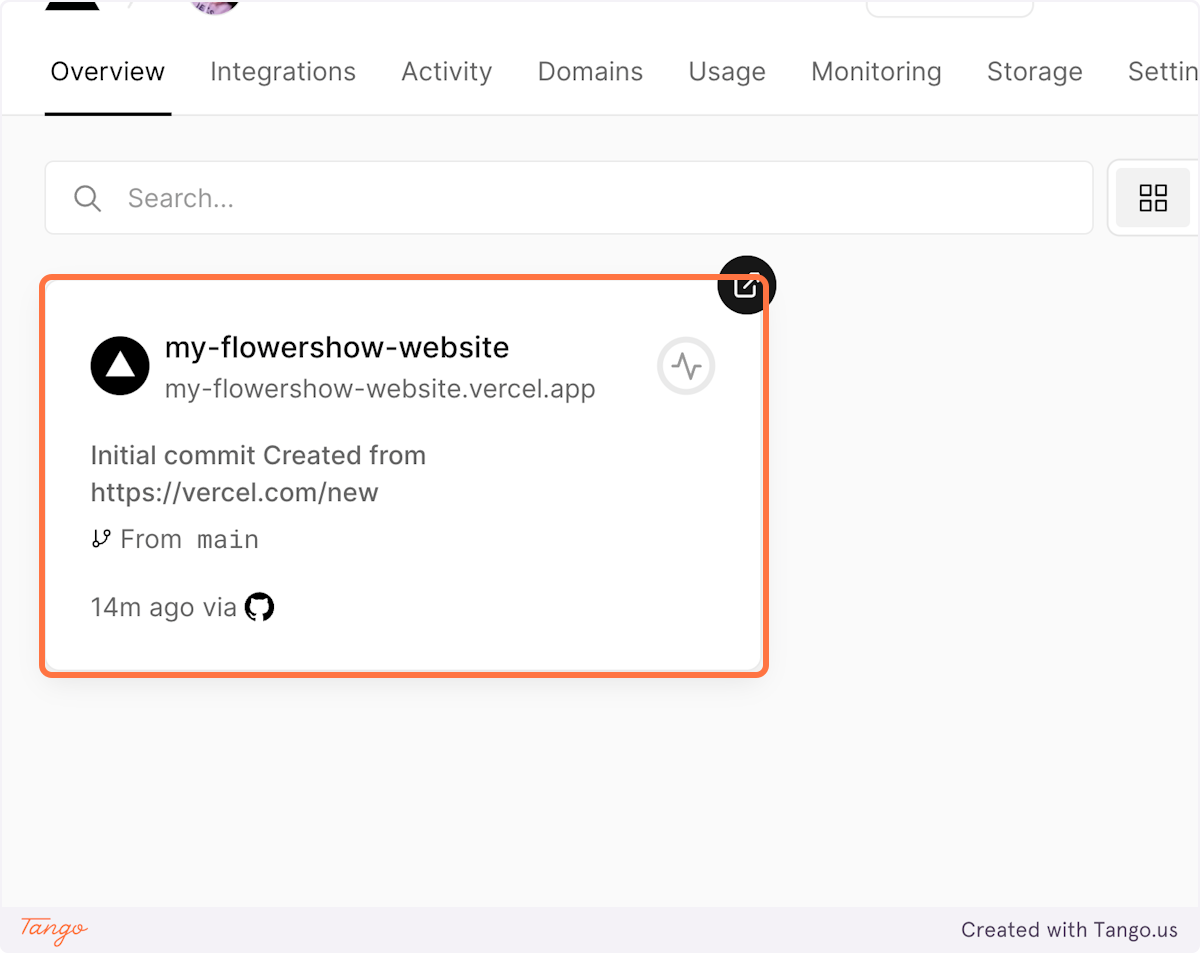
|
||||
|
||||
...and click on "Git Repository". You'll be redirected to the repository of your website on GitHub.
|
||||
|
||||
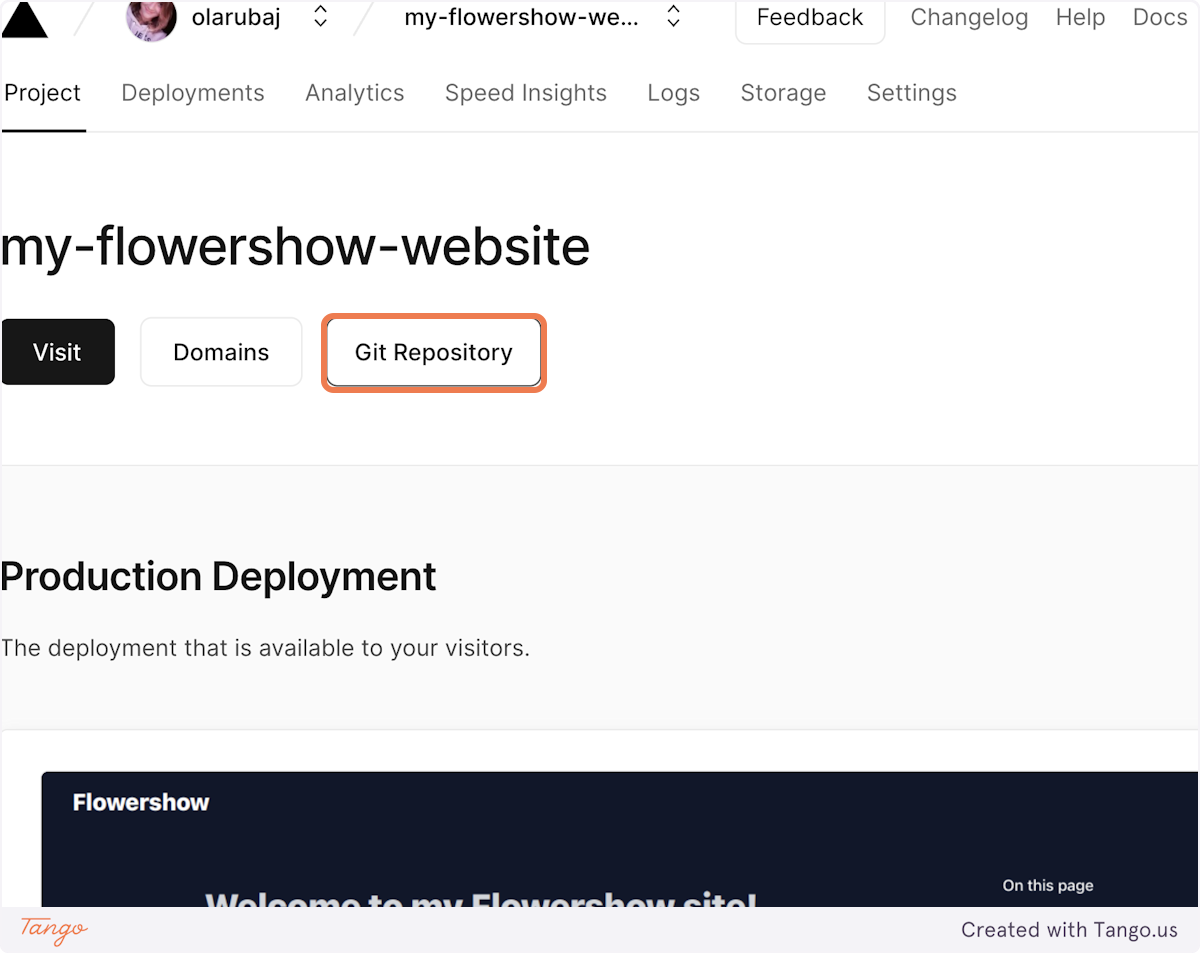
|
||||
|
||||
### 2. Navigate to the "content" folder
|
||||
|
||||
This is where all the Markdown-based pages live in a Flowershow-based project.
|
||||
|
||||
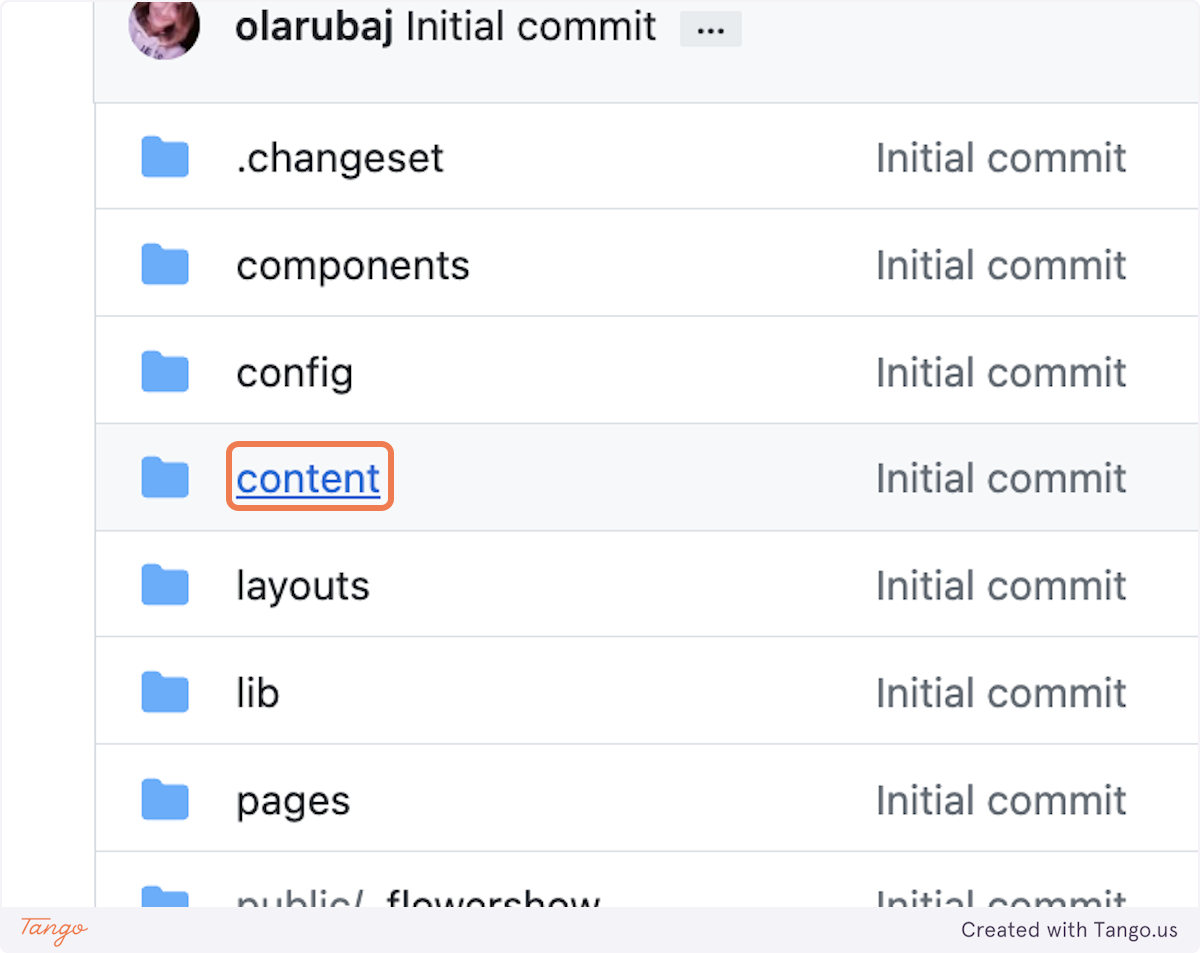
|
||||
|
||||
### 3. Edit the "index.md" file
|
||||
|
||||
The homepage on your website is built with the "index.md" file in the root of the "content" folder. Click on it to open.
|
||||
|
||||
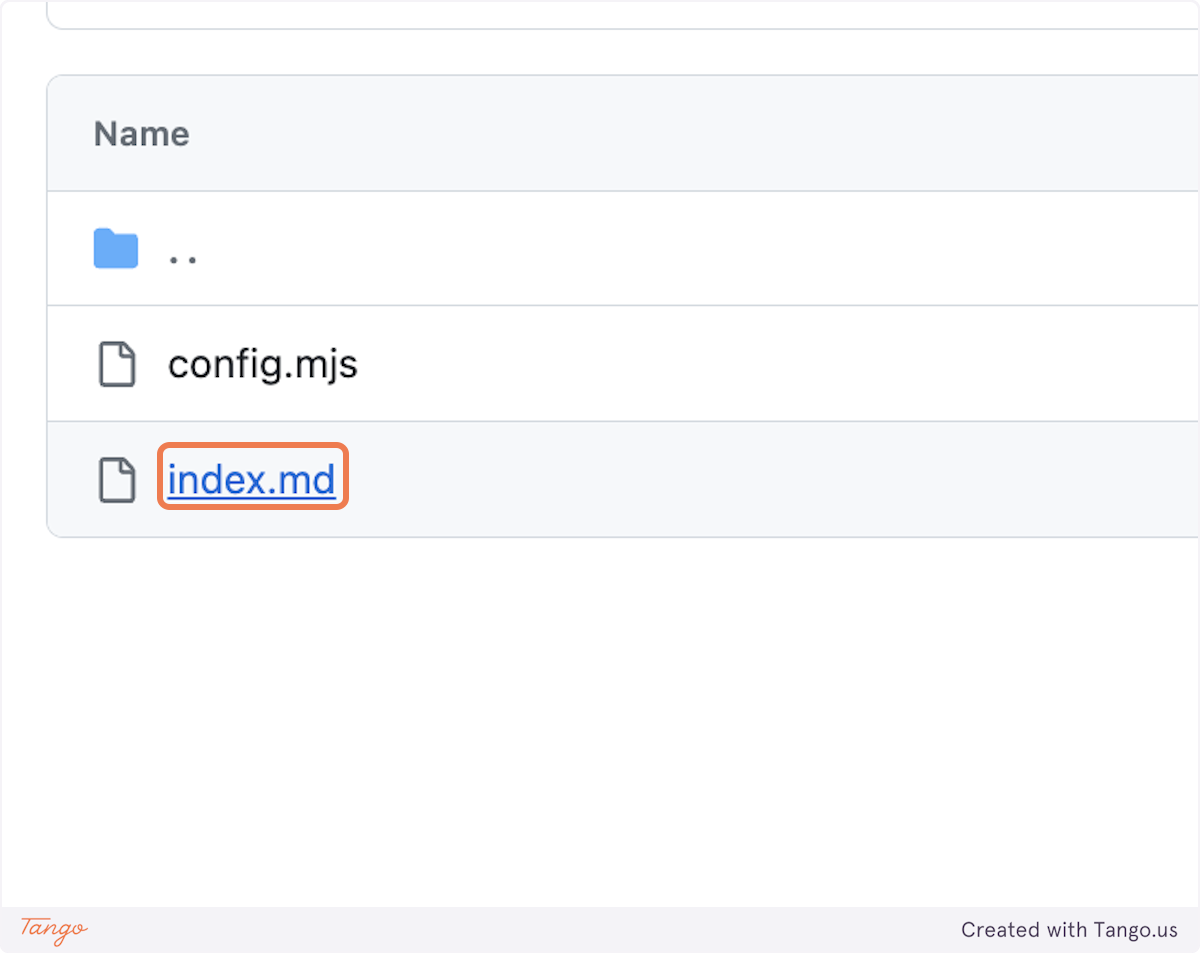
|
||||
|
||||
Then, click on the "Edit this file" icon...
|
||||
|
||||
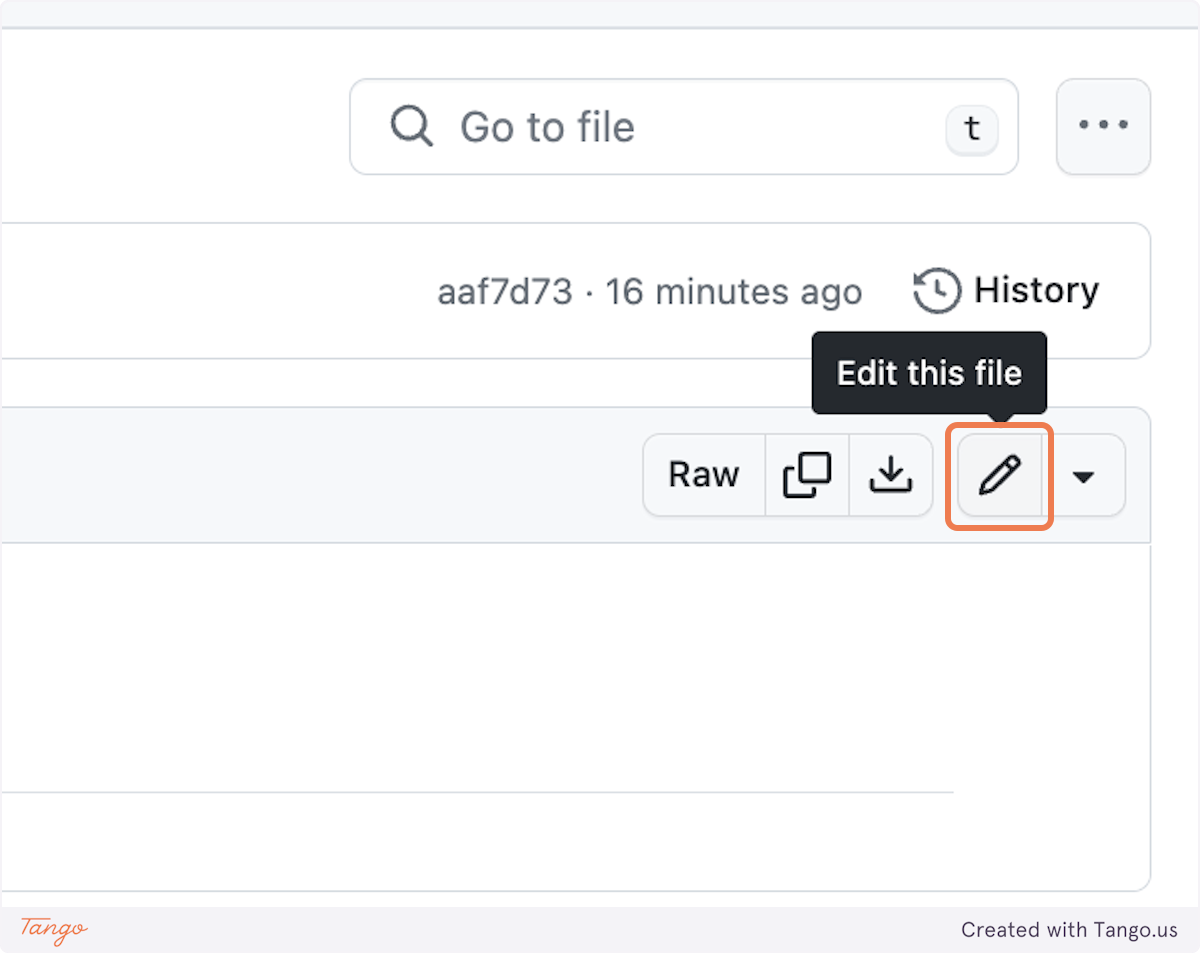
|
||||
|
||||
... and add some content.
|
||||
|
||||
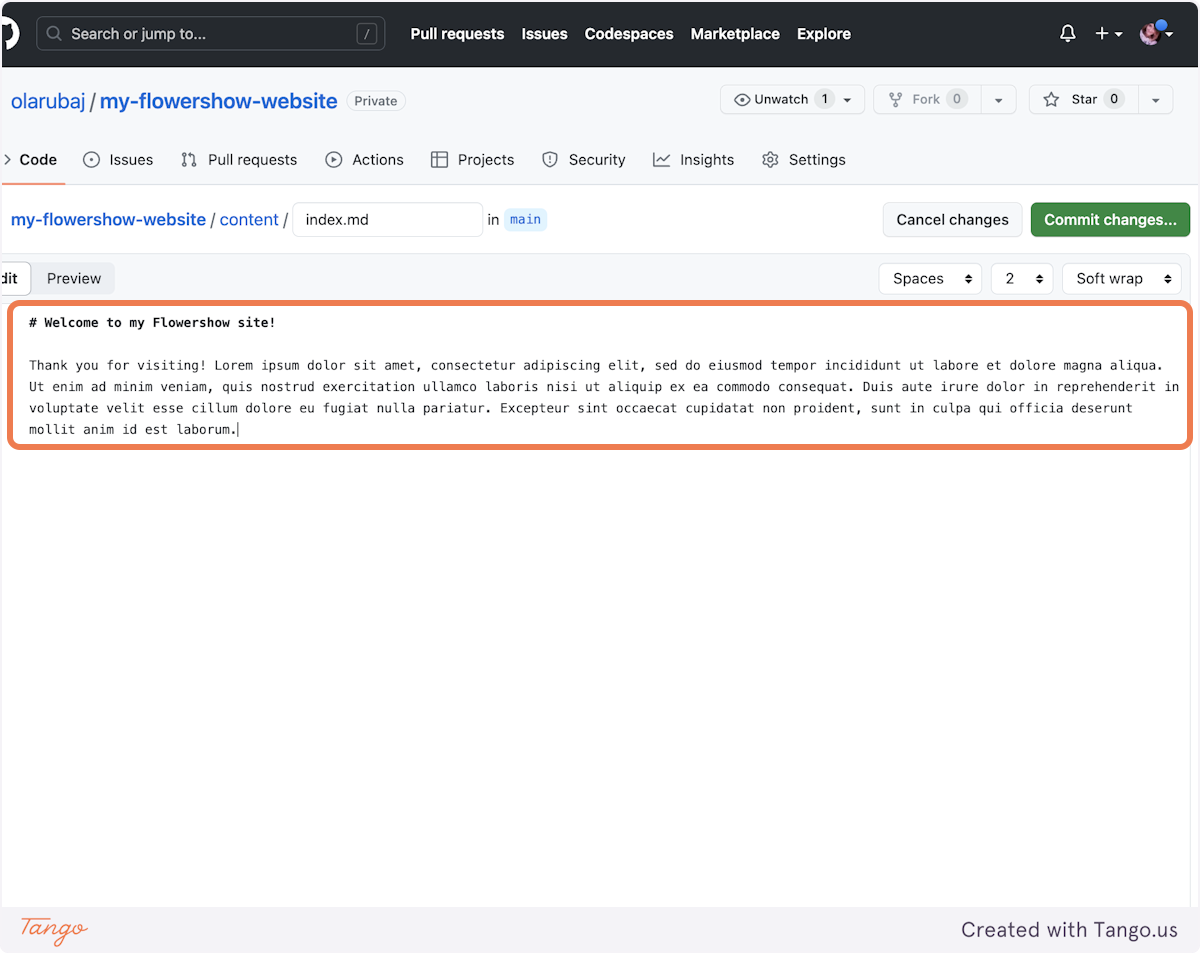
|
||||
|
||||
### 4. Save your changes
|
||||
|
||||
To see your changes live, you need to "commit" them. Click on "Commit changes..." buttom in the top-tight corner.
|
||||
|
||||

|
||||
|
||||
In the "Commit message" field add a concise description of your changes. Optionally, if the commit message is not enough, you can add more info in the "Extended description" field.
|
||||
|
||||

|
||||
|
||||
Leave "Commit directly to `main` branch" selected and click on "Commit changes". Doing that will trigger rebuilding of your site on Vercel.
|
||||
|
||||
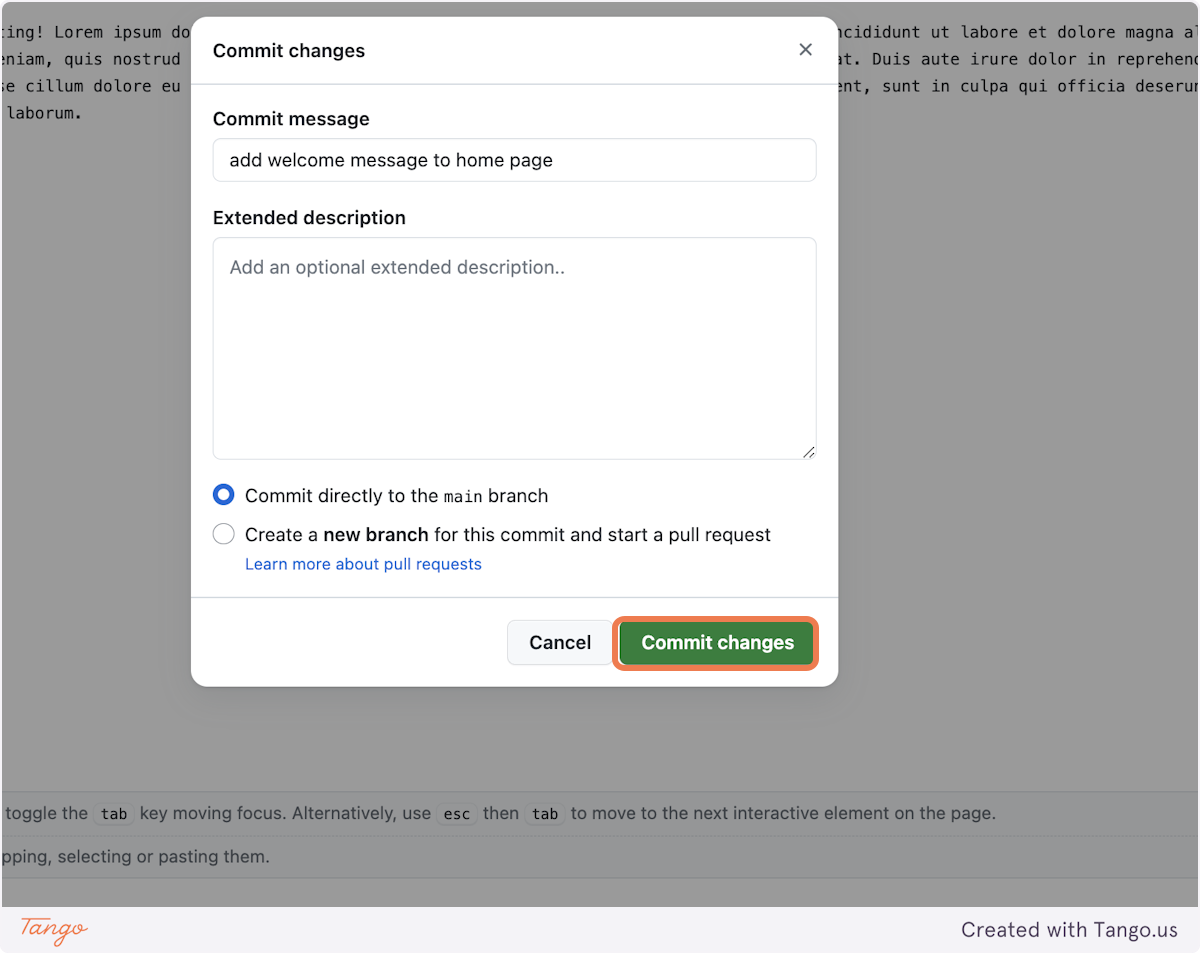
|
||||
|
||||
### 5. See your site getting rebuild
|
||||
|
||||
If you want to see the current progress of rebuilding your website after you've commited the changes, click on the dot next to your commit message.
|
||||
|
||||
> [!note]
|
||||
> It will be either a dot (if the site is currently being rebuilt after your changes), a check mark (if the site has finished building) or a cross (if something went wrong when rebuilding it).
|
||||
|
||||
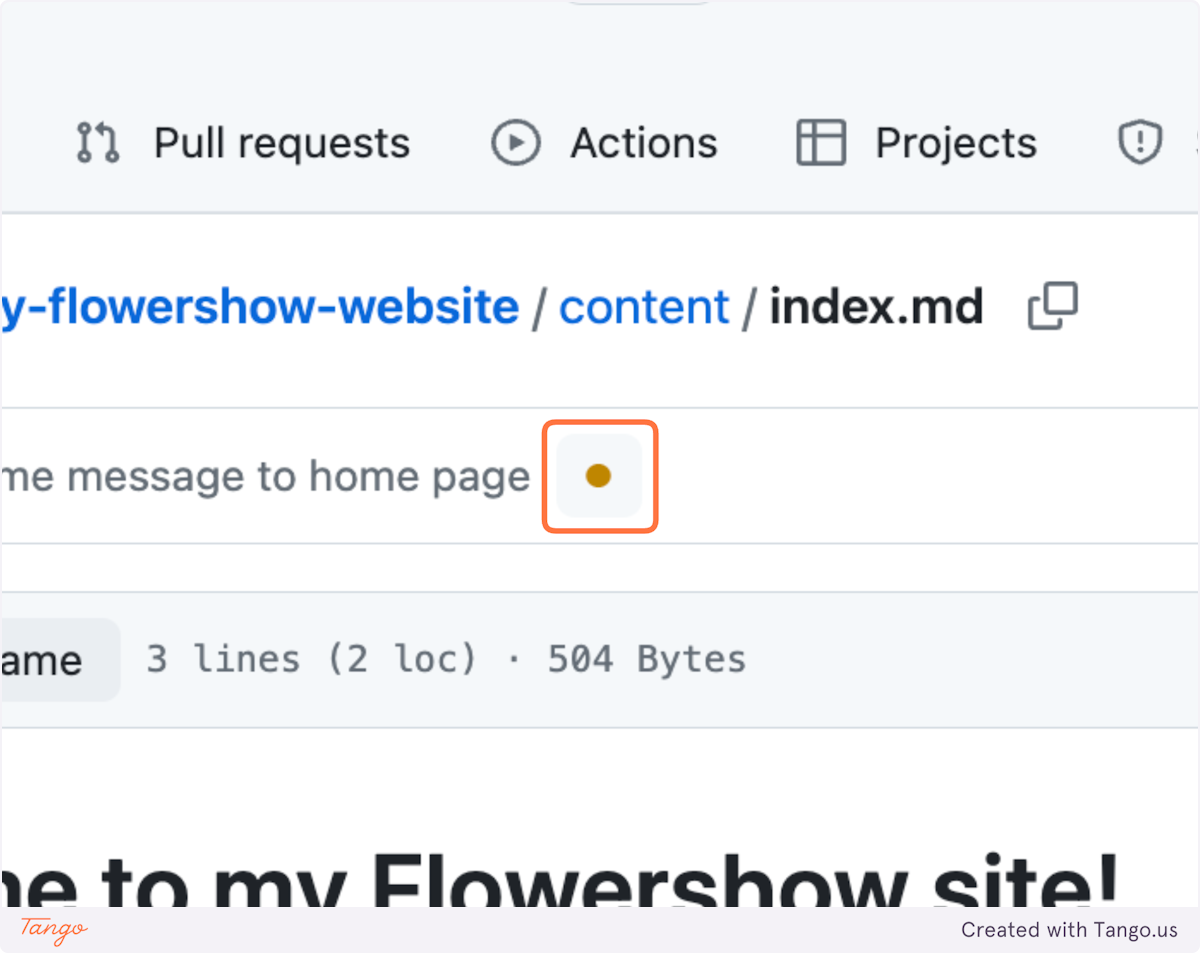
|
||||
|
||||
Click on "Details" to see your project's deployment status on Vercel.
|
||||
|
||||
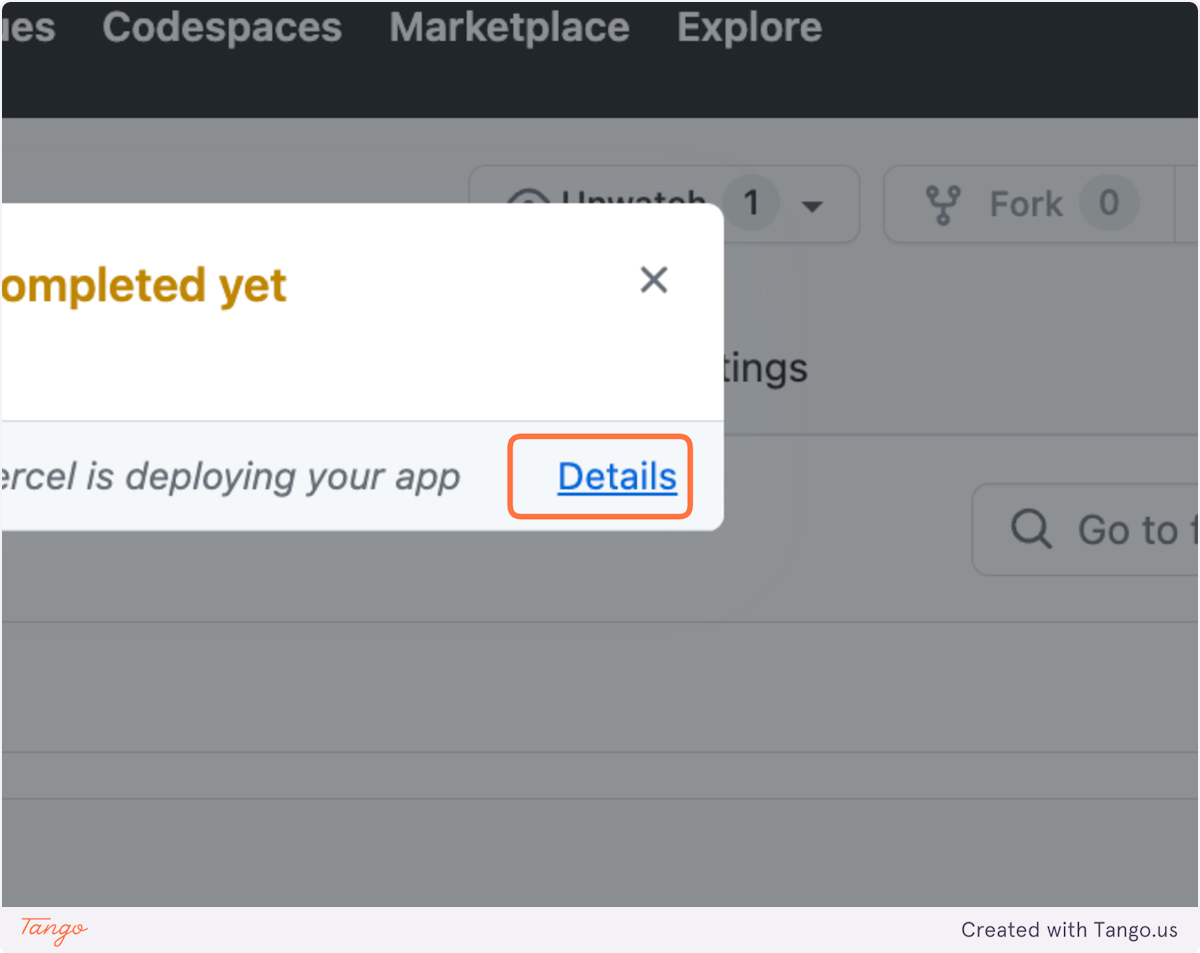
|
||||
|
||||
### 6. Preview your site after changes
|
||||
|
||||
Once the site has been rebuilt, click the preview to see your changes live.
|
||||
|
||||
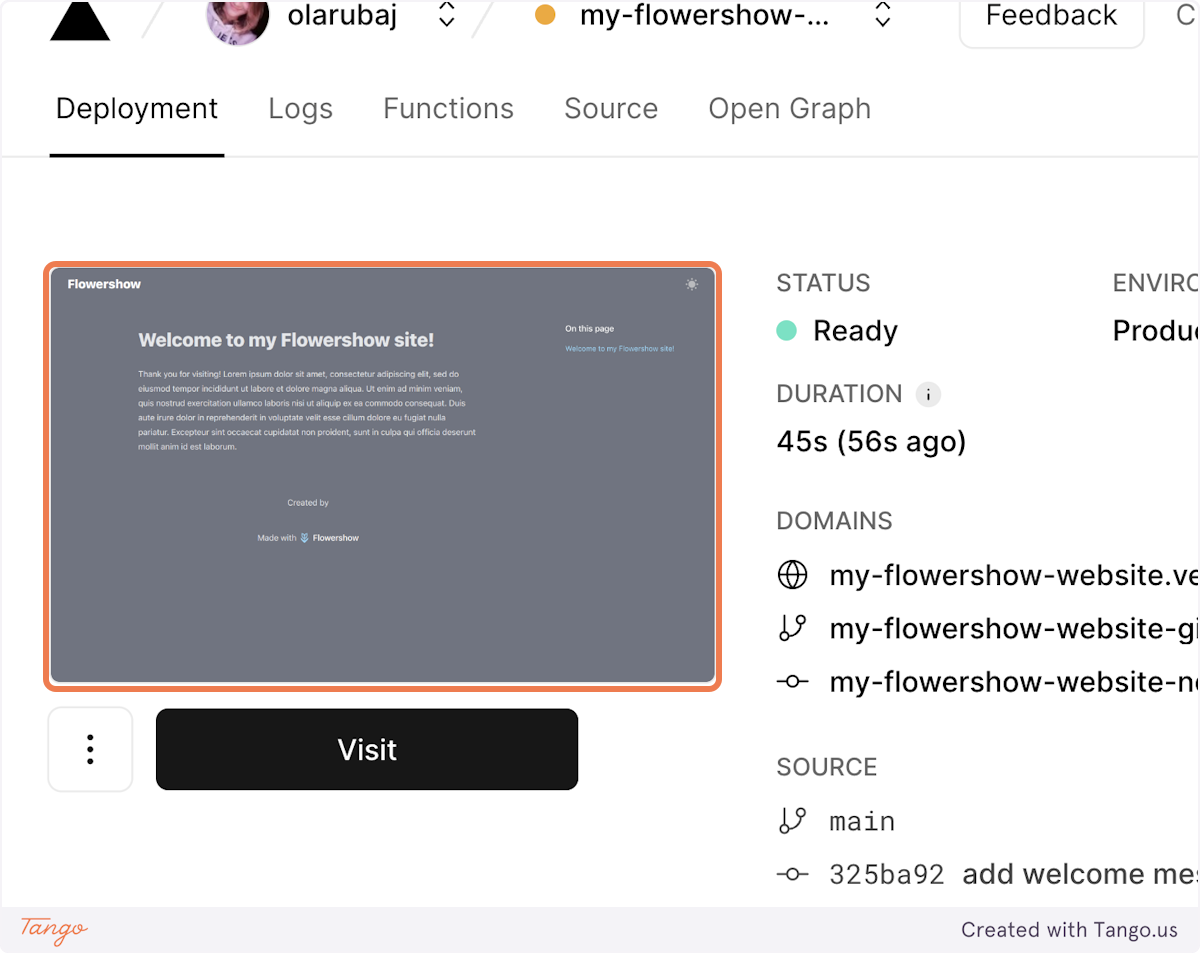
|
||||
|
||||
## Add a single Markdown-based page
|
||||
|
||||
### 1. Navigate to the "content" folder in your website's repository
|
||||
|
||||
See how to find it in the previous section.
|
||||
|
||||
### 2. Create new file
|
||||
|
||||
Click on "Add file"...
|
||||
|
||||
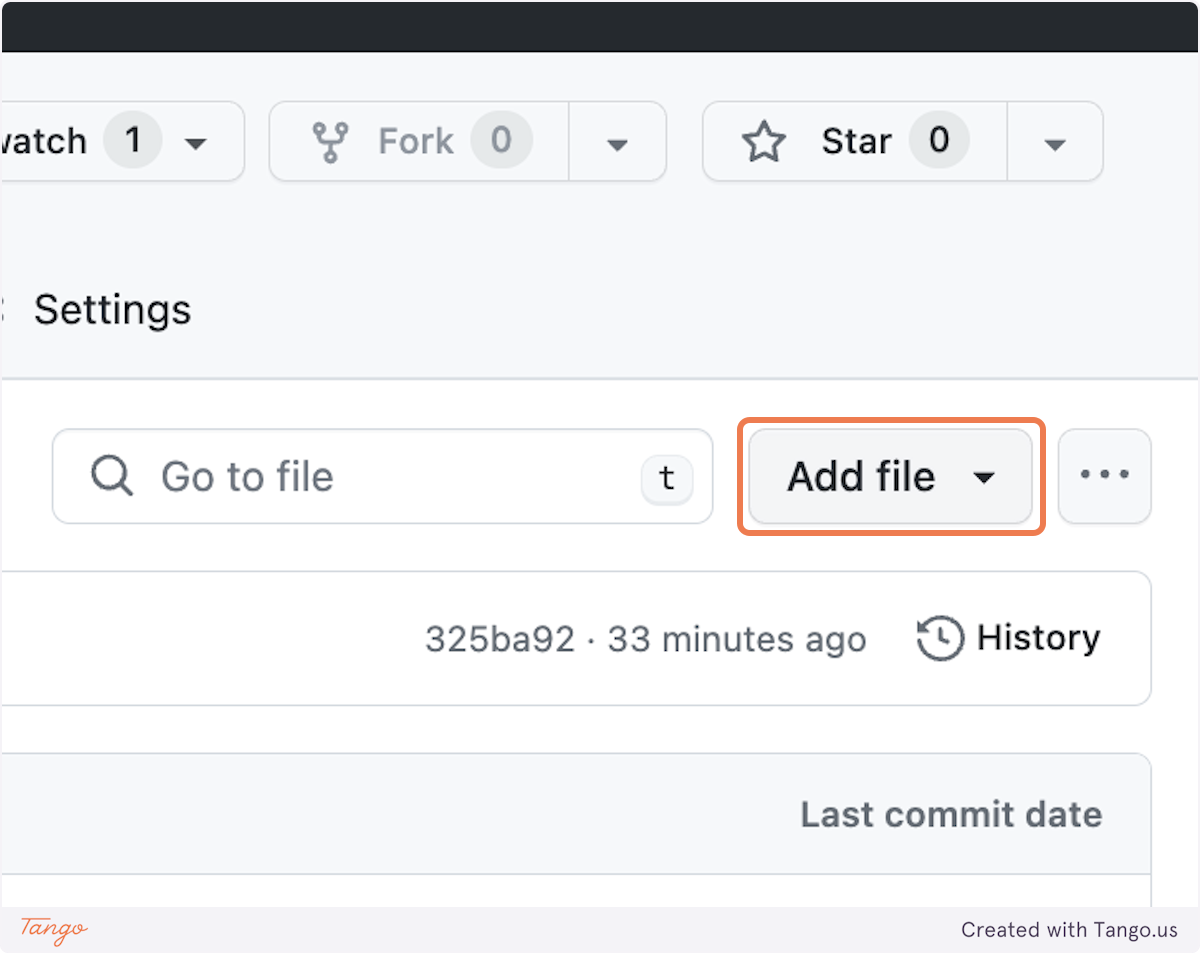
|
||||
|
||||
...and "Create new file".
|
||||
|
||||
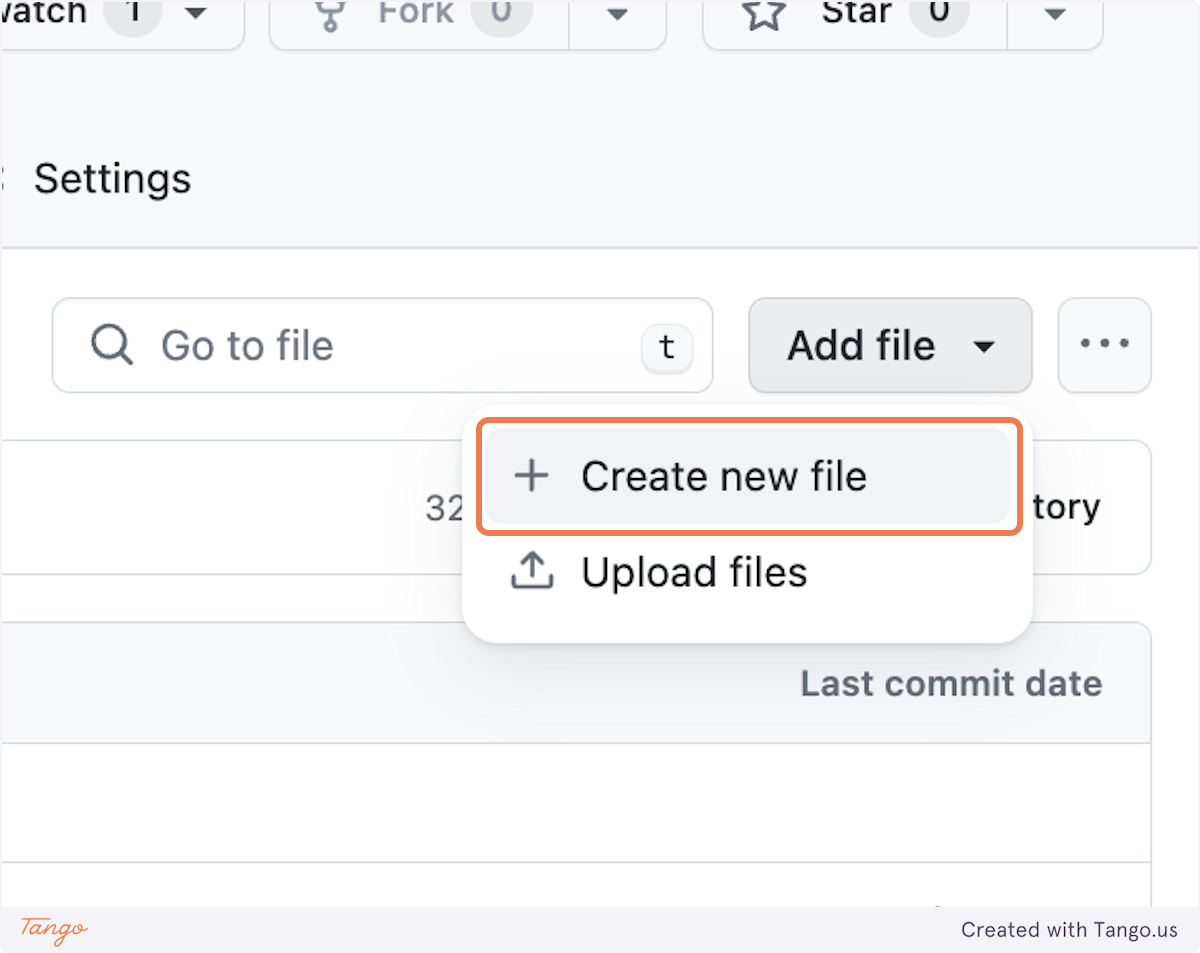
|
||||
|
||||
### 3. Type the name of the new file you want to create
|
||||
|
||||
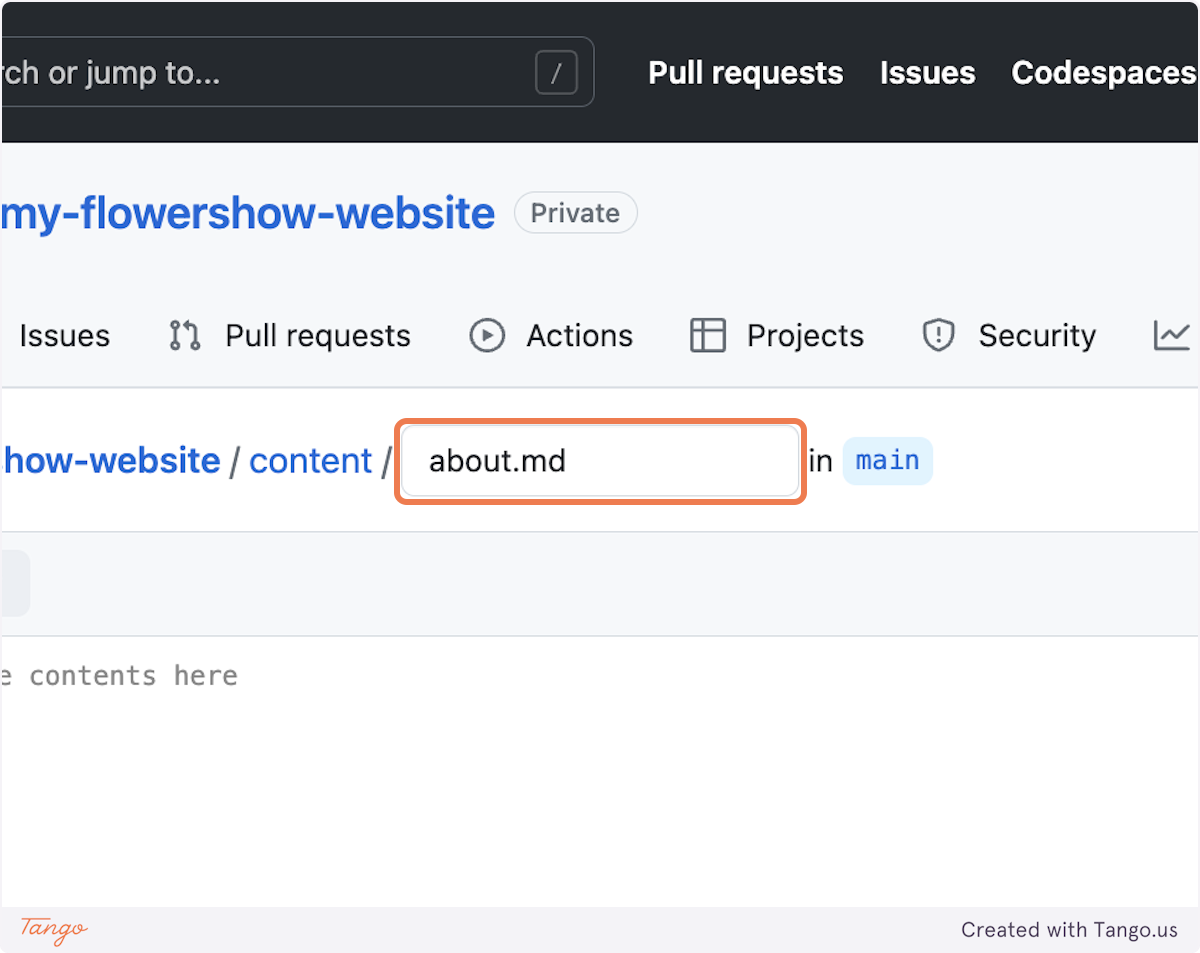
|
||||
|
||||
### 4. Write the content of the file
|
||||
|
||||
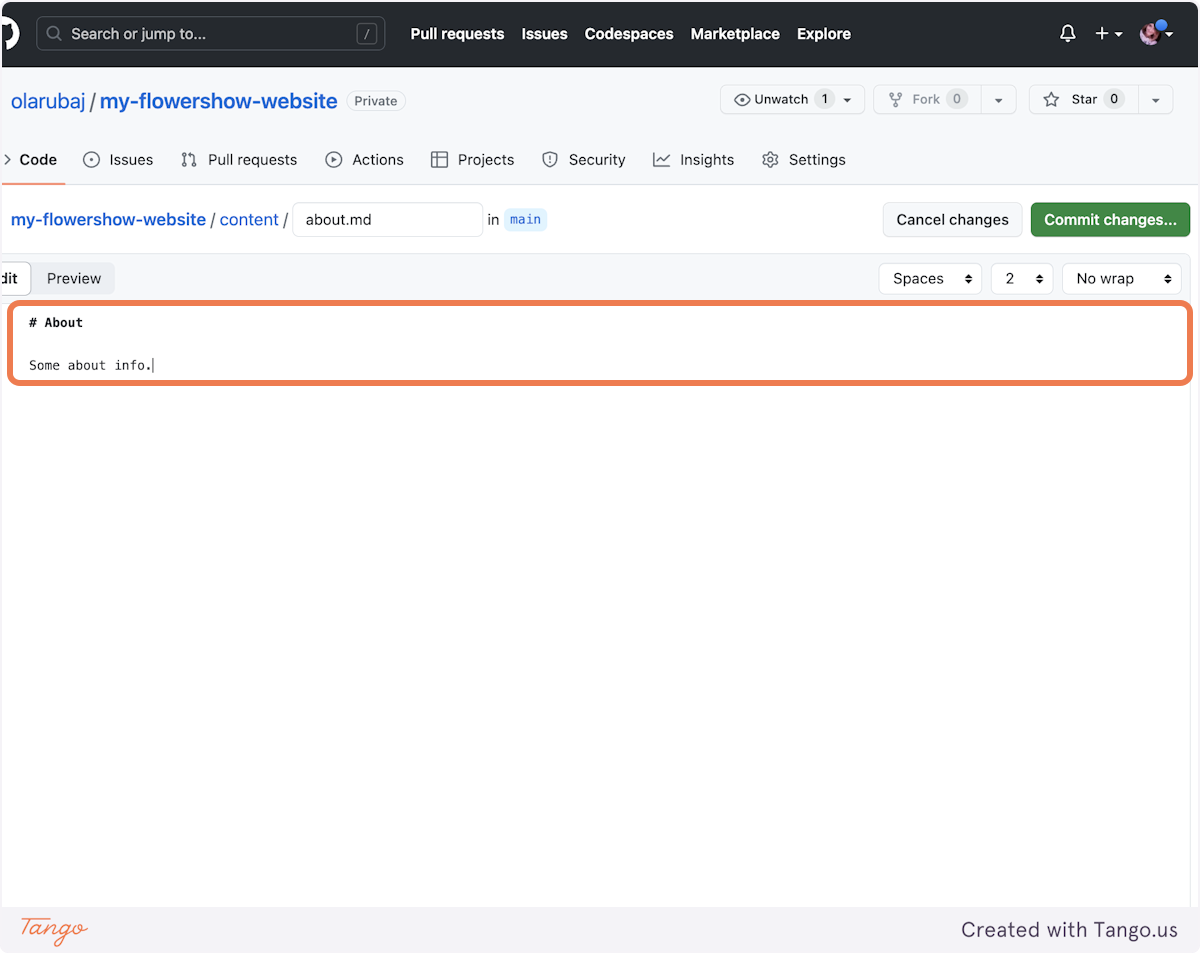
|
||||
|
||||
### 5. Save your changes
|
||||
|
||||
To see your changes live, you need to "commit" them. Click on "Commit changes..." buttom in the top-tight corner.
|
||||
|
||||
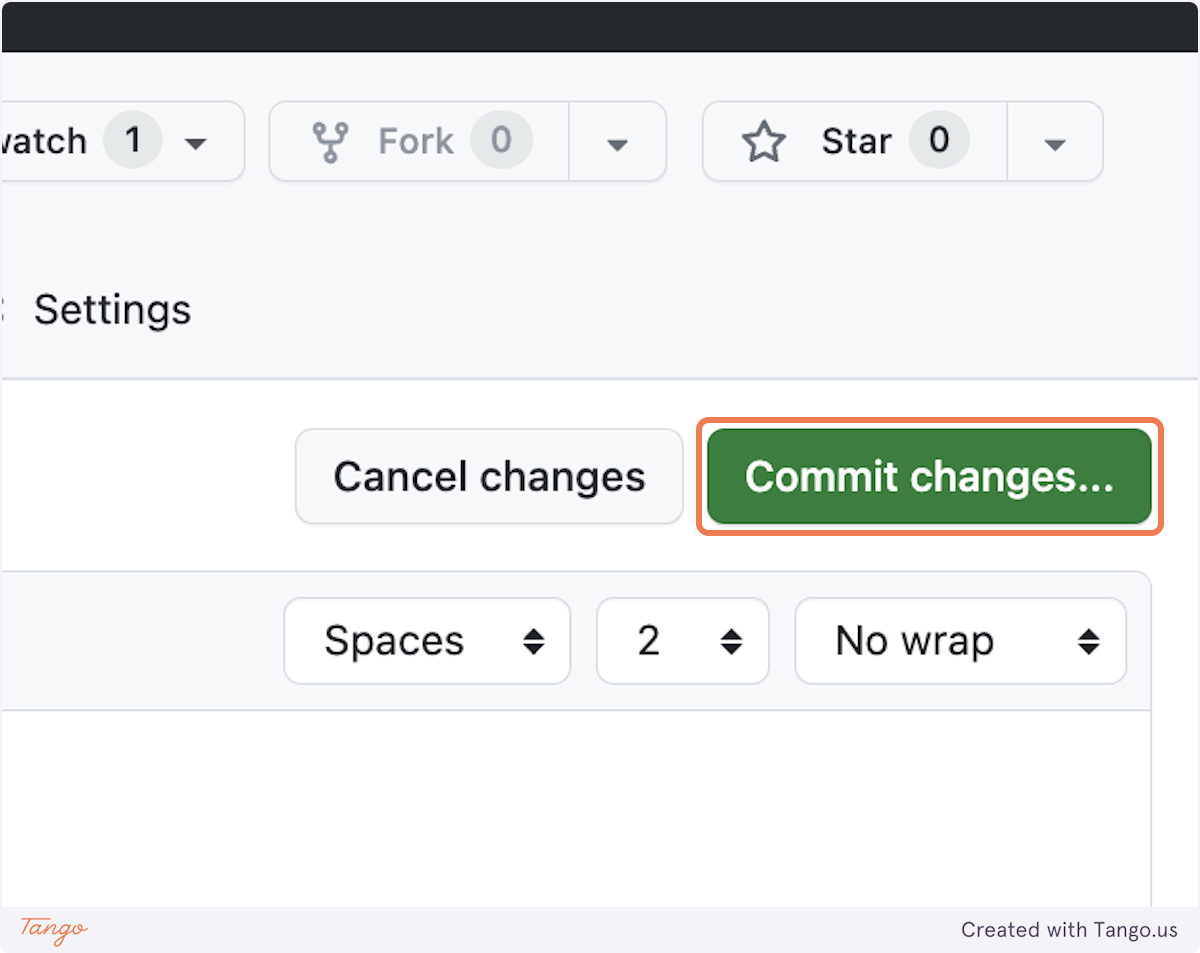
|
||||
|
||||
In the "Commit message" field add a concise description of your changes. Optionally, if the commit message is not enough, you can add more info in the "Extended description" field.
|
||||
|
||||
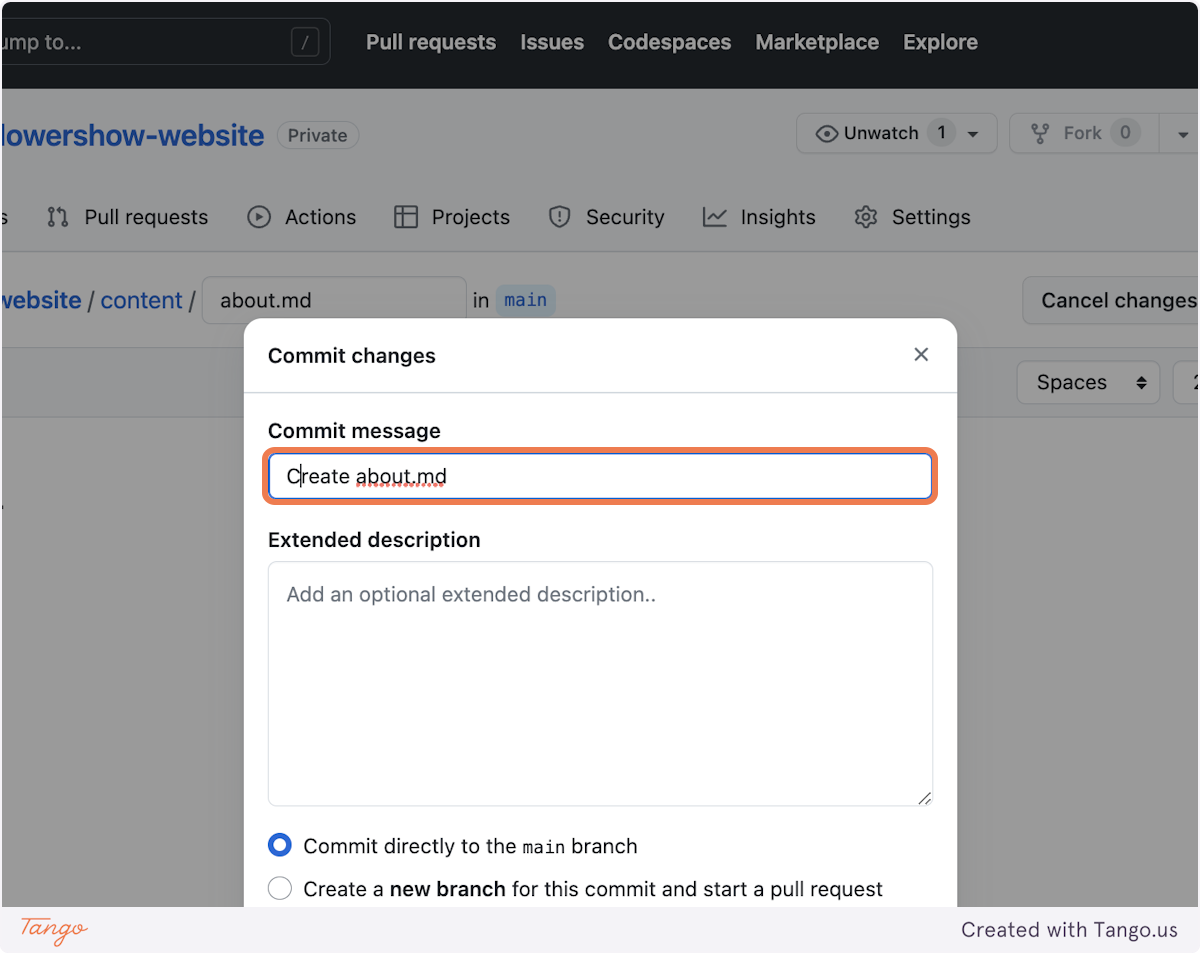
|
||||
|
||||
Leave "Commit directly to `main` branch" selected and click on "Commit changes". Doing that will trigger rebuilding of your site on Vercel.
|
||||
|
||||

|
||||
|
||||
### 6. Preview your site after changes
|
||||
|
||||
As you already know, Vercel will now start rebuilding your website. When it's done, you can navigate to `/about` url on your website to see the new file we've just added.
|
||||
|
||||
## What's next?
|
||||
|
||||
While editing on GitHub UI is acceptable, it has its limitations – it doesn't support working offline, adding multiple files simultaneously, or previewing many markdown syntax elements supported by Flowershow-based websites. We'll delve into these issues and solutions to overcome them in our next tutorial. Stay tuned!
|
||||
@@ -20,7 +20,8 @@ const config = {
|
||||
// { name: "Components", href: "/docs/components" },
|
||||
{ name: "Blog", href: "/blog" },
|
||||
{ name: "Showcases", href: "/#showcases" },
|
||||
{ name: "Howtos", href: "/howto" },
|
||||
{ name: "Howtos", href: "/howtos" },
|
||||
{ name: "Guide", href: "/guide" },
|
||||
{ name: "Examples", href: "https://github.com/datopian/portaljs/tree/main/examples", target: "_blank" },
|
||||
{ name: "Components", href: "https://storybook.portaljs.org", target: "_blank" },
|
||||
// { name: "DL Demo", href: "/data-literate/demo" },
|
||||
|
||||
@@ -63,7 +63,7 @@ Congratulations, your new app is now running at http://localhost:3000.
|
||||
|
||||
[](https://vercel.com/new/clone?repository-url=https%3A%2F%2Fgithub.com%2Fdatopian%2Fportaljs%2Ftree%2Fmain%2Fexamples%2Fgithub-backed-catalog)
|
||||
|
||||
By clicking on this button, you will be redirected to a page which will allows you to clone the example into your own GitHub/GitLab/BitBucket account and automatically deploy it.
|
||||
By clicking on this button, you will be redirected to a page which will allow you to clone the example into your own GitHub/GitLab/BitBucket account and automatically deploy it.
|
||||
|
||||
### GitHub token
|
||||
|
||||
@@ -101,7 +101,7 @@ It has
|
||||
You can also add
|
||||
|
||||
- A `description` which is useful if you have more than one dataset for each repo, if not provided we are just going to use the repo description
|
||||
- A `Name` which is useful if you want to give your dataset a nice name, if not provided we are going to use the junction of the `owner` the `repo` + the path of the README, in the exaple above it will be `fivethirtyeight/data/nba-raptor`
|
||||
- A `Name` which is useful if you want to give your dataset a nice name, if not provided we are going to use the junction of the `owner` the `repo` + the path of the README, in the example above it will be `fivethirtyeight/data/nba-raptor`
|
||||
|
||||
## Extra commands
|
||||
|
||||
|
||||
57
site/content/guide/index.md
Normal file
@@ -0,0 +1,57 @@
|
||||
---
|
||||
showToc: false
|
||||
showSidebar: false
|
||||
---
|
||||
|
||||
<Hero title="Markdown-based Websites" subtitle="Create markdown-based website, update it, add collaborators and discover markdown superpowers" />
|
||||
|
||||
# Tutorial 1: Create a website from scratch using markdown and PortalJS
|
||||
|
||||
In this tutorial we will walk you through creating an elegant, fully functional website written in simple markdown and published with PortalJS.
|
||||
|
||||
By the end of this tutorial you will:
|
||||
|
||||
- have a working markdown-based website powered by PortalJS.
|
||||
- be able to edit the text and add pages, all from an online interface without installing anything.
|
||||
|
||||
Below is a screenshot of how the final website will look like:
|
||||
![[tutorial-1-result.png]]
|
||||
|
||||
### Setup a sandbox website including live publishing
|
||||
|
||||
- Prerequisites: sign up for GitHub and Vercel
|
||||
- Navigate to [datopian/flowershow repository](https://github.com/datopian/flowershow)
|
||||
- Click on "Deploy"
|
||||
- Let the site build on Vercel
|
||||
- Visit the site! Yay! Your site is working! 🎉
|
||||
|
||||
### Now, let's edit the front page
|
||||
|
||||
- Navigate to `content/index.md` file in the site repository
|
||||
- Add some text to it
|
||||
- Save and watch the site redeploy
|
||||
- Visit the site! Yay! Your changes are live! 🎉
|
||||
|
||||
### Let's add a page: e.g. about page
|
||||
|
||||
- Navigate to the `content` folder in the site repository
|
||||
- Add `about.md` file with some text
|
||||
- Save and watch the site redeploy
|
||||
- Visit the site! Yay! Your changes are live! 🎉
|
||||
|
||||
> [!tip]
|
||||
> Read full tutorial [[create-a-website-from-scratch|here!]]
|
||||
|
||||
# Tutorial 2: Editing your site locally on your computer
|
||||
|
||||
### What is this markdown stuff?
|
||||
|
||||
- Idea of "markup" - how is this different from plain text
|
||||
- Brief info about markdown
|
||||
- Link to markdown tutorials
|
||||
- Explain we offer "markdown plus"
|
||||
- ?? Explain about PFM (vs GFM ...)
|
||||
|
||||
### Why go local?
|
||||
|
||||
While editing on GitHub UI is acceptable, it has its limitations – it doesn't support working offline, adding multiple files simultaneously, or previewing many markdown syntax elements supported by Flowershow-based websites.
|
||||
@@ -1,12 +0,0 @@
|
||||
# Guides and tutorials
|
||||
|
||||
- [[howto/analytics|How to add web analytics?]]
|
||||
- [[howto/seo|How to customize page metadata for SEO?]]
|
||||
- [[howto/sitemap|How to build a sitemap?]]
|
||||
- [[howto/markdown|How to add markdown-based content pages?]]
|
||||
- [[howto/blog|How to add a simple blog?]]
|
||||
- [[howto/drd|How to create data-rich documents with charts and tables?]]
|
||||
- [[howto/comments|How to add user comments?]]
|
||||
|
||||
If you have questions about anything related to PortalJS, you're always welcome to ask our community on [GitHub Discussions](https://github.com/datopian/portaljs/discussions) or on [our chat channel on Discord](https://discord.gg/EeyfGrGu4U).
|
||||
|
||||
34
site/content/howtos/add-a-simple-md-page.md
Normal file
@@ -0,0 +1,34 @@
|
||||
---
|
||||
title: How to quickly add a simple Markdown-based page
|
||||
---
|
||||
|
||||
Welcome to this tutorial on how to quickly add a simple Markdown-based page to your website. The steps here are designed for non-technical contributors. There's no need to know how to code!
|
||||
|
||||
> [!important]
|
||||
> This "How to" is only recommended for very simple Markdown pages, e.g. those without images, links to other pages, diagrams, or other elements that can't be previewed in GitHub preview mode.
|
||||
|
||||
>[!tip]
|
||||
> If you are unfamiliar with Markdown (and its different flavours and extra elements supported by Flowershow based websites), check out [this short guide](https://flowershow.app/docs/syntax) on available syntax elements.
|
||||
|
||||
## Steps
|
||||
|
||||
1. Go to the repository of your website in GitHub.
|
||||
2. Click on the `content` folder to open it. This is where all the Markdown files for a Flowershow-based website are stored.
|
||||
3. Optionally, navigate to a subfolder where you want to add your page.
|
||||
4. Click “Add file” and write the page name + extension `.md`, e.g. `my-new-page.md`.
|
||||
|
||||
> [!tip]
|
||||
> If you want to add your page to a new subfolder, in the "Name your file..." field, first type the name of the new subfolder, followed by a forward slash, .e.g., `blog/`. After you hit the slash, you'll see the name field gets cleared, but the path before it has been extended with your subfolder name. You can repeat this process if you want to put your file into further nested subfolders. Then, simply type the name of the file with ".md" extension.
|
||||
|
||||
5. Paste or write the contents of the file in Markdown format.
|
||||
6. (Optionally) Switch to the "Preview" mode, by toggling from "Edit" -> "Preview" at the top of the file content, to see a rough visualisation of your changes. Keep in mind though, that the actual website may have different styling and may support additional Markdown elements that GitHub doesn't render on the preview.
|
||||
5. When you're happy with the content, click on the “Commit changes...” button. In the "Commit message" field, provide a concise summary of your changes. If necessary, you can add further explanation in the "Extended description" text field. Then select “Commit directly to the main branch”, and hit "Commit changes."
|
||||
6. The site is now going to be rebuilt to reflect the changes saved to the `main` branch. This can take up to a few minutes. After this time you should see your page live.
|
||||
|
||||
## Summary
|
||||
|
||||
Congratulations, you've now learned how to create a new Markdown page on your Flowershow-based website.
|
||||
|
||||
If anything is not clear to you, or you have suggestions on how we can make this 'How to' better, please don't hesitate to let us know.
|
||||
|
||||
Happy editing!
|
||||
@@ -0,0 +1,160 @@
|
||||
---
|
||||
title: How to add or edit content on the Life Itself ecosystem page
|
||||
isDraft: true
|
||||
---
|
||||
|
||||
## Contents
|
||||
|
||||
1. [Introduction](#introduction)
|
||||
2. [How to edit and add to the site](#how-to-edit-and-add-to-the-site)
|
||||
3. [Glossary](#glossary)
|
||||
4. [Contact](#contact)
|
||||
|
||||
## Introduction
|
||||
|
||||
From the outset, we have argued that any successful mapping effort must be collaborative and participatory. To make it as simple as possible to contribute, we have opened up the site, giving it a wiki-like structure, meaning people can contribute and add items directly - no coding required. We hope this can support the ongoing growth of our contributor community, and empower users to continue in collective efforts to make the map ever more useful and informative.
|
||||
|
||||
We have included information on how the site works and its technical architecture. If you’re wanting to get stuck in, feel free to skip over this section and go straight to our instructions on [how to edit and add to the site](#how-to-edit-and-add-to-the-site) - you can always refer back if you need to!
|
||||
|
||||
### How does the site work?
|
||||
|
||||
All the content for the [Polycrisis Action Mapping](https://ecosystem.lifeitself.us/) site is contained within the life-itself/ecosystem [Github repo](https://github.com/life-itself/ecosystem).
|
||||
|
||||

|
||||
|
||||
#### Technical Architecture
|
||||
|
||||
The website is written in [Markdown](#markdown). A tool called content layer converts the Markdown files into HTML (the standard computer language for displaying and formatting web pages) so that they are displayed as pages on the site. This is the case for all pages on the website except for the homepage which is written directly in HTML.
|
||||
|
||||
#### Markdown
|
||||
|
||||
Markdown is a markup language (computer language for displaying and formatting web pages), which is designed to be easy to write and easy to read. It’s widely deployed on the web, for example by DataHub, GitHub, Stackoverflow and many other sites.
|
||||
|
||||
In Markdown, you control the display of the document. For instance, you can format words as bold or italic, add images, create lists, and much more. Mostly, Markdown is just regular text with a few non-alphabetic characters thrown in, like ## or \*\*.
|
||||
|
||||
Head over to our [Markdown Guide](https://playbook.datopian.com/markdown/#why-markdown) to learn more about Markdown and how to use it.
|
||||
|
||||
#### Front Matter
|
||||
|
||||
In the world of computer programming, front matter is metadata (data about data) at the top of a file. Front matter does two things: a) it displays key info about a page (such as its title and description) in a structured way which helps with a consistent layout throughout the site and b) is used as metadata for SEO (search engine optimization) purposes, helping our content to reach interested readers.
|
||||
|
||||
## How to edit and add to the site
|
||||
|
||||
There are two methods for making edits to the website:
|
||||
|
||||
1. Edit directly in Github
|
||||
2. Edit on your local machine (using a code editor or Obsidian)
|
||||
|
||||
For reasons of simplicity, in this guide we have only outlined how to edit using Github. If you would like to make edits using a code editor or Obsidian, please refer to our [editors’ guide](https://docs.google.com/document/d/1RcwjaJYn0jtMw9rOR9W0Gv2fmQDd7Fjr53NM6j1-lco/edit#heading=h.vkkc3zo06um7) for our [Web3 site](https://web3.lifeitself.us/) and apply these instructions to the ecosystem repo.
|
||||
|
||||
### Edit in Github
|
||||
|
||||
#### Setup
|
||||
|
||||
- Create a [GitHub](https://github.com/) account if you don’t already have one
|
||||
|
||||
#### Key steps
|
||||
|
||||
- Go to the repo storing the website content: [https://github.com/life-itself/ecosystem](https://github.com/life-itself/ecosystem)
|
||||
- All edits can be made in the main repo - unlike adding content to the site (see below), you can make edits to existing pages without forking the repo.
|
||||
- Look for the file that corresponds with the page you want to edit. To find the file, it might help to look at the page URL. E.g. To find the file containing the profile page for 42 Acres ([https://ecosystem.lifeitself.us/profiles/alter-ego](https://web3.lifeitself.us/concepts/blockchain)), go to the folder “content”, then “profiles“, then the file “alter-ego.md”.
|
||||
- Click on the pencil icon in the upper right corner to edit this file
|
||||
- Make your edits
|
||||
- Once you’ve made your edits, go to the bottom of the page where you will see a box titled ‘Propose changes’. Type into the first text box below ‘Propose changes’ a brief description of the edits you have made. E.g. ‘fix typo’, ‘add citation’ or ‘expand definition’. Use the box below that for optional further description of your edits.
|
||||
- Then click the button that says ‘Propose changes’.
|
||||
- Once you’ve clicked the ‘Propose changes’ button you will be taken to a new page. Here, click the button that says ‘Create pull request’. This will notify a team member to review and confirm the edits you’ve made.
|
||||
- Once they’ve done that, your edit will appear on the site! Thanks for contributing!
|
||||
|
||||
### Add to the website in Github
|
||||
|
||||
- Go to the repo storing the website content: [https://github.com/life-itself/ecosystem](https://github.com/life-itself/ecosystem)
|
||||
- Unlike when you are editing an existing page, in order to add a page to the site, you are going to fork the Life Itself ecosystem repo. To do this, click the “Fork” button at the top right of the page.
|
||||
- Click the green “Create fork” button
|
||||
- You have now created a fork! You can see that you are working in a fork of the repo by looking at the top left of the screen. It should look like this (but with your own user name).
|
||||
|
||||

|
||||
|
||||
- We now recommend that you do all the following steps in the same pull request. That way, you can request all the additions to the site you want to make in one request. But we’re getting ahead of ourselves, let’s add some content!
|
||||
|
||||
#### Templates
|
||||
|
||||
To add a new profile page, please use the [profiles-template.md](https://github.com/life-itself/ecosystem/blob/main/profiles-template.md) in the ecosystem repo.
|
||||
|
||||
To add a new topics page, please use the [topics-template.md](https://github.com/life-itself/ecosystem/blob/main/topics-template.md) in the ecosystem repo.
|
||||
|
||||
Copy the raw contents from the relevant template by clicking the icon with 2 squares overlapping.
|
||||
|
||||
#### Adding a page
|
||||
|
||||
##### Create the page
|
||||
|
||||
- In your fork of the ecosystem repo, go to the folder “content”, then select the folder representing the type of page you want to add, eg “profiles” or “topics”.
|
||||
- Click on the “Add file” button in the upper right corner to add a new page. Select, “create new file”.
|
||||
- On the top right, under the “Cancel changes” button is the line wrap mode box. Select “Soft wrap”.
|
||||
|
||||
##### Add the frontmatter
|
||||
|
||||
- Place your cursor in line with the figure “1”. Then “right click” (two finger click on a mac) and select paste. Alternatively, select command+v to paste. This will paste in your template (ensure the template was the last thing you copied).
|
||||
- Fill in the [frontmatter](#frontmatter) with the relevant information. The template that you have copied across will contain information from another organization/topic. We have left this information in place so you can see how the information should be inputted.
|
||||
- For a new profile page, the following answers can be left as is, the rest should be tailored to your oragnization.
|
||||
- Notes_data_entry
|
||||
- Curation_status
|
||||
- To add a logo and image to your profile:
|
||||
- Save the logo and photo you want to be featured on the profile to your computer. Name these files on your computer something that represents the images (eg organization-name-logo.png and organization-name-image.png).
|
||||
- Copy the name of one of the files you have just made.
|
||||
- Paste the name of the file into the relevant field in the frontmatter for the profile eg logo, cached. Add /img/ to the beginning so it should look like this: logo: cached: /img/organization-name-logo.png
|
||||
- Do the same steps for the other image.
|
||||
- In the url sections of the frontmatter for the logo and image, paste the url of where you downloaded the logo and image from (eg [https://www.facebook.com/AlterEgoNetwork/photos/a.163253037723176/163253617723118/](https://www.facebook.com/AlterEgoNetwork/photos/a.163253037723176/163253617723118/)).
|
||||
- The image and logo fields of the frontmatter should look like this:
|
||||
|
||||

|
||||
|
||||
- For a new topics page, leave “image” as is. Fill in the rest of the information as appropriate for the topic you are creating the page for. Have fun picking an emoji that you think best represents it!
|
||||
- Note: All fields within the frontmatter are optional. Remove (or leave empty) the fields that are not in use to eliminate any errors during build.
|
||||
- Name your file. In the box that says “name your file”, paste in the “id” of your page followed by “.md”. Eg for a profile, it should look like this:
|
||||
|
||||

|
||||
|
||||
##### Adding a description
|
||||
|
||||
- Once you have filled in the frontmatter, add a brief description of the topic/organization. Use the example description to guide what your description should contain and how it should be formatted.
|
||||
|
||||
##### Check and propose changes
|
||||
|
||||
- Once you have filled in the frontmatter and have added a description, check it’s all worked. Click the preview button. It should look like this for a profile:
|
||||
|
||||

|
||||
|
||||
- Or this for a topic:
|
||||
|
||||

|
||||
|
||||
- Once you’ve checked everything looks fine, and you’re ready to commit the new file, go to the bottom of the page where you will see a box titled ‘Commit new file’. Type into the first text box below a brief description of what you are proposing, eg “add alter-ego.md”. Use the box below that for optional further description of your edits.
|
||||
- Now you are going to commit directly to the main branch by clicking the green button that says “Commit new file”.
|
||||
- Well done! But you’re not done yet. Remember the logo and image you downloaded to your computer? Now you need to upload them to the repo.
|
||||
|
||||
###### Adding an image/logo
|
||||
|
||||
- Remaining in your fork of the ecosystem repo, click “content”, then “assets”, then "img". Once here, click on the “Add file” button, then select “Upload files”. Once here, click on the “Add file” button, then select “Upload files”. Upload your two files eg organization-name-logo.png and organization-name-image.png
|
||||
- Once you’ve uploaded the images, go to the bottom of the page where you will see a box titled ‘Commit changes’. Type into the first text box below a brief description of what you are proposing, eg “adding images”.
|
||||
- Now you are going to commit these images directly to the main branch by clicking the green button that says “Commit changes”.
|
||||
|
||||
##### Open pull request
|
||||
|
||||
- Now that you’ve committed your new page and the relevant images, you’re ready to open the pull request. Head back to your fork of the ecosystem repo. You should see a box that looks like this:
|
||||
|
||||

|
||||
|
||||
- Click the “Contribute button”. Now click the green “Open pull request button”
|
||||
- In the box that says “Title”, give a title to your pull request. Something like “Add (name of organization) profile page + images”.
|
||||
- Now click the green “Create pull request button”. This will notify a team member to review and confirm the additions you’ve made to the site.
|
||||
- Once they’ve done that, your edit will appear on the site! Thanks for contributing!
|
||||
|
||||
## Glossary
|
||||
|
||||
- Repo => short for [Repository](https://docs.github.com/en/get-started/quickstart/github-glossary#repository). Contains all a project’s files.
|
||||
- Working directory => The folder you are currently working in.
|
||||
|
||||
## Contact
|
||||
|
||||
If you run into any issues while following this guide, please [let us know](https://lifeitself.us/contact/) so we can improve this guide to help future contributors.
|
||||
@@ -12,8 +12,8 @@ Page comments can be setup with any one of the following supported providers:
|
||||
|
||||
Each provider has it's own configuration options that you should add to your `.env` file.
|
||||
|
||||
>[!Info]
|
||||
>If you are hosting your website on hosting providers like Netlify, Vercel or Cloudflare, you will also need to add the environment variables there.
|
||||
> [!Info]
|
||||
> If you are hosting your website on hosting providers like Netlify, Vercel or Cloudflare, you will also need to add the environment variables there.
|
||||
|
||||
### Giscus
|
||||
|
||||
@@ -26,7 +26,7 @@ Each provider has it's own configuration options that you should add to your `.e
|
||||
|
||||
Once the above steps are completed, head over to [https://giscus.app](https://giscus.app/) and follow the steps there by filling out the fields to get your config values.
|
||||
|
||||
>[!important]
|
||||
> [!important]
|
||||
> Make sure to choose `pathname` under page discussions mapping.
|
||||
|
||||
After filling out the fields, you will be provided with a script tag that contains your config values. Add them to your `.env` file, like so:
|
||||
@@ -86,21 +86,17 @@ Then, add the following to your custom layout (or directly to your pages):
|
||||
```tsx
|
||||
import Navbar from './navbar';
|
||||
import Footer from './footer';
|
||||
|
||||
|
||||
export default function Layout({ children }) {
|
||||
return (
|
||||
<>
|
||||
<Navbar />
|
||||
<main>{children}</main>
|
||||
<div>
|
||||
<Comments commentsConfig={commentsConfig} slug={urlPath} />
|
||||
</div>
|
||||
<Footer />
|
||||
<Navbar />
|
||||
<main>{children}</main>
|
||||
<div>
|
||||
<Comments commentsConfig={commentsConfig} slug={urlPath} />
|
||||
</div>
|
||||
<Footer />
|
||||
</>
|
||||
);
|
||||
}
|
||||
```
|
||||
|
||||
## Add user comments
|
||||
|
||||
Learn how to add support for user comments in [[comments|this guide]].
|
||||
@@ -0,0 +1,80 @@
|
||||
---
|
||||
title: "How to edit a page with a code editor or Obsidian"
|
||||
isDraft: true
|
||||
---
|
||||
|
||||
#### Setup
|
||||
|
||||
- Create a [GitHub](https://github.com/) account if you don’t already have one
|
||||
- Download [VS Code](https://code.visualstudio.com/) or [Obsidian](https://obsidian.md/). You can use whichever one you prefer. This is what you’ll use to view and edit the website’s Markdown files.
|
||||
|
||||
#### Key steps
|
||||
|
||||
##### Stage 1: Fork
|
||||
|
||||
In this stage, you ‘fork’ the Life Itself Web3 repository, i.e. you make a remote copy of the repository in your own GitHub account. If you’ve forked the repo before, skip this stage.
|
||||
|
||||
- Go to the repo storing the website content: [https://github.com/life-itself/web3](https://github.com/life-itself/web3) (0:00-0:02)
|
||||
- Click the ‘Fork’ button in the upper right-hand corner of the repo page to fork the repository
|
||||
|
||||
##### Stage 2: Clone
|
||||
|
||||
In this stage, you ‘clone’ your forked repository, i.e. you copy your forked version of the Life Itself Web3 repo to your computer so that you can make edits on your local machine without affecting the remote git repo. 00:40-01:50 of the [video tutorial](https://drive.google.com/file/d/1mWqXDx6ICJ_1qreoYoB774weWi-AtyDo/view) corresponds to this stage. _If you’ve cloned the forked repo before, skip this stage._
|
||||
|
||||
- Search your computer for its ‘terminal’ and open it. The terminal is simply a text-based way of interacting with the computer through commands. In the terminal, you can type commands, manipulate files, execute programs, and open documents. (00:03-00:39)
|
||||
- On your forked repo page (make sure you’re not on the main repo page), click the green ‘Code’ button and copy the HTTPS link
|
||||
- Type into Terminal "cd `directory`", where `directory` is replaced by the path to the folder you want to navigate to. E.g. “cd Desktop/Folder/life_itself/tutorial”. On a Mac, you can drag the folder to the terminal after typing “cd”. Otherwise, you can find the folder path [Mac](https://www.howtogeek.com/721126/3-ways-to-see-the-current-folder-path-on-mac/#:~:text=Open%20a%20Finder%20window%2C%20and,path%20to%20the%20current%20folder.); [Windows](https://www.wikihow.com/Find-a-File%27s-Path-on-Windows) and type or paste it in manually.
|
||||
- What you’re doing here is navigating in Terminal to the folder on your computer where you want to save the cloned repository (i.e. changing the working directory). Normally, on your computer you do this by searching for a folder and clicking on the icon to open it. In Terminal, you do this by typing commands. The command for changing directory is: `directory`. (00:40-1:11)
|
||||
- Type into Terminal the command “git clone” and then paste the repo URL you copied. E.g. “git clone https://github.com/life-itself/web3.git”. Press enter. (1:13-1:48)
|
||||
- N.B. When you try this, you may be prompted to install command line developer tools to be able to run git commands, e.g. XCode for Mac. If this is the case, follow the instructions for installation.
|
||||
|
||||
##### Stage 3: Branch
|
||||
|
||||
In this stage, you create a new ‘branch’, or temporary version, of the repository on which to make edits. These edits will later be merged with the main repository branch.
|
||||
|
||||
- Navigate in Terminal to the Life Itself Web3 repo which has been cloned to your computer. To do this, type "cd web3" or "cd `directory`" (as in Stage 2). Press enter. (1:49-2:02)
|
||||
- Update your local clone of the remote repository. _You don’t need to do this if you’ve only just cloned the repo just now._
|
||||
- Type into Terminal “git pull”. Press enter.
|
||||
- Create a branch on which to make edits
|
||||
- Type "git checkout -b `your_branch_name`". E.g. you might name your branch “edits”. So you would type “git checkout -b edits”. This command will create a new branch and switch you to this branch. N.B. the branch name cannot contain spaces.
|
||||
|
||||
##### Stage 4: Edit
|
||||
|
||||
In this stage, you use either a code editor, such as VS Code (see 4a), or Obsidian (see 4b) to view and edit the website’s Markdown files.
|
||||
|
||||
###### 4a: VS Code
|
||||
|
||||
- Open VS Code
|
||||
- Click the ‘Explorer’ icon at the top left hand side of the window. Then click ‘Open Folder’ to open the Life Itself Web3 repo which you cloned. You will then be able to see the list of folders from the repo on the left side of the window. (2:03-3:35)
|
||||
- Find the file that corresponds with the page you want to edit.\* (3:31-4:03)
|
||||
- Make your edits and save
|
||||
|
||||
###### 4b: Obsidian
|
||||
|
||||
- Open Obsidian
|
||||
- Open the cloned github repo folder as a vault (10:07)
|
||||
- Find the file that corresponds with the page you want to edit.\*
|
||||
- Make your edits and save.
|
||||
- See video tutorial (13:05-15:26) for info on useful Obsidian features such as shortcuts for linking to other pages.
|
||||
|
||||
\*N.B. To find the file that corresponds with the page you want to edit, it might help to look at the page URL. E.g. To find the file containing the “Blockchain” page ([https://web3.lifeitself.us/concepts/blockchain](https://web3.lifeitself.us/concepts/blockchain)), go to the folder “concepts“, then the file “blockchain.md”.
|
||||
|
||||
##### Stage 5: Pull request
|
||||
|
||||
In this stage, you prepare the changes you have made (and saved) to a Markdown file to be published on the website.
|
||||
|
||||
- Go to your computer’s Terminal (4:59-5:08)
|
||||
- Type “git status”. Press enter. (5:09-5:30)
|
||||
- Type "git add `name of modified file`". E.g. “git add site/content/test.md”. Press enter. (5:31-6:06) If you’ve edited more than one file, you can type “git add.” to add all the modified files with one command.
|
||||
- Type "git commit -m “`description of edit`"". E.g. "git commit -m “fix typo”" or "git commit -m “add extra text to definition”". Press enter. Note that the description of the edit must be in double quotation marks. (6:07-7:01)
|
||||
- Type "git push origin `your_branch_name`", replacing `your_branch_name` with the name of the branch you create.
|
||||
- Submit your changes for review: Go to your Github repo and click on the “Compare & pull request” button. Add a description and submit the pull request.
|
||||
- Someone from our team will review and confirm the merge. Once they’ve done that, your edit will appear on the site! Thanks for contributing!
|
||||
|
||||
##### Resolving merge conflicts
|
||||
|
||||
On occasion, it is possible that after submitting a pull request you may get a message flagging merge conflicts. This could be because when you were making your changes, someone else might have pushed new changes to the same content you were editing. If this happens, see here for what to do to [resolve a merge conflict](https://docs.github.com/en/pull-requests/collaborating-with-pull-requests/addressing-merge-conflicts/resolving-a-merge-conflict-using-the-command-line).
|
||||
|
||||
# Contact
|
||||
|
||||
If you run into any issues while following this guide, please [let us know](https://lifeitself.us/contact/) so we can improve this guide to help future contributors.
|
||||
58
site/content/howtos/edit-or-add-md-pages-locally.md
Normal file
@@ -0,0 +1,58 @@
|
||||
---
|
||||
title: How to edit or add Markdown-based pages locally on your computer
|
||||
---
|
||||
|
||||
## Intro
|
||||
|
||||
In this How to, you will learn how to edit or add Markdown based pages locally on your computer. This offers a range of unique functions, including the ability to automatically link to other pages as well as a simple way to preview the site.
|
||||
|
||||
## Prerequisites
|
||||
|
||||
- A github account
|
||||
- A github desktop app
|
||||
- Obsidian
|
||||
|
||||
## Steps
|
||||
|
||||
### Step 1: Clone the GitHub repository to your local machine
|
||||
|
||||
1.1. Go to https://github.com/ and navigate to the repository you want to clone.
|
||||
1.2. Click the `<> Code` button, then copy the URL shown under "HTTPS" tab.
|
||||
1.3. Open GitHub Desktop app.
|
||||
1.4. Click on "File" in the menu bar, then select "Clone repository...".
|
||||
1.5. In the popup, select the URL tab and paste the URL you just copied. Then, specify a local path where you want the files to be saved.
|
||||
1.6. Click Clone.
|
||||
|
||||
### Step 2: Open the project in Obsidian
|
||||
|
||||
2.1. Open Obsidian.
|
||||
2.2. If this is your first time using Obsidian, click on "Open folder as vault" on the welcome screen. If you've used Obsidian before, click on "File" -> "Open vault" first.
|
||||
2.3. Select 'Open folder as vault' and then navigate to the local path where you cloned the GitHub repository, select `/content` folder inside of it, and click "Open". This will open all the markdown files in the repository in Obsidian's file explorer.
|
||||
|
||||
### Step 3: Identify the markdown file you want to edit or add
|
||||
|
||||
3.1. To edit an existing markdown file: navigate to the file you want to edit, and click it to open.
|
||||
3.2. To add a new markdown file: click on the "New note" button (pencil icon) in Obsidian's left sidebar, name your file (e.g., `new-page.md`), and press Enter. You might need to move this file to the appropriate directory (pages or posts) later using your file explorer.
|
||||
|
||||
### Step 4: Editing or adding content to your markdown file
|
||||
|
||||
Some links here on editing on obsidian?
|
||||
|
||||
- Another link on markdown formatting?
|
||||
|
||||
Optional steps to test locally? I.e. npm install, npm run dev.
|
||||
|
||||
### Step 5: Push your changes to the GitHub repository:
|
||||
|
||||
5.1 Open your Github desktop app and select 'Add local repository' under 'File'
|
||||
5.2 Select 'Choose...' and navigate to the folder of the cloned repository and click 'Open
|
||||
5.3 Write a short summary, explaining the changes you've made
|
||||
5.4 Press commit to main
|
||||
|
||||
### Summary
|
||||
|
||||
Congratulations, you've now learned how to edit or add Markdown-based pages locally on your computer!
|
||||
|
||||
If anything is not clear to you, or you have suggestions on how we can make this 'How to' better, please don't hesitate to let us know.
|
||||
|
||||
Happy editing!
|
||||
49
site/content/howtos/edit-text-on-a-single-md-page.md
Normal file
@@ -0,0 +1,49 @@
|
||||
---
|
||||
title: How to quickly edit text content on a single Markdown-based page
|
||||
---
|
||||
|
||||
Welcome to this tutorial on how to quickly edit text content on a single Markdown-based page. The steps here are designed for non-technical contributors. There's no need to know how to code!
|
||||
|
||||
> [!important]
|
||||
> This "How to" is only recommended for text changes only, e.g. those that don't include adding images, links to other pages, diagrams, or other elements that can't be previewed in GitHub preview mode.
|
||||
|
||||
>[!tip]
|
||||
> If you are unfamiliar with Markdown (and its different flavours and extra elements supported by Flowershow based websites), check out [this short guide](https://flowershow.app/docs/syntax) on available syntax elements.
|
||||
|
||||
## Steps
|
||||
|
||||
### Step 1: Navigate to the underlying Markdown file and edit it
|
||||
|
||||
**Option A: Use the "Edit this page" button**
|
||||
|
||||
If it was enabled, some pages on your website may have an "Edit this page" button at the bottom. By clicking it, you would be redirected to the corresponding Markdown file in your repository, ready for editing.
|
||||
|
||||
**Option B: Locate the underlying Markdown file in the repository yourself**
|
||||
|
||||
If the "Edit this page" button is unavailable, or if want to familiarise yourself more deeply with the repository's structure 💪, follow these steps:
|
||||
|
||||
1. Go to the repository.
|
||||
2. Click on the `content` folder to open it. This is where all the Markdown files for the website content are stored.
|
||||
3. Navigate through the subfolders within the `content` folder to find the file corresponding to the page you wish to edit.
|
||||
|
||||
> [!tip]
|
||||
> To know exactly which file to look for, consider the URL of the web page you're trying to edit. The URL should correspond to the path of the file in the repository (excluding the `/content` prefix). E.g. a web page at `my.app.org/blog/welcome` will have its Markdown file located at `/content/blog/welcome.md`.
|
||||
> If you can't find the corresponding markdown file in the repository, it may have been written in JSX instead of MD. For JSX you would need to know frontend programming, in which case submit an issue to your repository for the editing to be completed.
|
||||
|
||||
4. Once you've found the correct file, click on it to see its contents.
|
||||
5. Click on the pencil icon near the top right corner. This will open the file in edit mode. Now you can make your changes.
|
||||
6. (Optionally) Switch to the "Preview" mode, by toggling from "Edit" -> "Preview" at the top of the file content, to see a rough visualisation of your changes. Keep in mind though, that the actual website may have different styling and may support additional Markdown elements that GitHub doesn't render on the preview.
|
||||
|
||||
### Step 2: Save your changes
|
||||
|
||||
When you're happy with the content, click on the “Commit changes...” button. In the "Commit message" field, provide a concise summary of your changes. If necessary, you can add further explanation in the "Extended description" text field. Then select “Commit directly to the main branch”, and hit "Commit changes."
|
||||
|
||||
The site is now going to be rebuilt to reflect the changes saved to the `main` branch. This can take up to a few minutes. After this time you should see your page live.
|
||||
|
||||
## Summary
|
||||
|
||||
Congratulations! You've now learned how to edit the text content on a single Markdown-based page on your website.
|
||||
|
||||
If anything is not clear to you, or you have suggestions on how we can make this 'How to' better, please don't hesitate to let us know.
|
||||
|
||||
Happy editing!
|
||||
12
site/content/howtos/index.md
Normal file
@@ -0,0 +1,12 @@
|
||||
# Guides and tutorials
|
||||
|
||||
- [[howtos/analytics|How to add web analytics?]]
|
||||
- [[howtos/seo|How to customize page metadata for SEO?]]
|
||||
- [[howtos/sitemap|How to build a sitemap?]]
|
||||
- [[howtos/markdown|How to add markdown-based content pages?]]
|
||||
- [[howtos/blog|How to add a simple blog?]]
|
||||
- [[howtos/drd|How to create data-rich documents with charts and tables?]]
|
||||
- [[howtos/comments|How to add user comments?]]
|
||||
|
||||
If you have questions about anything related to PortalJS, you're always welcome to ask our community on [GitHub Discussions](https://github.com/datopian/portaljs/discussions) or on [our chat channel on Discord](https://discord.gg/EeyfGrGu4U).
|
||||
|
||||
64
site/content/howtos/publish-obsidian-vault-to-github.md
Normal file
@@ -0,0 +1,64 @@
|
||||
---
|
||||
title: How to push an Obsidian vault to a GitHub repository
|
||||
---
|
||||
|
||||
This howto walks you through the process of setting up your Obsidian vault as a GitHub repository. Here are some of the benefits of doing so:
|
||||
|
||||
1. Creating a backup of your notes, accessible from anywhere.
|
||||
2. Keeping track of your note-taking history, thereby enabling you to see the evolution of your ideas over time.
|
||||
3. Collaborating with others on your notes.
|
||||
|
||||
In this howto, we will use the GitHub Desktop application, an easy-to-use interface for managing your Git repositories locally and on GitHub. This tool is particularly useful if you're not comfortable with Git's command line interface or if you just prefer a more visual representation of your Git operations.
|
||||
|
||||
## Steps
|
||||
|
||||
### Step 1: Setting Up GitHub Desktop App
|
||||
|
||||
1.1. If you haven't already done so, create a GitHub account at https://github.com
|
||||
|
||||
1.2. Download and install the GitHub Desktop app from https://desktop.github.com
|
||||
|
||||
1.3. Once installed, open the GitHub Desktop app. You'll be prompted to sign in with your GitHub account.
|
||||
|
||||
### Step 2: Setting Up Your Vault as a GitHub Repository
|
||||
|
||||
2.1. In the GitHub Desktop app, click on "Add an Existing Repository from your Hard Drive"
|
||||
|
||||
2.2. Navigate to your Obsidian vault's folder using the file explorer.
|
||||
|
||||
2.3. After selecting it, you'll see a warning saying "This directory does not appear to be a Git repository. Would you like to create a repository here instead?" Click on the link "create a repository".
|
||||
|
||||
2.4. You'll be brought to the "Create a New Repository" page with the vault's location already in the "Local Path" box.
|
||||
|
||||
2.5. Choose a name for your repository. It's best to use lowercase and dashes. (For the sake of simplicity use the same or similar name to your vault's folder name.)
|
||||
|
||||
2.6. Add an optional description.
|
||||
|
||||
2.7. Make sure the checkbox "Initialize this repository with a README" is unchecked, and "Git Ignore" and "License" are set to "None".
|
||||
|
||||
2.8. Click on "Create Repository".
|
||||
|
||||
Great! Now you have your Obsidian vault set up as a git repository. Now, let's push it to GitHub.
|
||||
|
||||
### Step 3: Pushing Your Vault to GitHub
|
||||
|
||||
3.1. After you've created the repository, in the GitHub Desktop app you'll see a dashboard with the heading "No local changes". Below you'll see a suggestion with a button "Publish repository". Click on it. (You could also use "Publish repository" button in the top application bar.)
|
||||
|
||||
3.2. A new window will appear. Choose a name (it will automatically suggest the one you chose during the creation process, and its best to leave it this way), add an optional description, and select whether you want it to be public or private.
|
||||
|
||||
> [!Important]
|
||||
> Please be aware that if your GitHub repository is public, this process will make your Obsidian vault publicly accessible. If you wish to keep your vault private, you'll need to select "Private" when publishing the repository.
|
||||
|
||||
3.3. Click on "Publish Repository".
|
||||
|
||||
3.4. Wait for the process to finish. You'll see a small prompt when the upload is complete.
|
||||
|
||||
3.5. You can now visit your repository on GitHub's website to see your uploaded Obsidian vault.
|
||||
|
||||
## Summary
|
||||
|
||||
Congratulations, you've now learned how to push an Obsidian vault to your Github repository.
|
||||
|
||||
If anything is not clear to you, or you have suggestions on how we can make this 'How to' better, please don't hesitate to let us know.
|
||||
|
||||
Happy editing!
|
||||
34
site/content/howtos/quickly-create-a-sandbox-website.md
Normal file
@@ -0,0 +1,34 @@
|
||||
---
|
||||
title: How to quickly create a sandbox website
|
||||
---
|
||||
|
||||
By the end of this guide you will have a working markdown site you can edit, which gets published automatically online 🎉
|
||||
|
||||
## Prerequisites
|
||||
|
||||
- A GitHub account. If you don’t have one, click [here](https://github.com/signup) to create it.
|
||||
- A Vercel account. If you don't have one, click [here](https://vercel.com/signup) to create it. Ideally, sign up using your Github account or you can choose to sign up with your email.
|
||||
|
||||
## Sandbox setup
|
||||
|
||||
1. Go to https://github.com/datopian/flowershow
|
||||
2. At the bottom of the page there is a "Deploy" button - click on this to be redirected to Vercel and log in using your account.
|
||||
3. Once you have logged in, you will be redirected to the "Create GitHub Repository" page.
|
||||
4. If you've signed up to Vercel with your GitHub account, you'll see "Git scope" and the field for the repo name. But if you've signed up using email, you'll see different buttons, like "GitHub", "Bitbucket", "GitLab". You need to select GitHub and possibly login to your GitHub account.
|
||||
5. Select your GitHub account from the "Git Scope" drop-down. If it's not there, click on "Add GitHub Account" to add it.
|
||||
6. In the right-hand box write a name for the repository. The usual format is all lowercase with hyphens in between words. Then click on the "Create" button.
|
||||
|
||||
The website will then be deployed. This takes approximately 1 minute.
|
||||
|
||||
Once you are on the Congratulations screen, click on the preview of your sandbox website to see the live/published version.
|
||||
|
||||
For instructions on how to add and edit pages, we recommend these tutorials:
|
||||
|
||||
- [[edit-a-page-with-code-editor-or-obsidian|How to edit text content on a single Markdown-based page]]
|
||||
- [[add-a-simple-md-page|How to add a simple Markdown-based page]]
|
||||
|
||||
Here are some other links Vercel links that might be useful for you:
|
||||
|
||||
- [Dashboard Features Overview](https://vercel.com/docs/concepts/dashboard-features/overview)
|
||||
- [Dashboard Features](https://vercel.com/docs/concepts/dashboard-features)
|
||||
- [Projects](https://vercel.com/docs/concepts/projects/project-dashboard)
|
||||
@@ -0,0 +1,12 @@
|
||||
---
|
||||
title: "Why use these tools to create a catalog?"
|
||||
---
|
||||
|
||||
On this site, we offer a “recipe” which uses a combination of free tools to easily create a directory of information that can be used for multiple purposes. With this method, you can start capturing information quickly and intuitively in a format that is flexible and usable later for various needs. Why does this help us? Because to map information – to collect, organise, structure, and classify it – and present it clearly is a way to make more sense of it and therefore of the world around us.
|
||||
|
||||
What are the benefits of using this method to create a directory?
|
||||
- You can capture both structured (inc. metadata) and unstructured data (inc. free text and images)
|
||||
- It’s easy to add to
|
||||
- It has a flexible structure, e.g. you can easily edit structured data fields
|
||||
- You can collaborate on it
|
||||
- You can easily access the information later for exploration and visualization, without the need for tidying and re-formatting
|
||||
@@ -1,21 +1,22 @@
|
||||
import { h } from "hastscript";
|
||||
import matter from "gray-matter";
|
||||
import mdxmermaid from "mdx-mermaid";
|
||||
import { h } from "hastscript";
|
||||
import remarkCallouts from "@portaljs/remark-callouts";
|
||||
import remarkEmbed from "@portaljs/remark-embed";
|
||||
import remarkGfm from "remark-gfm";
|
||||
import remarkMath from "remark-math";
|
||||
import remarkSmartypants from "remark-smartypants";
|
||||
import remarkToc from "remark-toc";
|
||||
import remarkWikiLink from "@portaljs/remark-wiki-link";
|
||||
import remarkWikiLink, { getPermalinks } from "@portaljs/remark-wiki-link";
|
||||
import rehypeAutolinkHeadings from "rehype-autolink-headings";
|
||||
import rehypeKatex from "rehype-katex";
|
||||
import rehypeSlug from "rehype-slug";
|
||||
import rehypePrismPlus from "rehype-prism-plus";
|
||||
import * as tw from "../tailwind.config";
|
||||
|
||||
import { serialize } from "next-mdx-remote/serialize";
|
||||
|
||||
import * as tw from "../tailwind.config";
|
||||
import { siteConfig } from "../config/siteConfig";
|
||||
|
||||
/**
|
||||
* Parse a markdown or MDX file to an MDX source form + front matter data
|
||||
*
|
||||
@@ -25,6 +26,7 @@ import { serialize } from "next-mdx-remote/serialize";
|
||||
*/
|
||||
const parse = async function (source, format, scope) {
|
||||
const { content, data } = matter(source);
|
||||
const permalinks = getPermalinks(siteConfig.content);
|
||||
|
||||
const mdxSource = await serialize(
|
||||
{ value: content, path: format },
|
||||
@@ -37,7 +39,7 @@ const parse = async function (source, format, scope) {
|
||||
[remarkSmartypants, { quotes: false, dashes: "oldschool" }],
|
||||
remarkMath,
|
||||
remarkCallouts,
|
||||
remarkWikiLink,
|
||||
[remarkWikiLink, { permalinks, pathFormat: "obsidian-short" }],
|
||||
[
|
||||
remarkToc,
|
||||
{
|
||||
|
||||
8
site/package-lock.json
generated
@@ -11,7 +11,7 @@
|
||||
"@headlessui/react": "^1.3.0",
|
||||
"@heroicons/react": "^1.0.3",
|
||||
"@mdx-js/loader": "^2.3.0",
|
||||
"@portaljs/core": "^1.0.5",
|
||||
"@portaljs/core": "^1.0.6",
|
||||
"@portaljs/remark-callouts": "^1.0.5",
|
||||
"@portaljs/remark-embed": "^1.0.4",
|
||||
"@portaljs/remark-wiki-link": "^1.0.4",
|
||||
@@ -722,9 +722,9 @@
|
||||
}
|
||||
},
|
||||
"node_modules/@portaljs/core": {
|
||||
"version": "1.0.5",
|
||||
"resolved": "https://registry.npmjs.org/@portaljs/core/-/core-1.0.5.tgz",
|
||||
"integrity": "sha512-HJ3eYjyKL7wrPlBwcEHzNd/SW2PwLu49nAsRTz8r7tgyRINDVkHTLVjZ5V6jCSYtuX7LSlxk0WMIZ9aDOocXDA==",
|
||||
"version": "1.0.6",
|
||||
"resolved": "https://registry.npmjs.org/@portaljs/core/-/core-1.0.6.tgz",
|
||||
"integrity": "sha512-nbBhrsI/A59K/JQSYBHlKNFy+iX2rK7bcInkshjzVYA8A/jO76FidGFMn6795sKK10s2Jc0bNYCkTKexUCcb1Q==",
|
||||
"dependencies": {
|
||||
"@docsearch/react": "^3.3.3",
|
||||
"@floating-ui/react-dom": "^1.3.0",
|
||||
|
||||
@@ -3,7 +3,7 @@
|
||||
"version": "0.1.0",
|
||||
"private": true,
|
||||
"scripts": {
|
||||
"dev": "next dev",
|
||||
"dev": "npm run mddb && next dev",
|
||||
"build": "next build",
|
||||
"prebuild": "npm run mddb && node ./scripts/fix-symlinks.mjs",
|
||||
"start": "next start",
|
||||
@@ -13,7 +13,7 @@
|
||||
"@headlessui/react": "^1.3.0",
|
||||
"@heroicons/react": "^1.0.3",
|
||||
"@mdx-js/loader": "^2.3.0",
|
||||
"@portaljs/core": "^1.0.5",
|
||||
"@portaljs/core": "^1.0.6",
|
||||
"@portaljs/remark-callouts": "^1.0.5",
|
||||
"@portaljs/remark-embed": "^1.0.4",
|
||||
"@portaljs/remark-wiki-link": "^1.0.4",
|
||||
|
||||